Wednesday, 31 December 2008

Focaccia

I first had foccacia when I visited Italy in the summer of 2006. J and I visited a couple of different places; Venice, the Lakes and then the mountains in the far North of the country. The food in the mountain areas is much more stereotypically Austrian or German in style than Italian, think Bratwurst not Bolognese, potatoes not pasta etc. However, it was here, in this perhaps unlikely place that I first ate foccacia. We bought a rosemary one from a little supermarket which was very nice, but then we found a proper bakery that was selling a green olive foccacia by the sheet. I bought a piece and fell in love instantly. It was thick and soft and crunchy and slightly oily with the most delicious flavour of olives and olive oil. Ever since, I have wanted to be able to recreate that type of foccacia.

I was lucky enough to go on a bread making course just over a year ago and we made a stunning foccacia there too. It was different because it was thinner, but just as delicious served with some lip tinglingly salty pecorino romano and wine for lunch that day. However, we weren't given the recipe, indeed, there wasn't really a set recipe. The baker worked by feel and look and although I attempted his method a couple of months after being shown, it didn't work in the same way for me. And sadly, I don't have an industrial bread oven. So the quest continued for a foccacia that I could make in my own home.


My first port of call for bread recipes, as regular readers will know by now, is the talented baker Dan Lepard. He has published a recipe for foccacia in the Waitrose Food Illustrated magazine a while ago and although it no longer appears to be on their website, it is on his website here. I have now made it a number of times and it is delicious. I have only ever made it with a rosemary and rock salt topping as that is my favourite, but green olives may be an imminent attempt, I just need to source some tasty olives first.

I'm glad this wasn't the first bread recipe I've ever tried though, as it can be a little soft and hard to work with. The most recent attempt was particularly sticky - it stuck badly to the work surface in spite of liberal application of olive oil and a dough scraper is very handy (but not essential!) for working the dough. However I promise that all this is worthwhile when you get the final product.

The crumb is nice and open but the bread has a good texture too, with a soft inside and lovely crispy top. I use dried rosemary on my foccacia because I have found that although fresh looks more attractive, it tends to burn to a crisp and then taste acrid and just plain nasty. Dried rosemary avoids this problem.

Since I follow the recipe and method exactly I am going to provide a link to avoid any copyright issues so here is the recipe for foccacia.

I use dried rosemary and rock salt for the topping and seem to have had best results when using the ale suggested in the recipe, but am only able to do this at home where there is someone else (you know who you are!) available to drink up the rest of the beer as I don't like it! I don't use the rendered pork/duck fat/dripping either.

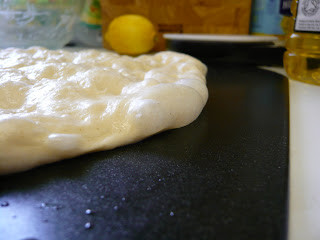
Rather an unappealing photo to start with, but bear with me because things will improve.

The dough after it has been folded. It isn't exactly a rectangular shape, but you can see the folds.

On the baking tray after being dimpled. You can see the trapped bubbles of air at the edge of the crust. Sprinkled with dried rosemary and liberally doused with olive oil prior to being baked.

I love this bread, so thanks to Dan Lepard for a great recipe. I think this would lend itself quite well to variations - I've already mentioned that green olives would be next on my list of things to try and you could vary the herbs to suit the recipe you're accompanying. I particularly love this with mushroom risotto and it always goes down well at home.

Monday, 29 December 2008

Christmas spice biscuits

OK, enough preserving for now. Time for instant gratification I feel! I wanted to make some pretty basic (but yummy) Christmas themed biscuits to take into work and turned to Nigella Lawson's How to be a Domestic Goddess for the basic recipe. I needed the biscuits to keep their shape rather than spreading out so chose the Butter cut-out biscuit recipe. I adapted it slightly and so I'll give you my recipe below. I wanted a variety of Christmas shapes, but was limited to stars because they are the only shape I have! I really wanted a snowflake, but no such luck!

UPDATE 30/12/08 I've found a tub of biscuit cutters, too late for this year, but they'll be good for next year - I'll have to put them somewhere 'safe' (and try to remember where that safe place is in 12 months time!).

To make my biscuits more interesting I decided to make window biscuits too, they always seem to impress people. I had a go at decorating some of the plain ones, but I was short of time and my decorating skills aren't up to much so I won't embarrass myself by publishing a photo of the attempt!

You can see the different colours in this one really well - I was quite impressed! Actually breaking up the sweets was really difficult. I don't know whether I bought particularly hard sweeties, but they took real force to smash and either went to dust or stayed as stubborn big pieces as you can see below.

Anyway, onto the recipe:

Butter cut-out biscuits
Ingredients
90g soft butter
100g caster sugar
1 large egg
200g plain flour
1/2 tsp baking powder
spices of your choice; I added 1/2 tsp mixed spice, a pinch of cloves or allspice a quick shave of nutmeg
some grated orange or lemon zest would be a good addition

Method
- Preheat the oven to 180C/Gas 4 (you needn't do this yet, as the dough rests for an hour but I'll forget to put this later)
- Cream the butter and sugar together until light and fluffy, then beat in the egg.
- Combine the flour, baking powder and spices in another bowl.
- Add the dry ingredients to the butter/sugar/egg mixture and mix gently until all combined. If the mixture seems too soft add a little more flour, but mine was fine.
- Form the dough into a flat disc and wrap in clingfilm before chilling in the fridge for at least an hour (I found that it wasn't as much of a pain as I'd imagined because I was doing other things in the meantime - preserving, tidying, well perhaps not, or wrapping presents).
- Remove the dough from the fridge and roll out to a thickness of about 0.5cm on a floured surface.
- Cut out suitably Christmassy shapes and put onto a baking sheet.
- Bake for 8-12 minutes until pale golden around the edges. Allow to cool for a minute or so before removing carefully to a wire rack to continue cooling completely.

Makes around 25-30 depending on size of cutter.

If you want to make window biscuits:

- Cut out biscuits as above, but make sure you have two sizes of the same shape cutter. Cut a smaller biscuit out of the middle of the larger biscuit and fill with smashed boiled sweets in various colours. You can do a mixture as I did, or stick to one colour if you've got a theme going. Green and red would (obviously) be very festive!
- The sweets were hard to deal with. I ended up with a sheet of clingfilm, with a sheet of silicone baking paper on top with the sweets on top of that. Fold over the baking paper and clingfilm to form a parcel and then bash hard with a rolling pin. NB Don't do this on a delicate surface - my wooden chopping board now has lots of dents in it!
These went down well wherever they went, which included work, home for J, T and A and then to a larger family gathering a few days after Christmas. I'm looking forward to making them next year with some more festive shapes and hopefully some more interesting decoration.

Friday, 26 December 2008

White Chocolate and Cranberry Muffins


I needed something quick to make to take into work, and then, because T complains that he never gets anything I make and post about I thought I'd make something especially for him, and A, his girlfriend. Because I needed to make their present as late as possible to keep it fresh, muffins were ideal because they're quick and easy to make at the last minute when I really should have been packing and wrapping presents and various other things. So the same recipe suited for both purposes. I decided on very festive flavours for these muffins - dried cranberries, which I always feel go very well with white chocolate. I also used some very festive gold muffin cases which I bought specially for Christmas (although I'm not sure they were noticed really!).


I got slightly distracted whilst making the batch I took into work and for once the rubbish picture actually is a reflection of the fact that they were a little overdone. No worries though, a festive snowstorm came and disguised this fact..... how convenient! T and A will be pleased to know that their batch came out much better - as can be seen below. I always worry about pouring a semi-liquid lumpy mess almost to the rim of the muffin cases, imagining all sorts of mess when I open the oven (my oven sadly has a solid door so I can't watch what's happening) but miraculously these seem to work.


Cranberry and White Chocolate Muffins
Ingredients
9oz/250g self raising flour
1 tsp baking powder
1/2 tsp salt
4oz/110g caster sugar
1 egg
8.5fl oz/250ml milk
1 tsp vanilla extract
3fl oz/90ml vegetable oil
2.5oz/75g dried cranberries
2.5oz/75g white chocolate (chopped)

Method
- Preheat the oven to 200C/Gas 6 and put 12 muffin cases into a muffin tin.
- Sift the first 4 (dry) ingredients into a bowl.
- Mix the next 4 (liquid) ingredients in a separate bowl, whisking to break up the egg.
- Add liquid ingredients to dry and mix briefly (it will be lumpy, but try not to leave large amounts of dry flour). During the last few strokes add the cranberries and chocolate.
- Spoon/pour batter into the prepared cases.
- Place in the oven and bake for 20-25 minutes until tops are lightly browned and spring back when pressed gently.
- Remove and cool on a wire rack.

Enjoy - or give away and watch other people enjoy them. In spite of being slightly overdone, these went down well at work, and I think T and A enjoyed them too!

Sunday, 21 December 2008

Stollen


What would the weekend before Christmas be without a good baking project to get immersed in? I know J loves Stollen and I made one a couple of years ago using Delia Smith's recipe. I've made quite a bit of bread since then (I wasn't really doing as much baking then) and wanted to try a slightly different approach (and use easy blend rather than dried active yeast). I turned to one of my favourite and most trusted bakers, Dan Lepard to provide the recipe. The picture on the guardian website isn't the greatest - I don't know why there is a large gap next to the marzipan (and I know that Dan doesn't have anything to do with the food made for the Guardian photoshoot as he has pointed this out on his forums). For some better pictures, see the forums.
I adapted the recipe very slightly and have set out the recipe as I made it below.
Stollen
Ingredients
350g strong white flour
75g caster sugar
3/4 tsp salt
1/2 tsp each ground mixed spice, nutmeg and clove
1 tsp cinnamon
4 tsp easy-blend yeast
75g each of raisins and currants
50g mixed peel
150ml milk
25g additional strong white flour
125g unsalted butter, melted and cooled
1 large egg
Finely grated zest of a lemon
250g marzipan, rolled to a 20cm stick
Extra melted butter and icing sugar
As I followed Dan's method exactly I'm just going to give a link to the recipe.
My notes:
- when kneading the dough both the first and second times, the currants and raisins kept jumping out of the dough and trying to escape. There were a lot of 'bits' in the dough and it was a very rich dough, which might account for it being less elastic than I'm used to for bread. It wasn't difficult to work though.

Dough rising. It didn't seem to rise very much, but then I wasn't paying a lot of attention!


Dough risen and shaped around the marzipan - you can see the traditional shape of the stollen appearing now. I got quite good oven spring too.


Cooked, cooled and with the coat of butter and icing sugar (but shot in appalling light!!!).
I was really, really pleased with the way this came out - it looked fabulous and J enjoyed it for Christmas day breakfast and was very happy with it! The rest is stashed in the freezer to be enjoyed at some point in the future.

Tuesday, 16 December 2008

Mincemeat

Hopefully that's a tempting enough picture for you to want to make the mincemeat that follows, just so that you can put it in your own mince pies. I admit they are rather rustic, but at least everyone knows that you made the effort of making your own!


Anyway, we'll start with probably the best picture of the mincemeat, below, before it's cooked. After it's cooked it seem a little brown and perhaps even uninteresting. But don't be fooled, it tastes delicious.

The recipe I use is essentially Delia Smith's but with a different set of spices and a couple of adjustments to suit my taste. I doubled the recipe given on her site because although mincemeat is not difficult, it is time consuming and because it keeps well, it makes sense to make a reasonably large batch. I didn't bother with the overnight standing step - it was late the night before I made it and I value my sanity and sleep above mincemeat. By all means, leave it to stand overnight if you are more organised than me.


A quick note on ingredients; I use whole candied peel and chop it myself. Why? well, as a child I hated mixed peel and couldn't see the point of it, until I decided to buy the whole stuff and cut it myself. It is totally and utterly different - it isn't dried up or bitter or any of the nasty things I associate with ready chopped. If you don't mind ready chopped use that, but I don't mind a few extra minutes spent with a pair of scissors cutting my peel. I also add glace cherries because I like them, and leave out nuts for the obvious reason that I'm allergic to them! So here is my amended and adapted mincemeat recipe.


Mincemeat
Ingredients (makes about 6 lb)

My oven doesn't have Gas 1/4 so it was cooked on a mixture of Gas 1 (when I wanted to leave the house and be sure the oven didn't go out and the 'S' start setting when I was in the house and could keep an eye on the oven).

1lb/450g Bramley cooking apples, cored and chopped small (no need to peel)
8oz/225g shredded suet (beef or vegetarian, I used 250g vegetarian, because that’s the size of the packet!)
12oz/350g raisins
8oz/225g sultanas
8oz/225g currants
6oz/175g glace cherries, chopped into quarters
8oz/225g whole mixed candied peel, finely snipped/chopped
12oz/350g dark brown soft sugar
grated zest and juice of 2 oranges (preferably unwaxed)
grated zest and juice of 2 lemons (preferably unwaxed)
scant tsp each allspice and ground cloves
heaped tsp each mixed spice and cinnamon
approx ½ nutmeg, grated
6tbsp brandy (optional, I didn’t add it)

Method
Delia recommends mixing all the ingredients together (apart from brandy) in a large mixing bowl, covering and leaving for about 4 hours in a cool place, to allow the flavours to mix and develop. I needed to get on with mine, so skipped the waiting step, so here’s what I did:
- Mix all ingredients together in a large pan. I used a pan as I don’t have an ovenproof bowl large enough to take all the ingredients.
- Preheat the oven to gas ¼, 225F, 110C (but see note above).
- Cover pan/bowl loosely with foil and place in the oven for 3 hours.
- Remove from the oven and allow to cool. As it is cooling, stir from time to time. This will allow the melted suet to coat all of the other bits and pieces in the mincemeat. This is important for appearances sake, as you will see below! Stir in the brandy if using.
- Pack in sterilised jars (see here for Delia’s take on sterilising jars at the bottom of the page, or here for mine - first paragraph of the method!) and cover with waxed discs and seal.

The mincemeat will keep ages in a cool, dark place. Delia says up to three years. It probably won’t last that long round here though! The mincemeat is probably best made a few weeks before you intend to use it to allow it to mature a little, but I used mine straightaway and it was fine.

If you ignore the instructions to stir the mincemeat as it cools, you will end up with small pockets of fat as above. I don't think this really matters in terms of flavour, texture and so on, but it doesn't look very attractive.


Here is some mincemeat made by J last year, who didn't ignore Delia's instruction to stir the mincemeat as it cools and subsequently doesn't have nasty pockets of unattractive fat.... Do it this way!!!

Sunday, 14 December 2008

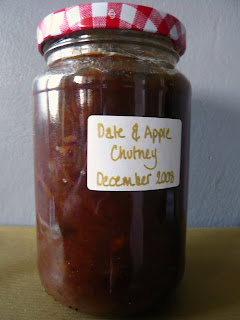
Apple, date and raisin chutney

I don't have a very good track record with chutney, as J would confirm. The only other time I have attempted to make chutney I burnt the stuff to the bottom of J's preserving pan. The expensive one. And I don't mean just a little bit either. This was a full 5mm deep covering of black stuff that was hard as nails. It wouldn't dissolve no matter what I poured on it, and in the end the only way to get rid of it was to chisel it off tiny bit by painstaking bit with a sharp knife. Never again I vowed, would I make chutney. Jam yes, chutney no.

But then I saw this recipe on Katie's blog, Apple and Spice and it appealed instantly. I seem to have accumulated quite a number of apples recently (poor organisation when it comes to going shopping can have the same outcome as growing your own fruit and veg - a glut!!!) and also had some dates that I wanted to make use of. I bought them for a sticky toffee pudding which has unfortunately never materialised and now never will. So I fought the fear of burnt black stuff and attempted chutney again. And luckily it was rather more successful this time - no black burnt bits at all! I stirred a lot, which must have helped and I now have a gas hob instead of electric which I think also helps. This was easy, I think chutney is back on the menu!
As Katie says, this would be ideal with a pork pie or cold meats (if you eat such things - I don't) or a wedge of cheese (which I will happily eat!). I can't vouch for how it tasted as it needs some time to mature - I wouldn't want to prejudice the outcome by eating it too soon, so am leaving it for a full month. Another preserve for presents, but recipients will receive an 'eat after' warning for this as I didn't manage to make it in time for it to mature by Christmas (next year, next year, I shall be more organised).
I adapted the recipe slightly to suit what I had and to take account of my irrational hatred of garlic - can't bear it at all and though some of the jars were for presents, some were for me too! I also toned down the chilli (I think, I haven't tasted it yet!) as I'm not a fan of very hot food. So here is my version:

Apple, Date and Raisin Chutney
Ingredients (makes 4lb)
375g stoned dates
300g raisins
1 large onion (150g)
2 cooking apples
2 red chillies
50g chunk root ginger
300ml water
150g caster sugar
1 tsp salt
600ml (1pint) distilled vinegar

Method
- Sterilise sufficient jars to take 4lb of chutney (I used 3 x 1lb jars and 2 1/2lb jars). I do this by washing in hot soapy water and drying thoroughly. Place the jars in an oven preheated to Gas 5/190C for 15 minutes. (This is probably overkill, but it's what I did!)
- Chop the dates into small pieces and put into a large saucepan. Peel and finely dice the onion and apples and put into the pan along with the raisins. Slit the chillies with a knife and add those too. Peel and finely chop (or grate) the ginger and add to the pan with the water.
- Bring the mixture to a simmer and bubble for 15 minutes until the onion and apple are starting to soften.
- Add the vinegar, sugar and salt and bring to the boil. Reduce the heat a little and allow to bubble for around 20-30 minutes until thickened and broken down. A tip from Delia Smith to check when your chutney is ready is that when you draw a wooden spoon through it, the channel it makes remains for a few seconds and no liquid remains.
- Remove from the heat, fish out the whole chillies and discard.
- Spoon the chutney into the warm jars (this is messy) and screw on the lids (carefully as the jars will be hot).
- Allow to cool before labelling.

Keep the chutney for 1 month to mature before eating. Once opened keep in the fridge.

NB Your house may well smell of vinegar for a while after doing this. I didn't find it too strong, but then I quite liked the smell of simmering vinegar, but I know some people hate it!
I can't wait to eat this......

Saturday, 13 December 2008

Cranberry jam


The Christmas cooking begins..... A quick and easy start though (not that it's ever going to get difficult given the lack of time I seem to have this year!) with this cranberry jam. Yes, it's the same one that bloggers the country (and probably the world) over are making at this time of year, and more than likely courtesy of Nigella Lawson. The recipe is extremely simple. In fact, possibly the most difficult part is trying to get the fresh cranberries. So, having achieved that, and sterilised the jars here is the recipe:

Cranberry jam

Recipe
350g fresh cranberries
350g granulated sugar
a splash of water

Method
- Place cranberries into pan with the splash of water (it needs to be barely enough to cover the base of the pan, and is just to stop the cranberries burning before they start to burst and release their juice to mingle with the sugar dissolving).
- Add the sugar and stir well.
- Place over a low to medium heat and stir until sugar has dissolved.
- Increase heat until jam is at a rolling boil. Boil for 7 minutes or until jam consistency is reached.
- Pour into sterilised jam jars and put lids on.
- Label when cold.

Well, those are roughly Nigella’s words, but I can’t tell what ‘jam consistency’ is until it’s cooled and I’ve made a fair bit of jam in my time! so I tend to put a small amount onto a chilled (in the freezer for a few mins) plate and see if the jam wrinkles when pushed – if it does, it’s ready, if not, boil for a few minutes longer.

I made this twice. The first time I used 350g cranberries and sugar and it made just short of 1 1/2lbs which was very annoying as I have a half full jar now! So the second time I used 400g of each and got three full 1/2lb jars. Perfect! The first batch was made with some vanilla sugar I had lurking around, so I'm looking forward to tasting that one and seeing if the vanilla flavour has come through at all.

I'm giving some of these as presents so I hope people enjoy it!

Friday, 12 December 2008

Banana flapjacks with white chocolate

The perpetual problem of being a generally disorganised person and living on my own is that I often have bananas excess to requirements. Don't get me wrong, I like bananas, I eat them every day but I don't like them squashily ripe. Ugh. A combination of having bought a couple too many bananas and then feeling under the weather and going off eating bananas (anything really!) meant that ideas were needed to prevent the decomposition any further. Luckily, squishy bananas are great for baking.

This recipe is a slightly adapted Sue Lawrence recipe, taken from her Book of Baking, in the healthy alternatives chapter. I think this is probably because oats are considered to be healthy, but lets be honest, in normal flapjack they're glued together with copious amounts of (admittedly delicious, but undeniably calorific) butter, sugar and syrup. The beauty of this recipe is that the bananas add some sweetness, and bind the mixture too, meaning that much less butter and sugar are needed here. So these genuinely are quite healthy! Except that it's nearly Christmas and at Christmas it becomes obligatory to eat more than we should, and chocolate is always a good way to go, so a dousing of white chocolate was in order. Less healthy, but more delicious! I toyed with the idea of adding dried cranberries too, but decided against it in the end. I suppose it would have been more festive, but never mind.

Banana flapjacks with white chocolate
Ingredients
125g/4 1/2oz butter
85g/ 3oz slight muscovado sugar
2 tbsp golden syrup
350g/12oz porridge oats
2 very ripe bananas, mashed (medium ish size!)

Method
- Preheat the oven to 180C/Gas 4 and lightly butter a 23x33cm/9x13in swiss roll tin.
- Melt the butter, sugar and syrup in a pan over a low heat (or in a microwave if you possess one I don't!). Tip in the oats (or if you've used a small pan, tip the butter mixture into a bowl containing the oats) and start to stir. Add the mashed banana and keep mixing until no dry bits or clumps of banana remain.
- Tip into prepared tin and level as best you can (with the back of a spoon is good).
- Bake for 20-25 minutes (but mine took 30) until lightly golden brown around the edges and it feels fairly firm all over.
- Remove from oven and cut into bars while hot. Allow to cool completely before taking out of tin.
- Melt white chocolate in small bowl over a pan of hot water (or in the microwave if you prefer) and carefully dip the flapjacks into the chocolate. Place on a piece of parchment/silicon paper until set (a few hours or overnight).
- Enjoy
NB This is a very soft flapjack, unlike traditional versions. It will not break your teeth but it isn't as robust as normal flapjack, and is more likely to crumble. Be careful handling it!


I took these into church, nominally for the children, but the adults ended up eating them anyway. They were well received and people liked the fact that you didn't get shards of lethal oat coated with sugar etc trying to pierce your mouth!!!

Tuesday, 2 December 2008

Apple crumble cake

Ah, it looks as if the sun is shining from within this cake. If only that were the truth! In fact, I decided to bake a cake that would cheer me up on a miserable November afternoon when sunshine was the furthest thing from my mind. I had plenty of apples hanging around and have fancied making an apple cake for a while now.


This one was inspired by the Caked Crusader's delicious blog but I decided to scale it down a bit as there's just the one of me, and I don't want to eat any cake, no matter how delicious it may be for ten or twelve days! So I halved the recipe given on the CC's blog. I wanted to try this recipe because I've never made a cake by this technique before and wondered whether it would be particularly light. I used cooking apples for my cake (Bramley's) and perhaps this was a mistake. I think that as the apples cooked and lost their shape they sort of absorbed the crumbly mixture, leaving less of it on the top of the cake than I would have liked.

Ingredients

For the cake
100g unsalted butter
2 eggs
100g caster sugar
100g plain flour
1 apple (I used a medium sized Bramley, but the Caked Crusader recommends Braeburn, Gala or Cox)


For the crumble topping
25g caster sugar
25g plain flour
25g unsalted butter
1 teaspoon ground cinnamon (optional, I didn't use it)

Method
- Preheat the oven to 180C/350F/Gas mark 4 and line a 6" cake tin (mine is loose bottomed so I made sure to line it well to prevent cake escape!)
- Make the crumble topping by rubbing the butter into the flour and sugar (and spice if using) until you get coarse crumbs. Set aside.
- To make the cake; melt the butter in a small saucepan and leave to cool.
- Put eggs and sugar into a large bowl and whisk with an electric whisk. The mixture should increase a lot in volume, but mine only took about 3-4 minutes really - I guess due to having half as much mixture as the original recipe where 10 minutes mixing is stated. The mixture should be pale and fluffy.
- Add the flour and melted butter, being careful to leave the white bits of butter behind (I just left the last bit of butter, but you could strain through a sieve) to the egg mix and fold together until thoroughly mixed.
- Pour into the cake tin.
- Peel and core your apple and cut into segments. Place these on the top of the cake mixture carefully so they don't disappear.
- Sprinkle the crumble mixture over as evenly as possible.
- Bake for about 1 hour 10 minutes or so (this was a guesstimate on my part - the recipe for double the amount cooks for 1 1/2 hrs, but because you've got the same depth, it will probably take almost as long to cook).
- Remove from oven and allow to cool on a wire rack.


Enjoy!

The cake has a lovely texture, light and moist yet also satisfying. The cooking apples were a nice slightly tart contrast to the sweet cake mix and the sweet crumble, and when I got a bit of crumble the crunch was a pleasing texture contrast. Next time I think I would add some vanilla to the cake mixture if I don't add spice to the crumble.

I would definitely recommend this cake. Enjoy it warm or cold with custard or cream for dessert, or just enjoy it as it comes, as I did.

Monday, 1 December 2008

Apple spice gingerbread

A recipe from another of my favourite food writers, Sue Lawrence. This is from her fabulous book, 'On Baking' and is in the cakes which keep chapter. Every time I open this book I find more recipes I want to cook. The ideas behind baking this particular cake were many; firstly I fancied something a little spicy, and didn't have any of the ginger spice cupcakes that I'd make a couple of weeks earlier left. Then J told me about a cake that one of her friends had made, using apple puree in the mixture. I thought this was a really good idea, and sounded like it would make a really moist cake. I love ginger too and so when I found this recipe I knew it would be just what I wanted.


Sue Lawrence says that the apples add not only flavour, but moistness and that the cake tastes best after a couple of days' maturing. It keeps well for over a week, wrapped in foil, but I doubt it would last that long if you've got ravenous hoardes. She suggests topping it with a ginger water icing, using a little ground ginger in the boiling water before adding it to the icing sugar. I think it would also go well with stewed apples and custard for a dessert. Or buttered for breakfast. Or with a nice cup of tea or coffee. The possibilities are endless!


Lovely moist crumb.


Apple spice gingerbread

Ingredients
225g/8oz cooking apples (I used Bramley)
25g/1oz caster sugar (I missed this out, as I don't think commercial Bramley apples are that sharp)
1 tbsp water
1 tbsp golden syrup (rounded)
1 tbsp black treacle (rounded)
85g/3oz butter
55g/2oz light brown soft sugar
1 egg
225g/8oz self-raising flour, sifted
1tsp ground ginger (or more if you like!)
1/2 tsp ground cinnamon (or mixed spice if your cinnamon is a bit elderly.....)

Method
- Peel, core and dice the apple(s) and place in a small pan with the sugar (if using) and water. Cook over a low heat until completely fallen. Allow to cool completely, mashing the apples until well pureed and smooth. (I put my pan into some cold water to get it to cool down quicker - ah the impatience of youth?!?)
- Preheat the oven to 180C/Gas 4 and base line a 1lb loaf tin with greaseproof paper (or parchment).
- Melt the syrup, treacle, butter and brown sugar.
- Beat in the egg, then the apple puree and finally fold in the flour and spices with a spoon.
- Spoon into the tin and smooth the top.
- Bake for 45 minutes, or until a skewer inserted into the middle comes out clean.
- Remove from the oven, and place the tin on a wire rack to cool completely.
- If icing only do so when completely cold.
Enjoy!

The apple flavour was quite subtle, but the cake was lovely and moist, and perfect with a cup of something hot mid-morning. The spices too were quite mild - if you like your gingerbread hotter I wouldn't hesitate to double the spice amount given here. Overall very yummy, and I'm looking forward to eating the remaining pieces currently residing in my freezer.

Sunday, 30 November 2008

Random pictures

Rainbow chard in my garden. Apparently frost doesn't kill it!

A completely random picture - I loved the way this drop was just about to fall off as the frost was melting this morning.

Monday, 24 November 2008

Chocolate and ginger parkin biscuits


A desire to combine homemade biscuits with lots of my favourite flavours - spice, chocolate and ginger (a combination made in heaven) meant that when I was browsing Dan Lepard's forums and saw this recipe from a couple of weeks ago in the Guardian newspaper it shouted at me to make it pronto. And so I did. (I have to admit a weakness for chocolate ginger biscuits - these ones to be precise -scroll down to the chocolate ginger biscuits, they're delicious and bizarrely nicer cold from the fridge). I thought it'd be better to make my own and perhaps save a few pence! I followed the recipe quite closely, and have reproduced it below to allow you to enjoy these rather delicious biscuits too.


As you can see, mine didn't quite turn out like the photo on the Guardian website, but they were great anyway! I substituted 75g crystallised stem ginger for the stem ginger in syrup that he specifies and made the method quicker - what can I say, I'm lazy and pouring the melted butter and treacle onto the rest of the ingredients was easier than adding stuff stepwise. It might account for why my biscuits look slightly different to his, it might not!

Chocolate ginger parkin biscuits
Ingredients
125g unsalted butter
2 tbsp black treacle
75g crystallised ginger, diced small (the original recipe states 100g stem ginger)
125g light soft brown sugar
75g rolled oats
100g plain flour
25g cocoa
1 tsp bicarbonate of soda
2 tsp ground ginger
½ tsp mixed spice
100g dark chocolate, chopped

Method
-Preheat the oven to 160C /325F/gas mark 3.
-Melt the butter and treacle in a pan, remove from the heat
-Weigh all remaining ingredients into a bowl (recipe says to sift flour but I'm lazy!)
-Pour melted butter and treacle onto dry ingredients, mixing thoroughly until well incorporated and no dry bits of flour remain.
-Roll into balls the size of an unshelled walnut and press these down a little on to a baking tray lined with nonstick baking paper, spaced 3-4cm apart.
-Bake for about 20 minutes, until barely firm.
-Remove, leave for five minutes - they're quite fragile - then slide the paper with the biscuits on to a rack to firm up.

NB You will need two baking trays. Because he doesn't specify how many it will make, I didn't know how much space they would take and I only have one large flat baking tray. The round biscuits you see at the top of the post were made on this tray. The square biscuit below started out life as a round ball, but the small tray I baked these on meant they didn't have enough space and essentially formed one gigantic biscuit. Yum! but I cut it up into squares. I made 27 biscuits in total.

One other point is that it's very difficult to tell when they're done. They go in dark brown and come out...... dark brown. Mine were in about 25 minutes and were still soft when they came out. They firmed up on cooling.


These were truly delicious biscuits. The oats added a nice texture - they were chewy all the way through and the treacle added a slight hint of bitterness and depth of flavour. Because there are lots of different components each bite is different - hot from a piece of ginger, smooth from a piece of chocolate, dark and spicy. Really addictive.

I took some into work, where they were received very well indeed, disappeared rapidly and got very favourable comments. Everyone loves a good chewy biscuit with their tea or coffee.

Wednesday, 19 November 2008

Wholemeal bagels

Nothing very exciting today I'm afraid. I decided to make bagels again, using exactly the same recipe as last time, but making a couple of little changes. I substituted 1/4 of the flour for wholemeal strong flour (so 300g extra strong white bread flour + 100g strong wholemeal flour), reduced the sugar from 2 tbsp to 1 tbsp (it turned out to be about 11g) and reduced the salt a little as well. In the first batch I made 6, as stated in the recipe, but decided they were quite big and tried for 8 the next time. There just wasn't quite enough when they were the smaller size, but then I'm greedy, so 8 might be ok for you. So I made 6 of these wholemeal ones and I'm going to stick to that size from now.
The only other thing I did was to use a smaller pan for poaching them in. The first time, I used my enormous stock pot, but could still only fit two bagels in and so I decided that in the interests of boiling less water and using less malt extract, I'd use a smaller pan. This worked fine - and I reckon that using a smaller volume of water means I only need 1 tbsp of malt extract, which makes them cheaper too! It does seem a shame really, that you use the malt extract (obviously a necessary part of the recipe, but not the cheapest or easiest to get hold of) and then just pour it down the drain once you've poached them!

And a gratuitous picture of the innards, showing the lovely dense texture and chewy crumb. I don't think the changes I made had an adverse effect on the bagels, and I'd do them wholemeal again. I don't think I'd go totally wholemeal - think they'd be a bit heavy, but a 50/50 mix white/wholemeal might work.

Friday, 14 November 2008

Wholemeal spelt bread


Well, I have to say that this is a more aesthetically pleasing attempt than my last loaf of bread! I saw some really good looking wholemeal spelt rolls over at Katie's blog, Apple and Spice and it spurred me into action. Spelt is a variety of wheat, but has been less intensively bred and developed than the modern wheat varieties which provide the vast majority of flour available in the shops. (It is also said to be easier to digest and some people with intolerance to normal bread can tolerate spelt bread more easily - DISCLAIMER: I have no medical knowledge and refuse to be responsible if you decide to try spelt flour knowing that you have a wheat intolerance!) I started out fully intending to make rolls, but then events conspired against me and I decided that not only was a loaf easier to work with, but it also fits into the freezer much more neatly than round rolls. So a loaf was born.
Having decided that a loaf was the way forward, I thought I'd better stick with a tried and trusted recipe for the wholemeal bread I quite often make. Anyone reading this blog for a while will know I'm a fan of Dan Lepard, and it was his recipe and methods of working the dough that I decided to base mine on for this loaf. Instead of pummelling the bread for ten exhausting (yes, I am that lazy!) minutes followed by a rise, a knock back and second rise, Dan advocates using three short kneads and leaving the dough to rest for 10 minutes inbetween. Sometimes this is a complete pain (when you're trying to knead bread and do the ironing at the same time for example - not good to have bits of bread welding themselves to your clean clothes) but most of the time I find some other kitchen task to be doing at the same time, making cupcakes more often than not, so the time goes quickly and I don't mind it. He explains his technique here, far more succintly than I will ever be able to, so it's well worth reading.
This is the recipe I based mine on; wholemeal bread. I have to admit though, I'm pretty lax with the timings. 10 minutes often stretches into 15 or even 20 depending on what other crises I may be having with things not cooking in the right time (Raisin buttermilk cake, you were the culprit this time!) or how distracted I get by other things. The recipe seems pretty forgiving though.
The changes I made were ditching the sugar and butter (because I'm lazy and I couldn't be bothered to melt the butter and mix it through) which are supposed to add to the texture and keeping qualities I think. And I also inadvertently added rather too much salt. I think I was confused between halving the recipe I'd seen on Apple and Spice and following Dan's recipe. I have a feeling I ended up with 2 tsp salt. Which was too much, even for my salt loving tastebuds. Well, when I say too much I mean I could distinguish that the bread tasted salted when I bit into it, it hasn't stopped me from devouring the rest of the loaf! So salt to your taste, I like 1tsp per 450g flour. Either that or I didn't make a mistake and spelt is slightly salty. Which I doubt somehow, but I'll be more careful in the measuring next time and find out for certain.

As I said before, I was struggling for oven space and time and the bread overproofed massively. So I just pushed it back, rerolled it and let it rise again so that it was ready for the oven at a more convenient time. I think this is perhaps why you can see the 'roll' of the dough so clearly.


It doesn't really taste much different from the normal wholemeal bread I make (apart from being saltier!) so I'm not sure I'd bother with spelt flour again, I think normal wholemeal flour is fine. Perhaps I need to try a different brand of spelt flour. But anyway, the bread is great, make it and enjoy! (Homemade bread makes the best toast..... need I say more).

Tuesday, 11 November 2008

Ginger spice cupcakes with lemon icing


Beneath the purity of the white icing and the perfect white flowers lurks a heart of darkness - ginger cake, warming and spicy. The weather is most definitely dictating what I feel like cooking at the moment. It's cold and blustery and hours at a time are spent with rain splashing on the windows. It seems as good a reason as any to make some warming cupcakes. These have a bonus feelgood factor - as well as being delicious, the whole house is filled with the fragrant spices as they cook - it makes it very difficult to wait for them to cool down once they're out of the oven, but I managed!

The recipe is another from the Caked Crusader's blog (seem to have been getting a lot of my inspiration from there recently!) but from a little while back. May this year in fact. Hmm, must get round to making bookmarked recipes more quickly in future! The recipe appealed because for the disorganised baker it doesn't require you to have soft butter as you melt it anyway. This is good news for me because I invariably forget to allow enough time for butter to come to room temperature, especially in winter (and I have a cold kitchen too). I decided on a lemon icing because the fresh flavour of lemon really complements the spicy ginger cake.
Anyway, onto the recipe:
Ginger spice cupcakes with lemon icing
Ingredients
1 egg
120ml milk (whole or semi skimmed)
90g plain flour
30g self raising flour
½ teaspoon bicarbonate of soda
2 teaspoons ground ginger
½ teaspoon ground cinnamon
½ teaspoon mixed spice
80g caster sugar
60g unsalted butter
100g black treacle
25g golden syrup
For the icing:
200g icing sugar
juice of 1 lemon (plus a couple of tsp of hot water depending on how juicy your lemon is)
Method
- Preheat the oven to 200°C/fan oven 180°C/400°F/Gas mark 6.
- Line a muffin tray with 12 paper cases.
- Place the butter, treacle and golden syrup in a saucepan over a gentle heat and stir constantly until the butter has melted, don't do what I did and forget about it until it hissed angrily and threatened to boil.
- Whisk together the milk and egg then add the ginger, cinnamon, mixed spice and caster sugar. Make sure your butter etc is melted and ready to add before whisking in the flours and bicarbonate of soda.
- Pour the warm butter mix into the flour mixture and stir. At first it will seem incredibly runny but keep stirring and you will feel it thicken.
- Spoon the mix into the paper cases. I found this easiest by pouring the mixture into a measuring jug and then using that to fill the cases - yes, it's more washing up, but so much quicker and easier and tidier (otherwise I'd have mixture all over the kitchen as it dripped about). Divide the mixture between the cases but bear in mind that the mixture rises quite a bit.
- Bake for 20-25 minutes or until a skewer comes out clean.
- Leave to cool on a wire rack.

When cool, make the icing by adding the lemon juice to the icing sugar. If the mixture seems too stiff, add a couple of tsps of hot (boiled) water but go carefully. I wanted the mixture quite stiff so it would sit on top of the cakes rather than run all over the place. It helped that my cakes didn't rise as much as the CC's cakes, and gave quite a good flat surface for icing. So don't despair if your cakes aren't reaching for the skies!

A picture of the deliciously dark interior of the cupcake. The cake itself was really light, but deliciously spicy. It reminded me slightly of McVities Jamaican Ginger cake, either that or parkin, so I suppose it was a hybrid of both their flavours. (I used to love Jamaican Ginger cake warmed in the microwave with golden syrup and bananas on it, served with Bird's custard - heaven!). A really really good cake, to be thoroughly recommended, especially when you want the flavour of parkin and autumn but don't want to wait all that time for parkin to cook!


Went down well at work too - some good compliments and a request for the recipe, so thanks, Caked Crusader.

Sunday, 9 November 2008

Food for the Fireworks

I went up to visit J yesterday as we wanted to go to the firework display together. It's becoming a tradition for us, this is the third year we've watched them together. The weather has been rubbish the past couple of days and yesterday evening was no exception - windy and cold. That's ok in moderation, it adds to the atmosphere of the firework display and we decided to have something warming and hearty before we went out. Meal of choice, mushroom risotto. We both like this and it seems appropriate and autumnal for a windy day. Plus, both J and I have a sweet tooth and love puddings and as J said, risotto is essentially savoury rice pudding! (I tend to make my risotto more on the soft than 'al dente' side. Yes, this probably makes it less authentic but I really don't care - it's my dinner after all!)

Mushroom risotto (serves 2)
I don't so much follow a recipe for this, just add what seems about right.
Pour boiling water over a small handful of dried porcini mushrooms (about 5-10g) and leave to rehydrate for 15 minutes or so. Soften a finely chopped onion in a glug of olive oil until soft but not coloured. Add chopped mushrooms of your choice (I used two large open portabella mushrooms plus a handful of brown chestnut ones that wanted using up) and turn the heat up high to draw out the water from the mushrooms and brown them a little. Add risotto rice (I used 150g for the two of us) and stir for a couple of minutes to coat in oil. Add a good glug of dry sherry and allow to evaporate. Add the mushroom soaking liquid plus the chopped up rehydrated mushrooms. Don't add the gritty bit of soaking liquid at the bottom of the bowl! Make up 1/2 litre of vegetable stock (I used Marigold bouillon powder) and add gradually to the risotto, allowing it to dry out a bit between additions. Don't have the heat high enough to boil the rice, it needs to be a bit slower than that. Keep stirring. Yes it may be slightly tedious (although I quite enjoy it, and it warms you up nicely!) but the end result is well worth it. The stock will probably take about 25 minutes to add. Test a grain of rice to see if it's done. It should be slightly 'al dente' but I like mine soft, so I keep going until it's lovely and soft and gungy!!! Season with black pepper and salt (if you want, I don't bother with salt as the mushrooms are tasty anyway and the bouillon powder is salty) to taste and stir in a big load of grated parmesan. Serve straight away.

We had it with a lovely green salad prepared by J; lettuce, spinach and avocado with a vinaigrette dressing, which offsets the rich risotto perfectly and adds a bit of crunch.


In the end we decided it was raining too much to go out and see the fireworks, but all was not lost because J has a fabulous view of the fireworks from one of the upper floor windows at the back of her house, so we watched in comfort there! And propping the window open slightly meant that we could hear the fireworks banging and get a little bit of a draught to simulate being out in the open. No substitute for actually being there but better than being drenched or missing them entirely. And opening the window meant I could attempt to take photos of the fireworks. I think they've come out rather well, considering that we were quite a long way from the display!


Happy bonfire night!!!

Tuesday, 4 November 2008

Buttermilk raisin cake

Well, I have to admit that I'm slightly lost for words about this cake. Not really so great given that I'm trying to blog about it! I first saw the recipe and pictures a couple of weeks ago on the Caked Crusader's blog, where she describes it as one of her all time favourite cakes. I suppose that must be partly what drew me to it, because raisins are one of those things I can take or leave and they seem to be the whole point of this cake, plus how can someone campaigning for the cause of cake be wrong?!? And I was intrigued by the use of buttermilk - I've always wondered what it did to the texture and taste of a cake. So the decision was made, for better or worse, to make the cake.
The circumstances weren't ideal - I wanted it in and out of the oven before I attempted to roast my very first whole chicken (about which I was slightly nervous - baking I can do, cooking not so much!!) so I was on a pretty tight timescale. But I forged ahead regardless.
This is a big cake. Really big. I suppose I should have guessed that it might not cook in the specified time, and in fact, mine took 1hr 45 minutes in total, where it was supposed to take 1hr to 1hr15. When I tested earlier there was definitely raw batter on the skewer. Repeatedly. So I left it in until it was done. Unfortunately this means that the crust is thicker than I would have liked and is slightly burnt. I was also worried that the cake would be really dry, having been in the oven for that long.(At this point I should admit to being a bit of a control freak and perfectionist - I hate it when things don't go to plan and at one point I considered just giving up and chucking the whole lot in the bin. Fortunately I came to my senses and realised just how much I'd spent on ingredients for the cake!)
On the plus side, it was easy to put together. I followed the CC's recipe exactly (apart from running out of raisins and having to put in 260g rather than 320g) so I won't reproduce the recipe here, you can hop over to the CC's blog (you should do that anyway because it's a fab blog!).
So, after having complained for the whole post about it, was it worth it in the end??? Well, surprisingly, the answer is a quite resounding YES!!!! I took some for J to try and we both agreed that it's a really delicious cake. My fears about it being dry were unfounded (yes, the very edge is a little dry and burnt, but can easily be cut off) because it's moist and tasty, and the raisins are really moist and sweet. I can't explain it very well, but the cake had a flavour that neither of us could identify and in the end put down to the buttermilk. But it was a gorgeous flavour! The only thing I can do is recommend you try this cake for yourself. I'd make it again, but perhaps use a 9" square tin rather than an 8" tin or try adjusting the recipe to make a smaller quantity.
You'll have to forgive the photographs of this one, I was tired and it was dark and I was cross that the recipe had taken so long that I just wanted to get it cut up and into the freezer. If I get a chance, I'll try and get a better picture to post. However, there are 14 more pieces still in there as I post this, so plenty to be enjoyed yet.... I think it could be good with custard as a pudding. Mind you, I think most things are good with custard!

LinkWithin

Related Posts Plugin for WordPress, Blogger...