Friday 31 October 2008

Hallowe'en cupcakes (AKA Double Chocolate Mud Cakes)


Hallowe'en is celebrated on the 31st October, and the name is derived from All Hallows' Even (with Even itself being a shortened form of evening) and is the evening before All Hallows' day, which is now more commonly known as All Saints' Day, on the first of November. This probably makes the religious origins of the holiday rather more obvious but it is now a secular and rather overhyped and commercialised occasion. I guess that it is more celebrated in the USA than here in the UK, although the retail giants are doing their bit to cash in during the otherwise holiday-less period leading up to Christmas. (However, I wouldn't say it was that lean - all the Christmas products have been out in the supermarkets for weeks and weeks now - it's barely September before they start putting them out!). Wikipedia has some more interesting background on the origins of Hallowe'en and the different ways in which it is celebrated in various parts of the world.
But anyway, enough of the background and onto the baking. Another recipe from my new (bargain) Cupcake recipe book. I wanted to try a different recipe for chocolate cupcakes. This one was actually decorated with a florentine topping in the book, but inkeeping with the time of year (and being somewhat short of time and topping ingredients) I decided to go for spooky hallowe'en spider webs. Actually, they aren't that spooky at all really, just chocolatey, but any excuse to eat chocolate is good with me!!

Gooey, shiny chocolate just after icing.

Hallowe'en cupcakes (a.k.a. Double chocolate mud cakes - actually, that sounds so much more enticing than just hallowe'en cupcakes!!!)
Ingredients
60g dark chocolate, chopped coarsely (I used Lindt 85% cocoa)
160ml water
90g butter, softened
220g dark brown sugar
2 eggs
100g self raising flour
2 tablespoons cocoa powder
40g ground almonds (but I substituted extra flour for this - use plain if you want)

Topping
150g milk chocolate (or dark if you prefer it - I would have used dark, but they weren't for me, and milk is usually more popular)
40-50g white chocolate

Method
- Preheat the oven to 170C/Gas 3/150C fan assissted. Line 6-hole large or 12 hole standard muffin tin with paper cases.
- Combine chocolate and water in small saucepan; stir over low heat until smooth (NB don't overheat here or the chocolate will catch - says the voice of experience here!)
- Beat butter, sugar and eggs in small bowl with electric mixer until light and fluffy. Persevere here - the mixture will start out really dark but will eventually become much much paler in colour, as you can see from the pictures below.
- Stir in sifted flour, cocoa, ground almonds (or extra flour if you're nut allergic) and warm chocolate mixture.
- Divide mixture among cases - it will be very runny.
- Bake large cakes about 35 minutes for large cakes, 25 minutes small cakes (I think mine took a bit longer). Turn cakes out onto a wire rack to cool.

For the topping
- Melt milk and white chocolate, at the same time if possible, but (obviously!) not together.
- Spoon milk chocolate onto the cakes (mine were quite flat topped - ideal for this kind of topping) and then put the melted white chocolate into a small piping bag (or do what I did and use a plastic bag and snip off a tiny corner).
- Pipe a spiral onto the milk chocolate. The first time I tried this (years ago) I tried to do concentric circles (ie lots of separate circles) but it's really difficult because once the chocolate starts to flow it doesn't want to stop. Spirals give just the same effect in the end, but are much easier to do!
- Using a cocktail stick, pull out from the centre to create the 'spokes' of the spider's web.
- Allow to set (or just dive in while the chocolate is still warm and gooey - mmmm!) and serve to amazed (well, slightly impressed I suppose!) colleagues.....

The butter and sugar mixture starts out really dark, but keep on with that mixing and......


it will eventually become much lighter. (Ignore the fact that my mixture is trying to curdle - I don't know why it's doing that, and it was fine when I added the flour, and the cakes turn out fine, so I guess it doesn't matter.)

Spirals of white chocolate piped onto the milk chocolate.

Nearly there - half of the spirals have turned into webs.....

These were well received and drew a couple of 'how did you do that' type questions!

Monday 27 October 2008

Toffee ginger cakes with fudgy icing

I don't often go to Waitrose, since it's about a twenty five minute drive from me, passing about five other supermarkets on the way! but I like to go occasionally to browse the special offers (which can sometimes be very competitive - who says Tesco is always cheapest?) and when I'm there I try and pick up the monthly recipe cards that they produce. There are usually 8 or 9 each month, showcasing seasonal ingredients and there tends to be a starter, meat, fish, veggie, childrens etc, and usually a baking/dessert one. This month toffee ginger cakes with fudgy icing was the recipe.
It just sounded perfect for the time of year - it's been really cold recently all of a sudden and ginger is such a lovely warming spice. These seemed the perfect way to use ginger in a cupcake. The recipe is based on the Waitrose one here, but because I tend to buy large rather than medium eggs I upped the amounts of flour, sugar and butter, as shown below.
Toffee ginger cakes with fudgy icing
Ingredients
120g soft butter
120g light brown soft sugar
1tsp ground ginger
25g golden syrup (I didn't weigh this, just put about a tbsp in!)
120g self raising flour
2 large eggs
For the fudgy icing:
25g butter
50g light brown soft sugar
2 tbsp warm water
100g icing sugar, sifted
To decorate:
Pieces of crystallised stem ginger and fudge
Method
- Preheat the oven to 200C/Gas 6. Place paper cases in a 12 hole muffin tin.
- Beat the butter and sugar together with an electric whisk for 2-3 minutes until pale and creamy.
- Beat in the ginger and golden syrup until well combined.
- Add the flour and eggs and beat like crazy with the electric whisk. (OK, so these aren't the original instructions - they tell you to gradually add a little egg followed by a little flour, etc until both are used up. Do that option if you have the patience. I don't!)
- Spoon into the paper cases and bake for 15-20 minutes until golden and well risen. Place on a wire rack to cool.
NB They may take longer than 20 mins because they are slightly bigger than the original recipe, but do check at 15 mins because the oven is hotter than usual for little cakes and mine were a little overbrowned on the tops by 20 minutes.
For the icing
- Melt the butter and brown sugar in a small saucepan.
- Bring to the boil, add the water and simmer for 5 minutes. It will look very runny.
- Remove from the heat and beat in the icing sugar until smooth. It stiffens up, and if it becomes too stiff add boiling water a little (i.e. 1 tbsp) at a time to soften it.
- Spread over the cakes and decorate with the chunks of fudge or crystallised stem ginger. The icing sets with a crust so it's best to decorate as quickly as possible.

Mmmm, fudge! I went heavy on the fudge for the ones I took into work, but heavy on the crystallised ginger for me, because I love it. It might be a bit of an acquired taste though!

All packaged up and ready to go into work, where they were extremely well received. Plently of praise for these gently spiced little buns.

Thursday 23 October 2008

Rocky road birthday cupcakes


One of my colleagues had a significant (noughtie!) birthday recently so I decided to make some cupcakes as a present for her. It was also a good reason to try out a recipe from (yet another!) a new cookbook. I found it in Marks and Spencer recently, simply entitled 'Cupcakes' for the bargain price of £3.50. (Unfortunately I can't find a link to it on their website - the nearest I can get is the 'Cookies' book which appears to be in the same series). I am so, so pleased with this purchase - I've been wondering about getting a cupcake book recently to inspire me, primarily for decorating ideas and this one is full of great ideas for decorations, but even better than that is that all of the cupcake bases are different too - ranging from the simplest standard cupcake mixture to the exotic sounding fig, caramel and walnut cake or white chocolate pistachio cake and the downright decadent chocolate ginger mud cake. There are a lot of bookmarks in this book already!
The friend in question is definitely a fan of milk chocolate and all things sweet so I decided that a rocky road type decoration astride a layer of buttercream perched on a marble cake base was the way forward for her. The cake itself was relatively straightforward to make, being essentially a basic sponge mix, but divided into three to allow the colours to be added. Colour comes in the form of red food colouring for the pink part - you can see the pink portion in the picture below, along with the food colouring and some of the general mess I make when I'm cooking! Cocoa powder colours the dark portion. A tbsp of cocoa is added and this thickens that portion of the mixture slightly. I forgot to add the recommended extra milk but would suggest you do add it, as the cocoa mixture was quite stiff. I also didn't take out quite enough for the cocoa portion, so there wasn't very much chocolate cake in comparison to plain and pink cake. Ah well, live and learn.
Marble cupcakes (makes 12)
Ingredients
125g softened butter
1/2 tsp vanilla extract
150g caster sugar
2 eggs
185g self-raising flour
80ml milk
pink food colouring
1 tbsp cocoa powder
2 tsp milk, extra

Method
- Preheat oven to 180C/Gas 4. Line 6-hole large of 12-hole standard muffin tray with paper cases.
- Beat butter, extract, sugar and eggs in small bowl with electric mixer until light and fluffy. Stir in the sifted flour and milk in two batches.
- Remove a portion of the mixture to a small bowl and add the cocoa powder and 2 tsp milk to it. Mix well to combine.
- Divide half of the remaining mixture between the 12 cupcake cases. This is the plain portion. Add the pink food colouring to the remaining mixture in the bowl until you achieve your desired colour. (You could use two separate bowls and add the pink to 1/3 of the total mixture, cocoa to 1/3 and leave 1/3 plain, but my method saves on the washing up, and besides, I didn't have sufficient clean bowls!)
- Divide the cocoa and pink mixtures between the tins. They will look like the photo below:

- Then it's time to swirl the mixture. I used the handle of a teaspoon as I find a cocktail stick or skewer doesn't swirl very effectively. They will look like the photo below:

- Then into the preheated oven for 30 minutes (large cakes) and 20 minutes (small cakes). I found that mine took 30 minutes even though they were only small cake size.

Rocky road topping
Really, this is up to you. I didn't go with the recipe recommendations because I decided the recipient probably wouldn't want nuts on her cakes and so I went for white chocolate buttons, quartered glace cherries and marshmallows, as pictured below. I had enough for about 3 chocolate buttons per cake, 3 quarters of glace cherry per cake and 2-3 mini marshmallows. I made up some buttercream (using about 60g butter, 120g icing sugar plus pink food colouring), smoothed it on when the cakes were cool and added the toppings.
I then melted some milk chocolate (I can't remember exactly how much, but 50g would probably be plently, and is the amount recommended in the recipe) and drizzled it over the decorated cupcakes. Unfortunately the chocolate I used didn't melt very well and so it sort of 'glopped' rather than 'drizzled', but you get the general idea.
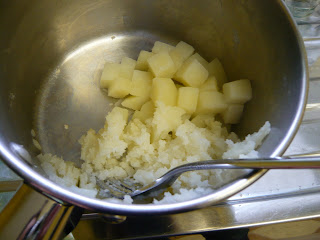

I think they went down well, but obviously can't tell you how they tasted, because they were for her not me! Happy Birthday!!!
EDIT: I've had word back from the birthday girl that they were very much enjoyed!

Monday 20 October 2008

Potato Bread (White flecked Cob)


Definitely not the most attractive bread I've ever made, but getting past first appearances is a must, this tastes really good - moist and chewy. I like my bread to have a bit of a bite to it - there's nothing worse than finishing lunch and feeling like you've just eaten air - a sort of cheated feeling. Not here though. The bread isn't heavy at all, but has a lovely texture - solid enough to know that you've eaten, if you follow my meaning.
The recipe came from Delicious magazine, November 2008 issue. I subscribe to this (well, in my defence I would only buy it in the shops anyway, so subscription is by far the cheaper option) and had some problems with my copy this month - I had to call the company up and request a re-delivery as mine hadn't arrived by the middle of the month! But anyway, when it arrived and I eagerly flicked through it there was a guest chef feature by Dan Lepard! I've mentioned him before on the blog (here and here) - I really like his bread recipes and when I saw that this one had potato in it, I really wanted to try it. I first read about potato bread ages ago in Nigella's 'How to be a Domestic Goddess' and dismissed it, but then read about it again when the Daring Bakers made it, and then again a couple of weeks ago. This repeated exposure was enough to catch my attention and when the introductory paragraph explained that potato used to be used by bakers years ago to keep bread moist, and that the bread freezes well, I was sold! One of the results of living on my own is that most things I make tend to get frozen and it's always nice to find something that stands up well to the freezing process. I have had a couple of bread recipes recently that have become freezer burnt quite quickly.
OK, so my picture of the finished loaf isn't great - but the pictures below showing the lovely moist insides and textured outer are better! (Well, not better pictures, but show the bread off to better effect!)
Lovely moist interior with even texture and holes.

Crusty looking exterior. I say crusty looking because as I took them out I expected the crust to be quite hard and crisp, whereas it was actually quite soft. I liked that (means you don't cut your mouth eating your sandwiches!) but it did make it more difficult to slice. The recipe makes two loaves and I sliced and froze one the day I made it and one the next day. It was much easier to slice thinly the following day so unless you're a dab hand with the bread knife I'd maybe try leaving it a day before slicing. I therefore had quite thick chunks to make my lunchtime sandwiches with - they were slightly unwieldy!
I'm not going to give the recipe, as it is published in the magazine, but will keep my eye on the delicious website because next months magazine is published soon, so there is a good chance it'll go on the web soon. Watch this space, but if I don't see it there soon, I'll post a version here.
Essentially the recipe involves boiling a potato to make mash (see picture below where I was being lazy and using a fork rather than a potato masher - easier to wash up!) and then using the water the potato has cooked in as the liquid component of the the dough. The method is Dan's usual three short kneads method, which I find very effective.
Half mashed....

It always looks like a disaster at this stage - leave it for 10 minutes before giving it the first of the three kneads.
Yep, the yeast is definitely active in this loaf!!
And finally leaving you with another picture of the interior - it really did make great sandwiches and I'll be making this again soon - it isn't often I make something straightaway from the current month's foodie magazines but this really jumped out at me! The recipe makes two loaves out of 500g flour plus a 225g potato, which seemed quite surprising, but was very welcome! And I can report that it does indeed freeze well - I've had it for lunch every day for almost a fortnight and it's just as good now from the freezer as it was fresh. Good result Dan!!!

Sunday 19 October 2008

Chocolate custard muffins

Mmmmmmm!!! What more can I or do I need to say? It seemed fitting to make something intensely chocolately to celebrate the end of chocolate week. My family are currently quite a way from me and consequently I don't get to see them very often. This also means that they tend not to get to sample the things that I bake and write about here. T was complaining that he never gets any of the muffins I bake and talk about and since I was meeting him and J this weekend, I thought I'd make something really special.
I was intrigued by the recipe for these muffins. I'm used to muffin recipes which have wet and dry components measured separately and then mixed together very briefly before being baked. These are different. They involve heating cornflour, water, sugar and cocoa powder to make a sort of custardy mixture - the custard in the name. They come from Dan Lepard via his 'How to Bake' column in the 'Weekend' magazine of the Guardian. I really like his recipes - I have used more of them for savoury breads, but the sweet ones are good too. He also has his own forum where recipes are posted, allowing bakers to ask all the questions they want - about adaptations to the recipes, baking times, any problems etc, but quite often just to say 'I made these and friends/colleagues/family agree with me that they're fantastic!!!'. Dan Lepard himself is often on the forums and will reply to people's problems in person, which I think is fantastic - he doesn't just submit the recipe to the Guardian and then forget about it all!
I'm not going to type out the recipe as I followed his instructions verbatim, and give him full credit for the fantastic outcome. You can either find the recipe here on his forum, or here in the Guardian newspaper. If you get the recipe from the forum, Dan says who won the competition mentioned, it's definitely worth taking a look at Nic's blog Cherrapeno for some fabulously tempting food and great photography.
Notes: When I made them I tried using a whisk for the custard stage, but it seemed to miss the clumps forming in the corners of the pan, so I switched to a wooden spoon, which was much better. The custard you get is very, very thick! When I added the next set of ingredients, the mixture seemed to split and curdle. It stayed looking like that until I added the flour, at which point it miraculously rescued itself! They were done after 25 minutes, just as the recipe says.
The majority of these were given to T to take away and enjoy during the long cold nights in Scotland (although for all I know he's eating them for breakfast) but I kept a couple and J and T tested one last night and the sounds were all of praise and satisfaction- these are seriously good - you won't regret making them!

Monday 13 October 2008

Chocolate shortbread

Well, anyone who knows me well (actually, even those who only really know me in passing!) know that I love chocolate and will eat it with no excuse whatsoever. But this week some nice people (possibly in London, most things seem to have an origin in London) have organised Chocolate Week. Ah, a reason to eat chocolate for the whole week and persuade other people that they should be doing the same! I particularly like Green and Black's range of chocolate - it's all delicious, especially the mint chocolate, and even more so if you put it in the freezer for a while before eating it (not recommended for those with weak teeth - you know who you are!). My other favourite brand is Divine chocolate. I've spoken about them before - they make delicious chocolate with a heart - it's all fairtrade, which I passionately believe we should support when possible. Do check out their website for loads more info about their fantastic products and show your support by buying the chocolate - available in all good supermarkets (and some that we'd rather not shop in.....)
Chocolate week runs from the 13th to the 19th of October, so make the most of it! To start I decided to make chocolate shortbread. I've recently started at a new site with work, and I wasn't sure how well cakes would be received so I decided to make biscuits as they keep better if not many people were interested in eating them. The new site is also considerably smaller than my old one and I wasn't sure how many people would be on diets/not wanting to eat sweet stuff etc. I needn't have worried! These were gone in just over a day!
The recipe is from Sue Lawrence, from her older book 'On Baking', not the newer 'Book of Baking'. I actually prefer the older one, but sadly it isn't nearly as readily available to buy. It's a fabulous book and every time I look in it I find something more that I want to try. It's predominantly sweet, but there are some very interesting looking savoury bread recipes (Rice and Leek bread, Stotties, Chollah, Kentish Huffkins - persuaded to buy it yet?).
Chocolate Shortbread
Ingredients
250g butter, softened
150g caster sugar
150g milk chocolate, cut into chunks
200g plain flour, sifted
100g semolina
Method
- Preheat the oven to 150C/300F/Gas 2.
- Place the softened butter and sugar in a bowl. Using an electric mixer on a low speed beat together until light and fluffy.
- Add the chocolate chunks, then the flour and semolina (you need a big bowl!). Using a wooden spoon, combine everything together without overmixing (as she says you will get a tough dough if you overmix). The mixture will still be slightly crumbly - don't worry!
- Turn into a lightly buttered swiss-roll tin, 23 x 33 cm/ 9 x 13 in. Press the mixture down using the palms of your hands or the back of a spoon.
- Bake in the oven for about 40 minutes, or until golden brown around the edges.
- Cut into squares or fingers while stil hot and leave to cool in the tin for 30-40 mins. Using a large fish slice, transfer to a wire rack to finish cooling before eating.
Notes: I found the mixture quite greasy, but I guess this is a function of so much butter! The shortbread has quite a distinctive crunchy texture due to the semolina. I think if I make these again I'd use less semolina. I used a mixture of 50g dark divine chocolate and 100g of Sainsbury's taste the difference milk chocolate with caramel pieces.

Well, that's all I really ever want to see - that people have enjoyed what I've made - it's great to have feedback! Some people commented that it was like flapjack - I guess this is because the semolina gives it a crunchier texture, but they liked it anyway!

Sunday 5 October 2008

Parkin

This has to be one of the most traditionally British cakes I make. And I put it in the present tense because this cake has at least an annual outing in my house. It is a traditionally northern cake, most often associated with Yorkshire (clearly the best, i.e. my home county!!!) but also with Lancashire and is a very old type of cake. It is defined by the inclusion of oatmeal and treacle - versions without these are blasphemy! I like mine plain, but have seen recipes with candied peel in them.
For me, and I suspect most people who have eaten this, it has strong associations with Guy Fawkes and Bonfire Night. J always made this, along with treacle toffee and toffee apples when T and I were small, for when we were watching the fireworks in our back garden. I always loved the parkin the most (but I loved the toffee and toffee apples too!) and the best thing is that because this is such a large cake, there was always some left for a few days after. Parkin is definitely best made in advance - a week is good, but up to two weeks is possibly even better. Make sure you wrap it well after cooking (in a layer of greaseproof paper and then a layer of foil) and leave it in a safe place. And yes, it requires a will of steel to leave it for a week, but it really is worth it. I had to cut the one I made just after it was baked, so that I could take it into work, and the photo at the top looks a little dry - leave it a week and it'll be moist and yummy.
It's the very end of British Food Fortnight now and Antonia at Food, Glorious Food is hosting a British food fortnight challenge. As ever, I am right at the last minute, and hopefully this post will be accepted! I can't really say that my ingredients were local or seasonal as such, I find that baking recipes very rarely are, but where possible I use British - flour, butter, oatmeal, milk etc. Anyway, onto the recipe. This is the one J has handed down to me, and is from an old Cordon Bleu cookery course booklet that she collected some time in the 1970s. It has done us proud, and I hope you'll enjoy it too whether you're celebrating Bonfire Night or not. Ingredients were originally given in oz, so I've converted them to grams as my current scales don't weigh oz (grrr!).
Parkin
Ingredients
16 oz (450g) plain flour
1 tsp salt
1/2 oz (14g) bicarbonate of soda
2 tsp mixed spice
8 oz (225g) oatmeal (I use medium)
12 oz (340g) soft brown sugar
8 oz (225g) butter
4 oz (115g) golden syrup
4 oz (115g) treacle
1/2 pint (284ml) milk
Method
- Grease and line an 8 inch square cake tin. Preheat the oven to Gas 4/180C.
- In a large saucepan, melt butter, syrup, treacle and milk until all liquid, but not bubbling.
- Sift flour with bicarbonate of soda, salt and spice in a large bowl (use your biggest - mine nearly didn't fit into the bowl I chose!). Stir in oatmeal and soft brown sugar until well mixed.
- Pour liquid ingredients into dry ingredients and mix thoroughly. It will look like a dark sloppy mess - fear not, all will be well.
- Pour into the lined tin, place in the oven and cook for 1 hr 15 minutes.
- Leave in tin until cool enough to handle then remove to wire rack to cool completely before wrapping it and leaving it for a couple of days.
- Your patience will be rewarded. Enjoy!!!

Yes, it does look burnt. It always, without fail looks like this, but it doesn't taste burnt!!!

Wednesday 1 October 2008

Caramel surprise mini cupcakes


and also, Butterfly cakes:


I still had some of the Werther's original toffees left, from when I made the chocolate caramel mud cakes, and decided that rather than eating them all myself, I'd add some to a basic vanilla cake mix, and see if they would suspend themselves as well as they did in the previous recipe. I opted for a standard 2 egg cake mixture, but decided to bake mini cupcakes, using a mini muffin tin. I topped them with a vanilla buttercream, and then having decided that not using a star shaped nozzle left them perhaps a little unattractive (in photo below), I topped them with some different coloured 'silver' balls (see top photo). I say 'silver' as they were blue, silver, green and pink.


As with the last time I used the toffees, I cut them into three and just put one third into each mini cake. As the pieces had suspended themselves in the mixture so well last time, I decided to push them down a little further this time, which turns out to have been a mistake, as the caramel sank to the bottom as they cooked, leaving a slightly aesthetically disappointing result - I would really have liked the caramel to be in the very centre of the cake. Ah well, practice makes perfect, I'll just have to try again!
You can see on the picture below that the dark rim at the bottom of the cupcake case is where the toffee ended up after baking. Another slight problem with them was that I added a little baking powder to the recipe, as I often do when using an all-in-one method, and I'm not sure if this is the reason that quite a few of them decided that making a break for it and escaping out of the cupcake case was far more exciting a prospect than staying put and just rising slightly! You can see the slight mushroom effect below:

The only other reason I can think of for this to happen (and it's not something I normally get, honest!) is that the melting toffee may have somehow superheated the surrounding cake mix and caused it to rise very vigorously - well, I can only guess I suppose. I used the same recipe for making the larger muffin sized buns that made the butterfly cakes, again filled with vanilla buttercream, and there were no exploding cake problems there!

Vanilla sponge recipe
Ingredients
120g self raising flour
120g caster sugar
120g softened butter/margarine
2 large eggs
1tsp baking powder
1tsp vanilla extract

Method
- Preheat oven to 180C/Gas 4. Place paper cases in either a 12 hole standard size muffin tin or in 24 mini muffin holes.- Place all ingredients into a large mixing bowl and mix with an electric hand mixer until well combined. NB butter needs to be very, very soft for this method to work.
- Spoon into prepared cases, place 1/3 of a caramel into the small muffin cases and push it down a bit.
- Place in the preheated oven and cook until lightly golden. I think my mini muffin size took about 25-30 mins and the larger ones about 30-35, but if your oven is hotter, start checking sooner.
- Remove to a wire rack until completely cool, then ice with the buttercream.

- For the butterfly cakes, cut a circle of cake out, making sure it isn’t too shallow, then cut it in half to form the butterfly’s wings. Put a splodge of buttercream into the hollow you have created and place the wings back onto the cake. A dusting of icing sugar is very decorative, but I forgot!

Comments: These were well received and the caramel came as a pleasant surprise to those who ate them! The only negative comment was from people complaining about nearly breaking their teeth on the little coloured balls - well, you can't have everything and beauty(!) and practicality sometimes aren't compatible! (I'd leave off the coloured balls if you were giving them to people with funny teeth - perhaps hundreds and thousands would be better!)

LinkWithin

Related Posts Plugin for WordPress, Blogger...