Showing posts with label bar. Show all posts

Monday, 31 December 2012

A Ginger Rocky Road


I have been meaning to make Rocky Road for years and years now, and like so many things have only just got round to it. I don't think I've ever even eaten Rocky Road before, it just seems like a jumble of random things melted together and set, but actually, it's pretty tasty! I should really have known that I was going to like it because in essence, it's very similar to these Chocolate Fruit and Nut Cases - a Delia Smith recipe that I've made countless times and enjoy very much indeed.

There are certainly plenty of recipes out there for Rocky Road, it appears to have increased in popularity over recent years. I decided that I would adapt a recipe from a recipe card I received as part of a set called 'The Food Files'. There are quite a few interesting looking recipes in this collection, which is comprised of recipes from a number of famous faces of the celebrity/cooking world (Rose Elliot, Fay Ripley, Richard Corrigan) and a few from food companies (Innocent, Gu, Hummingbird Bakery) and span a range of sweet and savoury cooking. It's not the kind of thing I'd choose to buy, but I ordered some (ahem..) books from The Book People a while ago and they had an offer whereby if you bought two cookery titles you were sent a set of recipe cards free of charge. 


Anyway, enough about where the recipe came from and more about the food. I adapted the recipe slightly to allow for the ingredients I had in my house and my tastes so here I give you

Ginger Rocky Road
Ingredients
400g dark chocolate (70%), broken into small pieces (but see below)
100g milk chocolate (34%), broken into small pieces
75g unsalted butter
30g (1 1/2tbsp) golden syrup
100g ginger biscuits, broken into pieces but not smashed
50g mini marshmallows
50g raisins

Method
- Grease and line an 8"/20cm square baking tin.
- Melt 300g of the dark chocolate and all of the milk chocolate with the butter and golden syrup. The recipe method was to melt the butter and syrup and pour it over the chocolate, stirring until it melted, but this really doesn't work as there is so much chocolate. I did as I was told, but then ended up microwaving it in short blasts until the chocolate had actually melted. I'll leave it up to you how you go about melting it. In a pan over hot water would work too.
- Add the broken biscuits, marshmallows and raisins to the melted chocolate and mix well so everything is coated.
- Pour into the prepared tin, level off and leave to set in the fridge (I left mine overnight). The recipe suggests a couple of hours.
- Melt the remaining chocolate and spread it over the biscuit/chocolate base. Place back in the fridge to harden and then cut into pieces.

Tips
- I found that the remaining 100g of chocolate was not enough to cover the whole surface area of the rocky road, and certainly not to cover it and give the depth suggested by the accompanying picture (don't you hate it when the pictures lie to you...). I'd suggest at least 150g extra for the topping, and more if you want a decent layer.
- To cut the hard rocky road into neat squares, boil a kettle full of water (or use hot water from the hot tap) and pour over the blade of your knife. Working quickly, dry the blade and make the first cut. Wipe the melted chocolate off the blade and you may have enough heat to make a second cut. Again, wipe the blade, and then run more water over it to heat it up again and repeat the process until your rocky road is cut up.


Were they yummy? Yes. I think it goes without saying that the end result here is the product of the quality of the ingredients you use and I used Green and Black's Cooking Chocolate for both the milk and dark parts. Obviously, use your favourite, I happen to like G&B! Infinitely customisable - use your preferred biscuits, dried fruit and ratio of dark:milk chocolate to suit your tastes. I liked the different textures - melty chocolate, crunchy biscuits, soft marshmallows and chewy raisins - it all worked really well together. I think cranberries would work well too, or crystallised ginger.

Would I make it again? For myself, probably not - I'm lazy and it's easier to just have a few squares of chocolate, a handful of raisins and a couple of biscuits by my side and graze on them all simultaneously. Or I might make Delia's Fruit and Nut cases again - they're very tasty and less faff (and they are delicious straight out of the freezer). However, these would probably make a good gift and were very tasty!


Since this rocky road is based on ginger biscuits I'm going to enter it as a rather last minute entry for the One Ingredient challenge, which this month is Ginger. Yum, I do love ginger! One Ingredient is hosted by Laura of How to Cook Good Food and Nazima of Franglais Kitchen. Nazima is the host this month.

Wednesday, 21 December 2011

Orange and Cranberry Stollen Bars


I don't often bake things that I cannot eat (for obvious reasons of greed!) but J loves marzipan, Stollen is a very festive and seasonal bake and I was intrigued by this recipe (it's the second one down), recently published by Dan Lepard on the Guardian website. I had previously thought that Stollen was always a yeasted treat, but this was a non-yeasted version of Stollen. I have made a more traditional version (also to a Dan Lepard recipe) in the past, and you can see it here. I was interested to see how this one turned out and how it was received, given that rich, fruited, spiced, buttery eggy doughs take an age to rise, especially in my chilly kitchen.

As I've been browsing all the Christmas goodies popping up on people's blogs recently, I noticed that Jules over at Butcher, Baker had made a Stollen and she notes that both yeasted and non-yeasted versions are widely made in Germany, with a yeasted version probably being more traditional.


I followed the recipe fairly closely, but made one fairly major change. I didn't have pistachios and when I went to buy them found that they are horrendously expensive. I'm sure this will not come as a surprise to the nut-eaters of you out there, but as someone who never looks at nuts I was horrified at the price I was going to have to pay, and (rather selfishly) more so because I'd never get to enjoy these bars or note the difference that the pistachios made to it. So apologies Dan, I substitued dried cranberries for the pistachios - totally different texture and flavour, but cost an awful lot less! I did however, splash out on some better quality marzipan. If you read the packets of supermarket marzipan most of them only contain around 25% almonds, but the Anthon Berg brand (bright pink/purple packet in the UK) contains 60% almonds - big difference!

I needed to cook these for much longer than 30 minutes. I think it was nearer to 50 minutes, and may even have been a little longer. I used a fairly shallow 8" square tin, so I'm not sure what, if anything I did wrong, but they definitely weren't done at 30 mins.


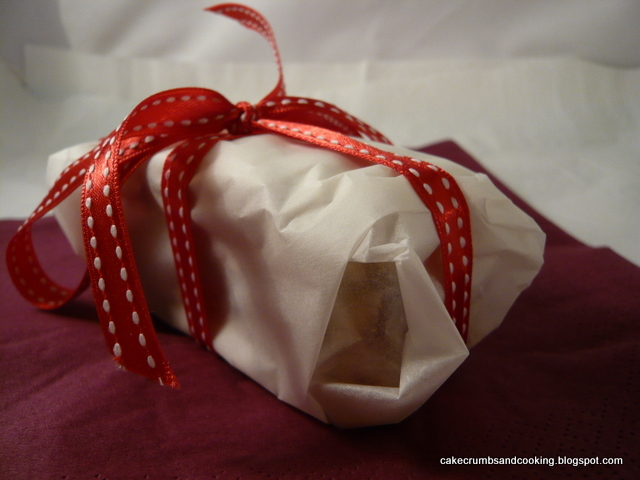
I made these for a staff lunch at work where we all brought something in, and these were really popular, with people commenting on how nice they were, which is very gratifying. I also sent a piece to my chief taste tester, J, and thanks to Royal Mail it arrived in one piece. She absolutely loved it, and so all of my taste notes are thanks to J.


The stollen is really moist and almondy - no doubt due to the ground almonds in the dough and the chunks of marzipan spread throughout. J thought this better than having one long chunk of marzipan down the centre, but I think that perhaps the marzipan had become a little lost from her description. However, she said that the orange flavour was subtle, and it was moister than a traditional stollen, which is what I had expected. The texture is like a very enriched bread dough, but without the problems those doughs tend to have of not rising very well in my cold kitchen - probably a more forgiving stollen to bake. I think, all in all, that she loved it, and was possibly disappointed that only one piece found its way to her in the post!

Saturday, 3 September 2011

Squidgy chocolate squares - unconventional brownies


I really fancied a rich chocolate square, brownie like but not a brownie, if that makes sense. After some hunting I came across this recipe for vegan brownies on allrecipes.co.uk and it seemed to fit the bill.

As usual, I adapted the recipe slightly, un-veganising it (sorry!) to include some butter (I'm sure it would work really well as stated though!) and halving the recipe. I made it in an 8" square tin, but next time I think it would be better in a smaller tin, to make a thicker square.


Squidgy chocolate squares
Ingredients
125g plain flour
175g demerara sugar
32g cocoa powder
1/2tsp baking powder
1/2tsp salt
125ml water
62ml light olive oil
62g butter, melted
1/2tsp vanilla extract (or 1tsp if not using chocolate essence)
1/2tsp chocolate essence (optional)

Method
- Preheat the oven to 180C/Gas 4. Grease and line an 8" square tin, or a slightly smaller one for thicker squares, but be prepared to adjust baking time.
- Mix flour, sugar, cocoa powder, baking powder and salt in a large bowl.
- Add the water, olive oil, butter, vanilla extract and chocolate essence if using.
- Mix well, pour into prepared tin and level.
- Bake for 25-35 minutes, depending on how squidgy you want the middle! (I think mine took about 35 minutes)
- Allow to cool, and very, very carefully remove from the tin. I wasn't careful enough and mine broke, but they were still delicious!


I really enjoyed these - they were deliciously fudgy and gooey in the middle - fabulous! I think next time I'll try them with either light or dark muscovado sugar or perhaps half and half of each, to add a little more depth of flavour to the sweetness. I might also add some chocolate chunks or some dried cranberries too, but wanted to make the recipe as stated first time round to make sure it wasn't a complete disaster!

Wednesday, 3 August 2011

Raspberry oat traybake


These were a very quick and easy bake that I spotted in a recent issue of BBC Good Food magazine. They ticked all the boxes - super quick to make and bake, reasonably cheap to make (especially if you use frozen fruit) and fairly healthy to boot. Well, they only contain 50g of butter for the entire tray, and they've got fresh fruit and oats too so although they aren't as healthy as say, a piece of fruit, you could certainly do worse!

I adapted the recipe slightly, and as I said, I used frozen fruit. I allowed it to thaw first, before mushing it up as stated in the recipe. You can find the original recipe here.

Raspberry oat traybake
Ingredients
200g rolled oats
50g medium oatmeal
150g raspberries, thawed if frozen, then mashed to break them up
1/2tsp vanilla extract
50g butter
75g runny honey

Method
- Grease and line an 8" square tin (20x20cm). Preheat the oven to gas 7/220C.
- Melt the butter and honey over a gentle heat.
- Mix in the oats, oatmeal and vanilla if using.
- Spread about half of the mixture into the tin and press down.
- Spread over the raspberries and then sprinkle/spread over the remaining oat mixture.
- Bake for 10-12 minutes until golden and crispy.


I used a mild honey, so it wasn't too obvious in flavour. I wouldn't bother adding the vanilla again, it got lost in the other flavours, although I had thought it would go well with raspberries. I think I baked mine at gas 6 rather than gas 7, but can't honestly remember, which is a pity because they were indeed browned at 12 minutes, as suggested by the recipe. Perhaps I did use gas 7 then...

I think next time I'll use more fruit because 150g only gave a very thin covering. I also used slightly more than half of the mixture to cover the base, and then sprinkled everything that was left over the top.

As you can imagine, without very much fat to hold them together they were very crumbly. Not so that you couldn't pick up a piece, but you had to be careful. I really liked them and can see them becoming quite a regular quick bake for when I can't think what else to make - they made a perfect small midmorning snack. I think they'd also be great with blackberries (though you'd have to make sure to squash them up well, and might need 200g to get a layer), or perhaps even very finely chopped stone fruit like apricots or nectarines. All sorts of possibilities!

Thursday, 16 December 2010

Chocolate Date Crumble Bar - I Should Cocoa


It's time for I should Cocoa again, with Choclette hosting this month. Her choice is dates and this month I have managed to not leave it until the very last minute! It didn't occur to me to use fresh dates, although I suppose that would have been good, given that they're in season, but instead I used the widely available dried dates.


These bars, recently published (though not as recently as I thought!) by Dan Lepard had intruiged me and Suelle at Mainly Baking gave the recipe a good review too. I made something with dates a while ago and wasn't exactly sure whether I like the flavour of dates, so the idea of combining them with orange sounded good to me. I halved the recipe and cooked it in a 2lb loaf tin (having worked out surface areas etc and found that this would be the closest thing to half of the specified tin size) and obviously, left out the hazelnuts. I'm sure they would have been delicious, but not for me!


The resulting bar is deep and generous looking - you can see the thick layer of dates in the picture above - really moist and delicious. I really, really enjoyed these, far more than I was expecting to. I know the point of the challenge is to make the dates the star, but in all honesty they aren't my favourite dried fruit - I think it's the combination of flavour and slightly stringy/fibrous texture that disturbs me. So I was really pleased to be able to find a way to enjoy the dates so much. The texture of the dates is lovely and soft and melting inbetween the two layers of crunchy crumbly bar. The predominant flavour was orange, with a very background date/chocolate flavour (oops, not quite in keeping with the challenge!!!) I added possibly a little more water than I should have to the top layer of crumbs, making the mixture a little wet but all turned out well after I dropped little bits onto the date layer. I also left them in the oven a little longer than specified, but this was deliberate as I wanted a really crunchy topping - which I got!

These might be nice with some mixed spice added to the date layer too, for a more festive treat, and I think they might make a nice change to mince pies for when you've had your fill of those during the festive season!

LinkWithin

Related Posts Plugin for WordPress, Blogger...