Wednesday 30 March 2011

Vegan Chocolate Avocado Cupcakes with Vanilla Buttercream Frosting

Firstly - disclaimer that the entire cupcake is not vegan - I used butter in the frosting, but you could easily make them vegan by using vegan spread/butter substitute instead.

I think that these definitely win the prize for the wierdest thing I've ever used as an ingredient for cupcakes. They definitely beat these sweet potato containing ginger cupcakes (after all, sweet potato almost looks like carrot once it's grated, and no-one thinks carrot cakes are wierd as a concept, even if they don't like eating them!) and as I'm not a particularly adventurous-with-new-ingredients baker I haven't really got anything else particularly odd on here. Which makes me wonder what inspired the use of avocado in these cupcakes?! I think it was serendipidy that caused me to come across this recipe for these cupcakes on Whisk Kid - I think it must have been quite far down the line of following interesting looking links from various blogs - I love whiling away a Saturday afternoon when it's dull and drizzly looking for interesting things to make! I even had the required ripe avocado sitting patiently on the kitchen counter. Well, when I say patiently I mean ripely - waiting to go off rapidly, needing using up.... and so on. So these cupcakes were perfect!

I didn't dare go the whole way though, and do the avocado frosting. I would have liked to try it, but fear of the lemon juice failing to prevent the browning that usually happens to exposed avocado and me having to scrape brown gunge off the cupcakes before taking them into work prevented me being bold and brave. One day I'll find my inner bravery! So I opted for my current favourite - vanilla buttercream - yum!


I adapted the recipe given to use one small avocado so my quantities are below:


Vegan chocolate avocado cupcakes

Ingredients

180g plain flour

16g cocoa powder

1/4 tsp salt

1tsp bicarbonate of soda

1tsp baking powder

200g caster sugar

30ml sunflower oil

60ml avocado, well mashed (my avocado flesh weighed about 60g)

1tbsp white vinegar (I used white wine vinegar)

1tsp vanilla extract

235ml water


Method

- Preheat the oven to Gas 4/180C and put 12 cupcake liners into a muffin tin.

- Sift the flour, cocoa powder, salt, baking powder, bicarbonate of soda into a bowl.

- Whisk together the sugar, oil, avocado, vinegar and vanilla and then when combined add 235ml water.

- Mix the dry ingredients into the wet and mix until thoroughly combined. The batter will be quite sloppy.

- Pour into waiting cupcake cases and bake for 25 minutes until a cocktail stick inserted comes out clean.

- Allow to cool on a wire rack before decorating as desired.


Buttercream frosting

- Make in the usual way using 75g butter, 150g icing sugar and 1tsp vanilla extract

I have to admit that I was fully expecting these to be a complete failure and even when they came out of the oven looking pretty good I still thought they'd collapse into a mess. How wrong I was. You too should have faith that although the method and ingredients aren't the most orthodox, these cupcakes have to be baked to be believed!


These were just so, so delicious. I might even say surprisingly and unbelievably so - they were almost black in colour they were so dark, yet every mouthful was full of chocolately lightness and moist squidginess that it just seemed untrue! Aside from being astoundingly light and delicious these were also the most fabulous colour. It's quite hard to see from these photos but if you look at the cut surface they were almost red in tone - I think this is the reaction between the acidic vinegar in the mixture and the alkaline cocoa powder producing this gorgeous hue. I think it's also supposed to be the reaction that causes red velvet cake to have its name, before bakers started throwing tonnes of red food dye into it!

Make these, please! Put aside any preconceptions (misconceptions!) you may have, either about vegan baking or about using avocado in baking, these are the most delicious chocolate cupcakes I have made in a very long time. I just wish they hadn't been quite so popular with my colleagues....

Sunday 27 March 2011

Forever Nigella 3 - Ciao Italia

I'm cutting this rather fine, because despite all my good intentions to make something Italian from Nigella early in the month, I only made my submission this afternoon. So, as you've no doubt gathered, this month's Forever Nigella is Italian.

There were many Italian recipes to choose from, but fewer baking recipes. I ended up plumping for Nigella's Italian biscuits from How to be a Domestic Goddess. Although there is no picture of them I was drawn to them by the memories I have of the little bakeries in Italy where these are sold, as Nigella says, by weight. I've not had them from Italy, but next time I go, perhaps I will, just to compare!
I will give the recipe here, because although Nigella's in essence I had to modify it to make it work for me.


Italian Biscuits

Ingredients

110g butter, softened

75g caster sugar

1 medium egg

zest of 1/4 lemon

175g plain flour

2g(1/4tsp) baking powder

glace cherries - enough to cut in half to decorate


Method

- Preheat the oven to gas 4/180C. Line a baking tray with parchment.

- Cream the butter and sugar together until very light, almost moussy, with an electric whisk.

- Add the egg, lemon zest and beat to combine.

- Add the flour and baking powder and beat to combine.


Tricky bit - you need the dough to be soft enough to pipe. I tried with 1/2 egg in the mixture and there was no way it was going to pipe through a nozzle. I added the extra 1/2 egg plus probably about 2 tbsp water too to get a consistency I could pipe.


- Pipe swirls and decorate as desired.

- Bake for 18-20 minutes (Nigella says 12, but mine were nowhere near done).

- Allow to cool on a wire rack.

- Makes about 20 - I got 19!


Taste? Well, I probably wouldn't make them again. They're nice, and perfect with a good espresso (note the sad lack of crema on my espresso - this is what comes of not having a proper machine to do it with!). I can quite well imagine countless people across Italy enjoying these with a morning espresso or cappucino. They are slightly crisp round the edge, but deliciously crumbly within, finished with a good, chewy red cherry. They are buttery and not dry, but perhaps not quite as sweet as I would have liked. However, Nigella does say that these aren't as sweet as some biscuits. I'm glad I made them though, because they were great fun to pipe!

As an aside - Nigella says that if you want to make these slightly differently, use vanilla extract in the dough and top with Minstrels. I had run out of cherries, but did have some minstrels so decided to give this idea a go. I think that since How to be a Domestic Goddess was published in 2000, the recipe for minstrel colouring/composition must have changed. My minstrels looked most peculiar when they were cooked. So much so that I picked off the minstrels on the biscuits waiting to be cooked and replaced them with Silver Spoon chocolate sugar beans, seen below. Not mini Smarties, though, because their natural colourings don't survive the oven any more either!


Saturday 26 March 2011

Chocolate cupcakes with chocolate lime buttercream


It's that time again - We Should Cocoa! This month's challenge was set by Chele over at Chocolate Teapot - she announced that the challenge this month was to be lime! Lime isn't a flavour that I'm very familiar with, I am more often to be found zesting lemons and oranges, so this was a good challenge for me.

It seems at the moment that I'm obsessed with buttercream frosting - what can I say? Well, I guess after years of thinking that I really don't like buttercream all that much - too sweet and sickly, I've come to appreciate a swirl on top of a cupcake can be a good, in fact, great thing indeed. I still don't want too much, which is why you can still see cake around the edges - too much is still too much, if you see what I mean...

So, in line with my current obsession I decided to make chocolate cupcakes with chocolate lime buttercream frosting. If you look really carefully you can see tiny little flecks of green in the buttercream - it is there, I promise!

The cupcake recipe is Nigella Lawson's cupcake base from her Night-and-Day Cupcakes, which she has apparently shared with Good Morning America - so I'll point you there for the method, and for cup measures if that's your thing. If not, the measurements are given below:

Night-and-Day Cupcakes
Ingredients
2 scant tbsp cocoa powder
2 tbsp boiling water
75g golden caster sugar
50g dark muscovado sugar
125g self-raising flour
2 large eggs
125g very soft butter
1tsp vanilla extract
1tbsp milk, plus more if necessary to achieve a dropping consistency.

For the buttercream
75g very soft butter
150g icing sugar
zest and juice of 1 (very large, or 2 smaller) lime(s)


These were very popular and disappeared rapidly at work. The lime was subtle perhaps I need to add it to the cake batter as well next time, but these were delicious as all chocolate cupcakes are!

Wednesday 23 March 2011

Maple, Apple and Cranberry Cupcakes with Maple Buttercream Icing

T was lucky enough to visit Canada recently. Canada is on my list of 'all time top places to visit just as soon as I can afford it....'. I'm not sure how near to the top of this list it is, but pretty close. Although I've never visited my mental picture of Canada is an absolutely stunning country - beautiful green, lush scenery, fantastic rocky mountains covered with snow and shimmering in the sunlight, vast plains stretching for miles... as far as the eye can see. I'd love to visit the bustling cities and experience the cultural side of the country as well as the scenic, outdoorsy side (although I'd absolutely love to ski in Canada - I've never skiied before in my life, well, not on real, proper snow - that brief flirtation in Scotland at the turn of the Millenium on melting slush doesn't count...). Where is all this picture painting leading, you wonder? Having established that I've never been to Canada and know little of it, the thing that I do associate most strongly with the country (aside from polar bears and grizzly bears) is maple syrup.

Rather embarrasingly, I'd not tried maple syrup until recently, so I didn't even know if I liked it when I asked T to bring me some back from his jaunt abroad. Don't misunderstand me, I had a strong suspicion that I would like it.... and I'm right! Yum, delicious. The sweet, smoky flavour really appeals to me, which is great because T brought back a rather large container of maple syrup for me, just as requested. He's a star! (N.B. The bottle pictured here came from Canada via Waitrose, rather than via T, but I already had it and thought I'd better use it first!)


To start my adventures with maple syrup I decided to make something with a definite flavour of the syrup, but without using too much of the precious liquid. After flicking through various baking books (oh how I love doing this!) I settled on a recipe for Maple, Pecan and Apple cakes with Maple Frosting. The recipe is one from the Australian Women's Weekly baking books, and can be found here. I followed the recipe as stated apart from substituting 40g dried cranberries for the pecans. I chopped the cranberries finely with scissors, which helped them to stay suspended in the cake mixture. I opted not to make the caramel shards but simply to pipe the buttercream in an elegant swirl.

The recipe worked really well, and although a little on the small side, these were delicious. The apple made the cupcakes moist and the cranberries stayed suspended in the mixture, adding chewiness and texture (although in honesty I think that they would have been better with the crunch of the originally specified pecan nuts - somehow the chewiness of the cranberries wasn't quite right) which was pleasing. I used light muscovado sugar, which in combination with the maple syrup, lent a lovely musky, smoky flavour to the cupcakes and a darker crumb. This was complemented perfectly by the sweet buttercream which had just a hint of smokiness from the maple syrup in it - you could definitely taste it, but it wasn't overwhelming.

I'm looking forward to using maple syrup more in my baking and cooking - have you got any favourite recipes to recommend?


Sunday 20 March 2011

Stunning Sour Cream loaf, or how to change your mind...

Can I change my mind please? Last time I made this loaf and blogged about it, I really wasn't that sold on it. It was a combination of overbaking the crust, and just not being in the right mood for a soft white bread. Well, that mood hit and luckily I remembered this bread, and decided that now was the time to remake and give it a second chance.

I'm so, so glad that I did. This is the softest, most stunningly delicious white bread I've had in a long time. I was just in the mood for white bread, and this satisfied the craving perfectly. I even loved the top crust this time! I can totally understand why everyone was raving about it on Dan's forums when he first published it.
This time I just made half the recipe and baked it in a 1lb loaf tin, making sure that I kept a good eye on it to prevent it overbrowning. One of the sides is a slightly funny indented shape - when the loaf had had most of its baking time (about 10 mins at gas 6 1/2, then 20-25 at gas 6) I turned it out, turned it upside down and balanced it in the tin to brown the base and finish baking. Because the loaf is so soft, the tin made an indent as the loaf finished cooking. Note to self, next time, brown the base of the loaf by putting it on a baking tray!

So soft, so delicious - make this and you will not be disappointed. Can you tell I've definitely changed my mind?!?

Saturday 19 March 2011

Glorious Gooseberry Crumble Cake


This one was inspired by a recipe for rhubarb crumble cake in the March 2011 issue of Delicious magazine. I don't make nearly enough recipes from the magazines that I subscribe to, so it was nice to feel that this is being rectified. Rhubarb is apparently in season at the moment. I know this should be the case and I keep seeing it at the supermarket but I haven't bothered to look where it is coming from - whether it is imported or home grown. Hopefully homegrown, but possibly not.

Supermarket rhubarb quite often seems a little on the soft side, so I went to my local wholefood co-operative in the hope that they would have some nice rhubarb for me. When I couldn't see any I asked about it, and was informed that it's not quite in season yet. Ah. I really thought forced rhubarb would be here now, but obviously not. I'll have to be patient.

In the meantime however, I made this cake using some of the stash of lovely, juicy tart gooseberries in my freezer. I thought gooseberries would be a pretty good substitute for rhubarb - both are tart and need added sugar to make them palatable. Although having said that, the gooseberries I used were a mixture that consisted predominantly of red dessert gooseberries, which are much sweeter than the green varieties.


I can't find the recipe online, and am not going to reproduce the whole thing here, but the crumble part of the recipe was intruiging:

5og unsalted butter
25g light muscovado sugar
40g caster sugar
100g plain flour, sifted
pinch salt


Melt the butter over a low heat, remove then add the sugars, stirring until they seem to have dissolved, making a toffee like sauce. Stir in the flour to make a stiff biscuit-like dough, spread into a small mixing bowl and leave to go cold.

The fruit is tossed in a mixture of flour and sugar, which sadly didn't prevent it dropping to the bottom of my cake. Hey ho!


The sponge part of the cake is a soured cream cake and has a proportion of ground almonds or hazelnuts, which I substituted for more plain flour.

The recipe instructs you to spread the cake mixture into the tin (20cm square) then top with the fruit. You then have to break up the crumble topping into chunks and scatter this over. It was certainly an interesting technique to try!

The recipe states that it makes 9 squares, but I got 16 reasonable coffee time size pieces out of mine. Nine would probably make an excellent pudding with custard.... mmmm, custard.


Sadly this was not my most popular of cakes - I forget that just because I love gooseberries other people tend to be put off by the thought of them. I'm not sure why this is - perhaps people just don't see them often enough? Do you like gooseberries? Do let me know in the comments! But those who were put off missed out! This was a tasty cake - the main body of the cake was nicely sweet and soft, contrasting with the moist pockets of gooseberry (which had predominantly sunk to the bottom of the cake) and the chewy chunks of crumble.

I can't quite decide whether I liked the crumble part or not. It was certainly a different way of making a crumble for a cake, and perhaps my pieces were too big but most of them sank during the baking of the cake, whereas those in the photo that inspired me had mostly remained on the top of the cake. It's annoying when that happens isn't it! The rhubarb also seems to have stayed afloat better than my gooseberries, but it's hard to know whether this is down to me using different fruit, or my cake turning out differently from the one pictured on the cover of the magazine. I think on the whole I wouldn't do the crumble like this again, I already have a crumble the works well for cakes, so I think I'll stick to that in the future.

Wednesday 16 March 2011

Lime star yogurt cakes

I'm rotating out of my current department, having thoroughly enjoyed the past eight or so months that I've spent there. My colleagues are really lovely, and have been an absolute joy to work with - sometimes that's the most important thing about a job I find. I can enjoy my work, but if I don't get on with the people I'm working with then I can still struggle to find the motivation to work hard.

My colleagues have been the recipients of quite a lot of the baking you see on this blog, and it seems that they've enjoyed it greatly! I've had some really lovely comments from various people, and at times, it's really made my day when someone has said something good. Anyway, because I'm rotating out of the department (but not permanently!) they very generously bought me some leaving/appreciation presents before I went. One of the things I was given were some silicon star shaped cupcake cases. I've had mixed success with silicon moulds before (see here for a bit of a disaster) but I had high hopes for these - the star shape was good and open and the silicon light and flexible and luckily they worked really well!
All packaged up and ready to transport into work.

I had yogurt in the fridge to be used, and limes that were threatening to take over the world (I've never seen such huge limes in my life before - they're the size of small lemons, I'm so impressed!) so I decided to make Nigella Lawson's Baby Bundts. I've always passed over these before, simply because I don't have the correct moulds to make them in, but this time I decided to adapt and use my new silicon baking cases. After all, a 2 egg mixture usually makes about 12 cupcakes doesn't it, so it was worth a try!

These have the added advantage of being a muffin mix - no creaming of butter and sugar is required, which makes them quick and simple to get into the oven and henceforth into waiting mouths....

The recipe comes from Nigella Lawson's How to be a Domestic Goddess, surely my most used of her cookery books, and constantly inspiring.

Lime yogurt star cakes
Ingredients
125ml natural yogurt
75g butter, melted
2 eggs
zest of 1 enormous (or 2 more standard) limes
150g plain flour
1/2 tsp bicarbonate of soda
125g caster sugar

Method
- Preheat the oven to 170C/Gas 3. Prepare your tins as necessary. I didn't do anything to mine at all!
- Mix together the yogurt, butter, eggs and lime zest.
- Put the flour, bicarb and sugar into a large bowl.
- Pour wet ingredients onto dry, mix well to combine and spoon into your waiting moulds.
- Bake for 20-25 minutes until lightly golden brown.
- Allow to cool a little, until you can handle them, but not too long - Nigella says if they're too cold they'll stick. Mine turned out fine, happily!

Prepare your topping. Nigella's cakes are iced with a lemon glace icing (icing sugar plus lemon juice) but I decided to go for a more decadent buttercream frosting. 75g butter and about 150g icing sugar gave me enough to decorate the twelve cakes I made.

The cakes were moist and quite lime flavoured - not in-your-face lime-y but a bit more subtle. The vanilla buttercream was a nice complement to the cake, adding richness to a fairly plain base. This recipe isn't the sweetest of cakes, which makes it nice to have a sweeter frosting. I can't say that this will be my go-to recipe for cupcakes though, but it's good to try new recipes and ring the changes a bit. I was really pleased with how these silicon moulds worked though, I guess it's just a bit pot-luck whether your moulds stick or don't. Many thanks to my lovely, generous colleagues for their gifts. It's been a pleasure baking for them!

Monday 14 March 2011

The Mill Loaf - attempt #1 - a miche

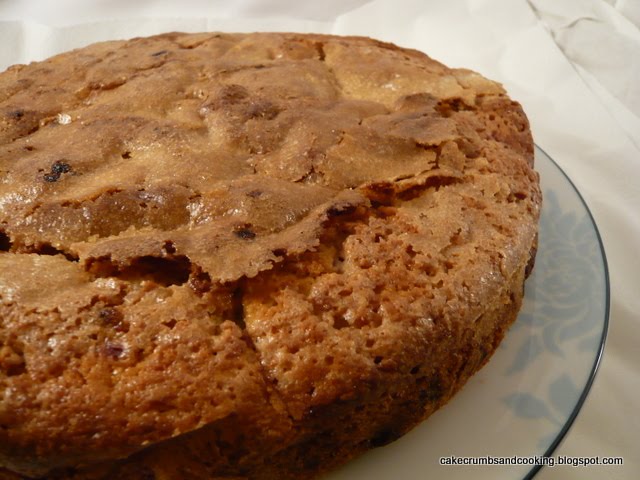
The adventures in sourdough continue. And I appear to have made a flying saucer. I will not be defeated though, I'm sure that all practice is worthwhile and that success in achieving my perfect loaf is just around the corner....
This recipe is Dan Lepard's Mill Loaf, taken from The Handmade Loaf, a book that I love looking through, if only to imagine that I could make bread that looks even halfway as good as the amazing pictures in the book.

I halved the recipe because I don't need such a big loaf, and have given half of it to J anyway. I think the only other things I did differently to the recipe were to keep the loaf in a very warm place rather than at room temperature. Perhaps next time I should just keep it at room temp and not worry if there appears to have been no growth whatsoever. (And for those who are looking for a warm place, I can vouch that my sourdough is pretty active if I put the bowl containing the dough on top of a warm hot-water bottle, incubated inside a 13.5 tog duvet..... mmm, toasty warm!)

I tried to shape the dough as a baton style loaf, as pictured in THML but after about 30 minutes I had a ciabatta slipper shape about an inch high, if that even, that clearly wasn't going to hold it's shape. I then decided to form the dough into a ball, and tried hard to create tension over the surface of the dough to form a tight ball, before placing this upside down (i.e. seam side upwards) in a 2 litre pyrex bowl, lined with a rye-floured tea towel. Sadly I didn't manage to get enough rye flour into the tea towel and when it came to turning out for baking some of the dough had stuck, as you can see in the picture above - the wrinkles are where I had to prise the dough away from the teatowel very gently. Sadly, I clearly hadn't got enough tension into the surface of the ball, it quickly slumped to a saucer. On baking there was a bit of spring, but not enough to rectify my mistakes in handling!

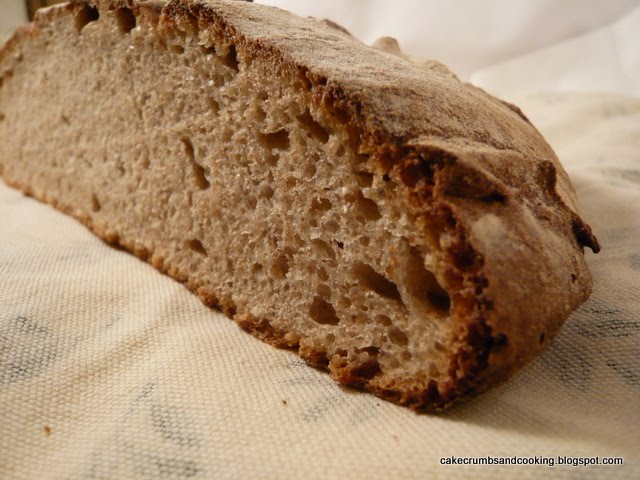
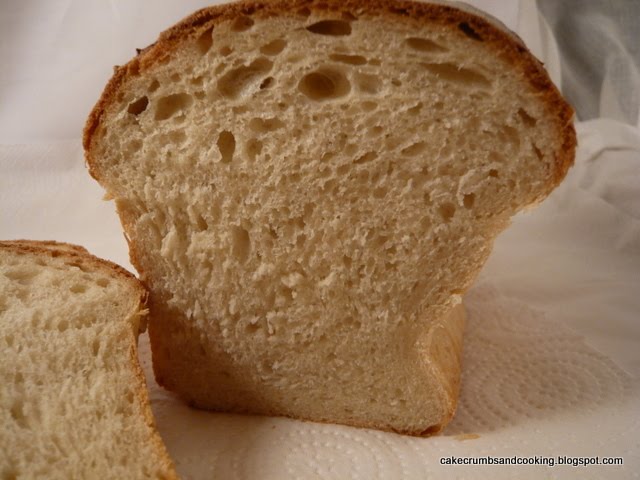
Fortunately this was a rather delicious disaster of a bread. So not really a disaster then! The taste is really lovely - tangy and sour and complex due to the mixture of flours - white, wholemeal and rye, used in the dough. I am perfectly happy to eat my way through this one in the quest for a perfect looking loaf. The texture is what I am coming to expect from my homemade sourdough - chewy and reasonably close, with an excellent crunchy, chewy crust. I guess that sourdough should have bigger holes, but next time, next time.....

Edited to add: I'm reliably informed (by Joanna) that this shape of bread is called a 'miche'. So I've managed to create a sought after shape without even trying ;-) And as I've been eating this loaf, it has really grown on me. The crust is absolutely lovely, and the crumb is lovely and dense and chewy - in a good way! and the flavour is really quite sour and complex. I'll be really sorry when it is all finished. Definitely worth another go.

Sunday 13 March 2011

Chocolate cranberry crunchies

I love these little crunchy biscuits. I know I've made them before, but they're so versatile, quick and easy to make, and so tasty that they deserve revisiting. The recipe is extremely adaptable to the ingredients you have available, this time I chose dried cranberries and some dark chocolate chips.


I only decided to make them on a whim - I was waiting for some bread to be finished rising, and in the meantime decided to throw together a batch of these biscuits, guessing that they'd probably be pretty well received at work. I was right!

The recipe is from Delia Smith's How to Cook Book 1, in the 'Cakes and Biscuits for beginners' chapter. It can also be found online, here. Delia gives suggestions for variations on the specified chocolate and almond - apricot pecan, cherry flaked almond or raisin hazelnut crunchies, but I think that this could be a very frugal recipe - if you use raisins as the dried fruit (I think they're the cheapest dried fruit you can get hold of round here) and then a mid-range chocolate for the chocolate chips. Much as I adore 70% dark, you could substitute it here for your favourite milk or white chocolate. Yum!

Chocolate cranberry crunchies
Ingredients
110g butter
75g demerara sugar
generous tbsp golden syrup
110g self raising flour
110g porridge oats
40g chocolate chips, or chopped chocolate
40g dried cranberries

Method
- Preheat the oven to Gas 3/170C. Line a couple of baking trays with baking parchment.
- Melt together the butter, sugar and syrup over a low heat.
- Stir in the flour and oats.
If you're using chocolate as one of the add ins leave the mixture to cool a bit at this point otherwise your chocolate will melt and become a big mess (still yummy, but not as attractive)
- Stir in your chosen additions (chocolate and cranberries here)
- Form into walnut sized balls, place on the trays and squash flat a bit.
- Bake for 15-18 minutes. Next time I'll bake mine a little less (I think I gave mine 18-20 mins) because the soft middle was nice!
- Allow to cool on the tray for a while - if you try and move them, they'll fall apart and the chocolate will adhere to the tray rather than stay in the biscuit. When a bit cooler, transfer to a wire rack to cool completely.

These disappeared rapidly, and I wrote out the recipe for a colleague the day I took them in. (Another advantage of having an easy recipe - it's easy to remember the ingredients!) The next day she reported back that she'd made them successfully and her family all liked them. She used a darker sugar, being the only available one, but is going to try them again with a lighter sugar. They're much cheaper than the commercial cereal bars available, and let's face it, much tastier!

They're oaty and good, and the dark chocolate and cranberries are a lovely combination. The biscuits are still a little chewy in the middle, but crunchy round the edges. As I said above, next time I'll cook them a little less to get more chew and less crunch. But they're so easy and popular that it won't be a problem if I make them again soon!

Friday 11 March 2011

Soured cream blueberry and raspberry cake

I'm absolutely sure that I'm not the only person with so many things on the 'to make/bake' list that only the top few are ever going to be made, no matter how hard I try to make my way through it. This cake is one that I've glanced at on many an occasion, but always glossed over. The reason is that in the picture, pretty much all of the fruit has sunk to the bottom. Generally speaking, this annoys me because the bottom of the cake is soggy and the rest of the cake boring, with no fruit, so it was easy to push this cake to one side and let others creep up the list.

What made me think again then? The Caked Crusader made and blogged about this cake recently, and it made me think again. I was also liberated by the thought that I didn't have to pile the cake with great swathes of soured cream icing, which I didn't much fancy. And since pretty much everything I've made after seeing it on her blog has been delicious I was inspired to make this cake too. That, and the pressing need to use up some of the fruit mountain that accumulated in my freezer last summer and hasn't been eaten yet. This summer is rapidly approaching (yes, really, it is.... well, at least in terms of how quickly items in my freezer get used up) and I need to use last years fruit to..... ahem, make room for this years fruit..... (yep, my mind works in strange ways). Plus I had soured cream that also had no purpose in my fridge, just begging to be used.

Lets get back to the cake now shall we? The original recipe can be found here, on the BBC Good Food website, but is also in a number of their recipe books I imagine, it's certainly in my 101 Cakes and Bakes book.

I decided to give my cake a crunchy sugar crust, achieved by a liberal hand with the caster sugar just before the cake went into the oven. I used a mixture of blueberries and raspberries, but decided to break the raspberries up a bit as they were quite big ones. This worked well, and the lovely pale pink streaks you can see dotted through the cake are probably raspberry. The original recipe states a 22cm cake tin, which is what I used. The CC used a 20cm tin, so if you want a deeper cake go for that. My cake cooked in the original specified time though, and if it had been deeper I would have had to cook it for a little longer.

I think I like blueberries - I certainly like them when they're flavoursome and blueberry-ish but I think I must have had quite a few bad examples of this fruit where there is just colour and little taste. I do think that cooking the berries helps the flavour and this is probably the case in this cake too. The juicy, moist blueberries were a lovely contrast to the soft, moist, rich crumb of the cake and the crunchy sugar topping added another texture. The sour cream definitely gave this cake an edge and I'll have to try baking with it more often.

Extremely well received, this cake gained compliments from lots of people and I was asked for the recipe too (and I think said person may even make this cake, as they seemed particularly impressed by it). I'd definitely make this cake again, I'm just sorry it's taken me so long to get round to trying it in the first place.

Mmm, crunchy sugar crust...

Saturday 5 March 2011

Sweet potato and ginger cupcakes

I was very taken with Dan Lepard's recently published Hemp and Ginger Cake, but don't have a ready source of hemp flour nearby. And since this is the only recipe I've ever seen that called for hemp flour, I decided that although it is clearly a defining ingredient in this recipe, it was going to have to go (well, what am I going to do with the rest of the bag of hemp flour once I've done these???). Sorry Dan. But thank you for the inspiration and the rest of the recipe, which is a winner!

In the absence of two 18cm (7") round cake tins, I decided to bake these as cupcakes, but guessing that the full amount of batter would give me too much for 12 cupcakes, I decided to make 2/3 of the recipe instead. This worked well, and I got 11 tasty cupcakes out of it.

The original recipe can be found here, on the Guardian website should you wish to see it. I'll give my amounts but the method I followed was Dan's.

Sweet potato and ginger cupcakes
Ingredients
100g dark muscovado sugar
35g treacle
2 eggs
85g sunflower oil
75g crystallised stem ginger (plus extra to decorate)
115g sweet potato, finely grated
150g plain flour
2tsp ground ginger
2tsp baking powder

For the icing
125g icing sugar, plus water to mix

I baked them for 25 minutes at 180C/Gas 4. When cool, mix the icing sugar with enough water to form a stiff icing then spoon onto the cupcakes. Decorate with the extra crystallised stem ginger.
What did I learn? That grating sweet potato finely is hard work and potentially dangerous for the fingers. I'm not sure whether I'm glad that my grater is pretty blunt (given the number of times my fingers slipped with no ill effects!) or sorry that it isn't sharper, so that I could have got the job done more easily!

These are definitely ginger cupcakes for ginger lovers. I chopped the crystallised stem ginger fairly small, but the chunks were very much in evidence, and they were big enough to have to chew on, releasing all that ginger flavour and heat that I love! The cool icing was a really nice contrast to the heat of the ginger and I'm sure that had I been eating these straightaway, the suggested cream cheese cinnamon frosting would have lifted them again. A nice complex flavour to back up the ginger came from the treacle and dark muscovado sugar and these were moist soft cupcakes. Colleagues were very complimentary about these cupcakes, especially the ginger lovers! Thanks for a great recipe Dan, and sorry to have adapted it so heavily!

Wednesday 2 March 2011

Moist muscovado mango cake

After my recent not quite successful use of my bundt tin I was a little doubtful about using it again, but it gives cakes that are such a lovely shape that I just couldn't resist. There isn't very much in the way of seasonal fruit about at the moment (barring rhubarb) but a tropical mango provided the inspiration for this cake and its beautiful yellow, sunny flesh reminded me that sunshine and warmer weather will appear again, at some stage if not soon enough! (The weather here seems to be chillier this week than it was a week ago - we surely can't be regressing to winter.... perish the thought). I had thought about making this a mango and ginger cake, and then thought that light muscovado sugar would give a lovely caramelly flavour to complement the ginger. In the event though, I forgot to add the ginger to the batter, so it's turned out as a rather moist and delicious mango brown sugar cake.

Moist muscovado mango cake
Ingredients
175g butter, softened
175g light muscovado sugar
3 large eggs
195g self raising flour
flesh of 1 large mango, diced (I ended up with 215g mango flesh)
Method
- Preheat the oven to 180C/Gas 4. Grease your bundt tin well, I lined mine with a few strips of parchment paper to help the cooked cake out if it looked stuck, which it didn't.
- Cream together the butter and sugar until really light and fluffy - the colour will change and become much lighter.
- Add the eggs and flour and beat well until combined.
- Fold in the mango flesh until well mixed.
- Spoon into the prepared tin and bake for 40-45 minutes (slight guesstimate) until a cocktail stick/cake tester inserted comes out clean.
- Leave to cool in the tin for a little while, then turn out carefully onto a wire rack to cool.

Serve as is, or with custard for dessert.


Some of the mango chunks sank, but quite a few stayed suspended, very pleasingly. This was such a soft, moist, buttery, caramelly cake with soft chunks of mango adding another dimension. I was particularly pleased with the use of the light muscovado sugar, it really did add another level of flavour to the cake. I would definitely make this again, perhaps adding that ginger I meant to add the first time round, just a tsp to add a back note of ginger rather than a full on ginger cake. I'm certainly not sorry that I didn't put it in this time though, this was gorgeous with a cup of tea and would be perfect served with custard for a lovely warming dessert to ward off our chilly weather.

LinkWithin

Related Posts Plugin for WordPress, Blogger...