Showing posts with label disaster. Show all posts

Friday, 25 May 2012

Chocolate Peanut Butter and Jam Cupcakes - Disaster Averted

Success

Regular readers will know that I have had numerous failures over the time that I have been blogging. I tend to share them because I hope that I have learnt something from my mistake (this is likely to be wishful thinking) and so that other people can learn from my mistakes. Sometimes a failure is just because I don't happen to like the end result, even if it was probably intended to turn out that way, sometimes a failure is down to a dodgy recipe and (quite often) a failure may just be down to my ineptness. It happens.

On the small side... wonder why?!

The majority of the failures are still edible, if not perfect. I had to share this one though because it was very nearly destined for the bin. I often use self raising flour, more often than I use plain flour. Guess what - this recipe is plain flour plus baking powder, or in my case, not plus baking powder. Fail. I realised as I checked the cakes after a while in the oven that the reason they really didn't seem to be rising very much (or at all...) was the fact that they were missing the vital raising agent. Not one of my finer moments. And so they were mentally destined for the bin.

But when they came out they just looked so dinky and more importantly smelled so, so delicious (can you imagine how good a cake containing peanut butter and light muscovado sugar smells while it is baking - it's delightfully nutty and yet caramelly too in a rich, complex way) that I couldn't resist a peek inside one of the cakes. Hmm, not too bad at all. Clearly not a well risen, light cake, but not the disasterous dense soggy mess that I had anticipated.


Plan B. Add jam. Peanut butter and jam (jelly for my American readers) is a combination made in heaven and the jam would also add moisture to the buns - they were a little on the dry side. Then as an added extra, melted chocolate dolloped onto the top would round off this treat very nicely. So I dug out a little cone from each cake, lopped a little of the soft crumb off, added a little raspberry jam and replaced the lid. When all my cakes were doctored with jam I melted chocolate (Cadbury's Dairy Milk here because although I'm a dark chocolate fiend there is something rather lovely about peanut butter and milk chocolate) and smoothed it generously over the top.


Need I really tell you that these went well at work? I'm going to make them again with the added raising agent because I think they'll be stunning with a little more lift. So my lesson here is not to write off a potential disaster until I've had a good inspection and a sneaky nibble too.

In fact, they were so good that I have already made them again with the added raising agent and as anticipated they were even better than before. The flavour is gently peanut buttery complemented by the jam and finished off with sweet chocolate - utterly delicious. Yum, even the memory of these is making me crave peanut butter!


Now the challenge for We Should Cocoa (hosted by Choclette) this month is almonds and is being guest hosted by Laura (@laura_howtocook) of How To Cook Good Food. When she announced the theme as almonds I was obviously disappointed, being allergic to them. However, I quickly tweeted and asked if I could make something with a different nut, and being rather lovely she said yes, this wouldn't be a problem. So hopefully these peanut butter cupcakes will be an honorary almond entry from someone who really wanted to enter, but didn't want to make herself ill..... And you could just as easily make them with almond butter too :-)

As the recipe has come straight from one of my books (a baking book from Marks and Spencer) I don't feel able to share the recipe here, but this combination is fabulous - I'm sure a search for a cupcake recipe with smooth peanut butter and light muscovado sugar will yield good results - or feel free to email me/leave a comment and I'll share that way!

Saturday, 17 March 2012

Caramel Mud Cakes - a Random Fail


Each month I intend to enter Dom's random recipe challenge. Each month he announces the theme and I scurry away to see what recipe I'll get. Ocassionally I actually make and post the proscribed recipe. More often than not I look at it and try to think how I'll persuade myself to eat X, Y or Z ingredient, or ponder how to cut down a savoury recipe intended for 4, 6 or more to just the required one portion. And then I give up and the intended random recipe remains in my cookery books and never makes it to the plate or to this blog.


Where is this leading I hear you asking... Well, this month Dom has set his random recipe challenge as being cookery book number 17 on the shelf. Not a problem, cookery book duly plucked off the shelf. Quite excited, as the chosen book is simply 'Chocolate'. A small book purchased from Marks and Spencer, and containing many delicious looking recipes for chocolate containing goodies - yum, what would I get?


The random page opened showed caramel choc-chip mud cakes. Oh yum indeed. So I set to making them.

Caramel Choc-Chip Mud Cakes
Ingredients
90g white eating chocolate, chopped
90g unsalted butter, chopped
110g light muscovado sugar
2 tbsp golden syrup
125ml milk
110g plain flour
35g self raising flour
1 egg
40g milk chocolate, chopped
milk chocolate, to decorate (I used about 25g)

Method
- Preheat oven to 160C/Gas 3. Grease a nine hole (125ml) friand or muffin tray (I used a similar sized tin meant for making eclairs). Line bases with baking parchment (I didn't!).
- Stir chocolate, butter, rown sugar, syrup and milk in medium saucepan, over low heat, until smooth. Cool 15 minutes.
- Whisk in sifted flours and egg. Stir in chopped chocolate. Divide between holes in prepared tin.
- Bake for about 25 minutes, then allow to cool a little in the tin before turning out onto a wire rack to cool.
- Melt the chocolate and pipe onto the cakes to decorate.

I had such high hopes for these - they smelled utterly delicious while they were baking. Afterwards they did sink slightly in the tins, which should have warned me.


When I cut into them, the texture was heavy and dense in the middle. I guess I should have expected this as there was only 35g self raising flour in the batter and lots of weighty ingredients like golden syrup. I think they were cooked through, but wasn't willing to inflict them on my testers - I have a reputation to uphold here ;-) so I sadly have no taste report for you.

If you don't mind heavy, dense, chewy centres, this may be the cake for you. But not for me. I think the recipes in the book are from the Australian Women's Weekly. Browsing their website for this recipe I came across a number of caramel mud cakes, (there are some here) some of which showed the texture I could see in mine (here) but some seemed to have a lighter texture (here). I don't actually know what mud cake texture should be like, so if anyone can enlighten me that would be great. I might make them again because they just smelled so delicious but instead of using 110g plain flour and 35g self raising, I might use 110g self raising and 35g plain.

So there we have my random fail for Dom's Random Recipe challenge.

Saturday, 28 January 2012

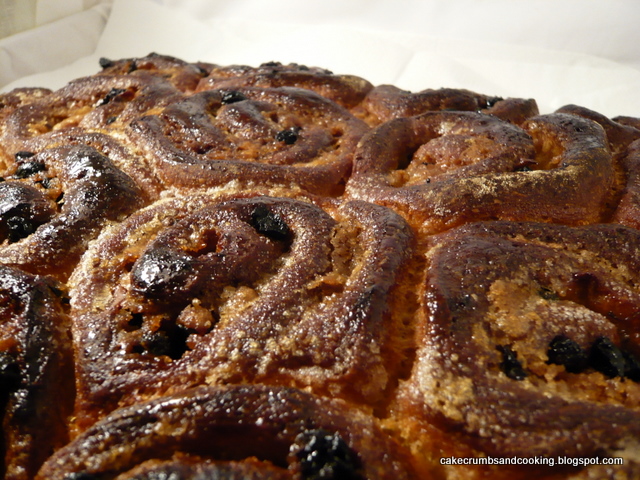
Chelsea Buns - Fail


Edited 30/01/12 in response to an anonymous comment. Please see end of post.
I guess there isn't really much to say about these, but I'm going to anyway. I wanted to make a sweet yeasted dough to enter into the Teatime Treats challenge that is run each month by either Kate of What Kate Baked or Karen of Lavender and Lovage. This month's theme was sweet doughs or pastries and I fancied trying my hand at Chelsea Buns. I have in fact made Chelsea buns before to a different recipe, but haven't yet blogged them. In the interests of this blog being a record of the recipes I attempt and how they turn out (good or bad, but happily rather more of the former than the latter) I am including this recipe.

It is from a trusted source, and so I can only imagine that it was a combination of errors on my part and perhaps the recipe that caused the result to be so disappointing. The recipe can be found here, and I think is also available in a published recipe book.

I did follow the recipe, but not to the letter. My dough had rather more time to rise at all stages as I was distracted by various other things and at the final stage the oven was occupied by something else when I needed to bake these. However, I reduced the temperature given in the recipe slightly, and baked for less than the initial time stated. When I tentatively opened the oven door (my oven has a solid, not a glass door, which is a pain in these cases) the buns were already over-browned.

I wish I could say that these were only cosmetic problems. When the buns were baked it was too late to try one, so they had to be left until the next day. By the time I started to split them it was immediately apparent that they were almost stale, and once split into separate buns they staled very, very quickly indeed. Perhaps this is a characteristic of this recipe, but if so, it is not a desirable one to me. I have to confess that I was so disappointed with the appearance of them and the rate at which they staled that I didn't even bother to eat one. So I suppose they may taste fantastic, but this is not a recipe I shall ever repeat.

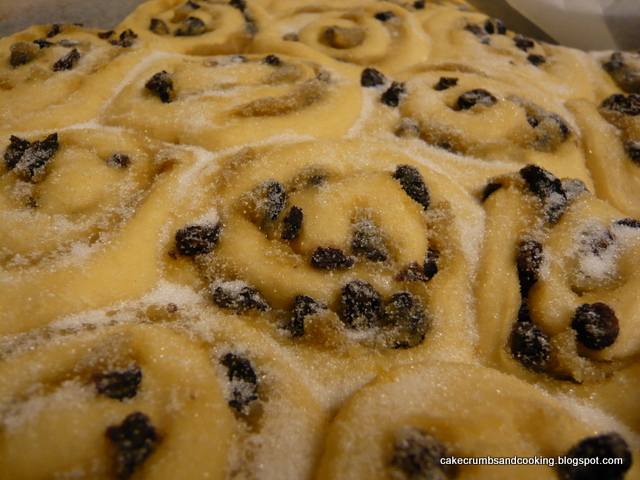
Just typing this up is making me feel sad and disappointed, disillusioned with baking. They looked so promising before baking. I hate it when things go wrong at the last stage. So much time and effort wasted. But I have other, more successful recipes to share soon, and will move on from this disaster. I would love to know whether simply leaving the dough to proove for too long caused all my problems... any thoughts?

Edited 30/01/12 in response to an anonymous comment.
Anonymous said...
You imply that you didn't in fact follow the recipe, that in fact you left the dough for too long at every stage. Given that it's a yeasted dough, this would mean that the dough was exhausted by the time that it got into the oven, and so the failure, I'm afraid, is yours... the buns were not stale, you'd simply let the dough "die" before it got to the oven. Always unfair when someone does this, then tries to blame the recipe.

I'm glad that you felt able to comment on my blog, I like reading all of the comments I receive and try to respond to them all. I felt that this comment warranted a fuller reply than I could give in the comments section.

Firstly, I do not imply that I have not followed the recipe - I am clear that the dough had too long at all stages, an outright statement is not an implication. Secondly, I understand that over-proofed dough would have no oven spring, this was not a complaint I made of the recipe. I was unaware that overproofed sweet dough, or any dough for that matter, goes stale quickly. I have not experimented and have no evidence to suggest this is either true or false. Having read other people's comments it does in fact seem to be a characteristic of these sweeter doughs to stale more quickly. Finally, I have not blamed the recipe in the slightest. I have been careful to present a balanced view, that it is likely to be a combination of factors that have led to my failure with this recipe. I think you have misunderstood me. Just because I have failed with this recipe does not mean that it is the recipe's fault, and I have accepted that as the baker, I am partly to blame. However, my blog is a record of the things I have baked, successful and not - I like to remember what I don't want to repeat and it makes a change from always successful. My gripe with this recipe is that the temperatures and times given are too hot and too long for a sweet dough baked in my oven. Perhaps a misjudgement on my part to not reduce the temperature further, but if I had I would have strayed even further from the recipe - it seems I cannot win.

I would be happy to correspond with my anonymous commenter if they care to get in touch - my email details are in the side bar.

And a final thought - wouldn't life be boring if everything were to be perfect the first time round!

Tuesday, 22 February 2011

Lemon and Turkish Delight Disaster Cake

I've had rose flavours on the brain recently. That's what happens when I dig in cupboards and unearth different bottles - they get left out on the side and every time I see them I wonder how else I can use them. Such was the way with the rosewater bottle. However, it didn't actually make it into this cake, rather provided the inspiration. The other factors were a surfeit of eggs that I needed to use, plus a box of (whisper it, Christmas) Turkish delight that I stumbled across when doing a little light tidying. Well, it wasn't even tidying really, I was just moving things around. Tidying implies that the place looks, well, tidier after you've finished. Mine doesn't - things have just moved round a bit. Anyway, back to the Turkish delight. The box I found was rose and lemon flavoured (they usually are round here...) and having made rose flavoured things recently, I opted to enhance the lemon flavours this time round. Plus I had lemons in the fridge already!


This was a midweek bake, so I chose my bundt tin because I always think that bundt tins give cakes that look good whether you decorate them beautifully or not, and I knew I wouldn't have much time to decorate my cake. I think this was a mistake given the advantage of 20/20 hindsight....


I decided to chop my Turkish delight into little pieces (each of the original pieces was snipped into 8 and dusted with more icing sugar to prevent it all clumping together in the cake) and mix it through the cake batter. I was slightly concerned (rightly so...) that the heavy Turkish delight pieces would sink a little, so spread some of the batter into the greased tin before mixing the Turkish delight through the rest of the batter and spreading that on. Hmm, well that idea failed spectacularly. All of the TD sank like a bomb to the bottom of the tin and stuck there. Like superglue, or perhaps those annoying kind of labels that just won't come off your book/plate/shoe or something else very sticky. Once cooked and cooled the cake eventually (with much levering and prising out) came out of the tin with a crater like top, devoid of any TD. However, I scraped all the Turkish delight off the tin and pressed it back on though - I will be triumphant!

I won't give the exact method for this because I can't imagine that I want to do this again, but the cake was good so I'm going to note down the amounts I used, for future reference.


Lemon Turkish Disaster Cake
Ingredients
175g softened butter
200g caster sugar
200g self raising flour
3 large eggs
grated zest 1 unwaxed/organic lemon
175g Turkish delight, chopped small


Method
- Preheat oven to gas 4/180C. Grease your bundt tin.
- Cream the butter and sugar until light and fluffy.
- Add the eggs, flour and lemon zest and beat again until well combined.
- Fold in the TD and spoon into the baking tin. Bake for 35-40 minutes until risen and golden.
- Remove and allow to cool until you can handle the tin.
- Remove from tin. This is where it all goes wrong, and where this method will stop.....


You can see the damage in the photo above - the cake really had well and truly stuck in some places and it was heartrending to see it ripped when it finally dropped out of the tin. However, I was sure it would taste good and not wanting to waste an entire cake I took it into work anyway. Was the taste a disaster? Nope! Actually quite a successful cake. The cake was moist, light and lemony and the turkish delight on the top provided a nice contrasting chewy texture. I think that had I not admitted to people that this had almost been a complete disaster they wouldn't have known or said anything! Needless to say, it was all eaten.

Friday, 8 October 2010

Blackberry and pear cake - disaster

This was theoretically a really good idea, and I might get round to repeating the combination of flavours, but just to show that sometimes the smallest ingredient can be the most important here we have my latest complete disaster. Next time I'll follow the recipe including the... baking powder. D'oh!!!
Needless to say I didn't taste it!

Friday, 27 August 2010

A warning....

A revisit of this semolina bread (I enjoyed it greatly and wanted to make it again!) with a couple of little changes. I still shaped it as a loaf (as you can see) but tweaked the recipe a little. I used about 10g olive oil instead of the butter, and missed the yogurt out as I didn't want to open a tub specially. I also reduced the honey to about 1/3 tsp and used a milder flavoured honey than last time, when the flavour was a little too prominent. These changes worked well, and the bread was still soft and delicious. A very forgiving loaf.

Sadly not forgiving of some of my more stupid mistakes.... I usually use silicon baking parchment for lining tins and trays because nothing I've ever made has stuck to it. I ran out unexpectedly midway through a day of baking and couldn't get to the shop for more before this bread needed to be baked. So I used greaseproof paper. Don't follow my lead. I was very upset to find that it stuck badly and I lost some of the delicious bottom crust - curse the stupid greaseproof paper, and the stupid baker who decided to use it.....

Very upset to see my lovely bread with nasty paper stuck to it!!!

Saturday, 31 January 2009

Chocolate Cupcakes with Chocolate Buttercream icing

Mmmm, chocolate buttercream. Just imagine your teeth sinking through the smooth richness of the buttercream before coming into contact with the soft, moist and yielding cake. Well, why aren't you in the kitchen already then? Oh, right, you need the recipe first!

I have a small confession to make. This recipe was a rescue effort (a successful one I hasten to add) due to a lack of care and attention on my part. I had halved the recipe from a printed one I was following, but inadvertently forgot to halve the melted butter component, realising as I poured the butter into the mixture and looked at a pool of melted butter forming that something had gone wrong. So, making the best of a bad job, I added a little more flour to soak up the excess butter and the rescue was complete. No-one other than me (and, well, you now!) was any the wiser as they still tasted great. In for a penny, in for a pound as they say, and having added extra butter to the cake mix I decided to go for full-on buttercream topping for these beauties.

Chocolate cupcakes with chocolate buttercream icing
Ingredients
2 large eggs
85g caster sugar
75g self raising flour
18g cocoa powder
90g butter, melted
1/2 tbsp hot water

For the buttercream icing
75g butter
150g icing sugar, sifted
50g dark chocolate, melted

Method
- Preheat oven to 180C/Gas 4. Put 9 muffin cases into a muffin tin. Alternatively grease a 9 hole friand pan.
- Beat eggs in a bowl with an electric mixer for about 5 minutes until thick and creamy. Beat in the sugar a tbsp at a time until dissolved.
- Fold in the sifted flour and cocoa, the butter and the hot water.
- Divide between the cases. They won't be very full but it doesn't matter.
- Bake for 12-15 minutes until the cakes spring back when touched lightly. Remove from tin/pan to a wire rack to cool.

For the buttercream icing, cream the butter and icing sugar together with an electric whisk until very light and fluffy. Add the melted chocolate and continue to beat until the mixture is very pale. Transfer to a piping bag with the nozzle of your choice on it, and pipe to your heart's content.
I used 85% cocoa chocolate to try and make the icing a little less sickly sweet. I'm sure 70% would also work well though.

These have a lighter, more open texture than the recipe without the extra butter and flour, presumably due to the presence of extra raising agent in the flour.

Naked cupcakes before receiving their complement of rich buttercream. They have risen a little more than the original recipe ones, but not so much as to make icing them difficult.

Needless to say, these disappeared in a trice at work - diet be gone!!

Tuesday, 4 November 2008

Buttermilk raisin cake

Well, I have to admit that I'm slightly lost for words about this cake. Not really so great given that I'm trying to blog about it! I first saw the recipe and pictures a couple of weeks ago on the Caked Crusader's blog, where she describes it as one of her all time favourite cakes. I suppose that must be partly what drew me to it, because raisins are one of those things I can take or leave and they seem to be the whole point of this cake, plus how can someone campaigning for the cause of cake be wrong?!? And I was intrigued by the use of buttermilk - I've always wondered what it did to the texture and taste of a cake. So the decision was made, for better or worse, to make the cake.
The circumstances weren't ideal - I wanted it in and out of the oven before I attempted to roast my very first whole chicken (about which I was slightly nervous - baking I can do, cooking not so much!!) so I was on a pretty tight timescale. But I forged ahead regardless.
This is a big cake. Really big. I suppose I should have guessed that it might not cook in the specified time, and in fact, mine took 1hr 45 minutes in total, where it was supposed to take 1hr to 1hr15. When I tested earlier there was definitely raw batter on the skewer. Repeatedly. So I left it in until it was done. Unfortunately this means that the crust is thicker than I would have liked and is slightly burnt. I was also worried that the cake would be really dry, having been in the oven for that long.(At this point I should admit to being a bit of a control freak and perfectionist - I hate it when things don't go to plan and at one point I considered just giving up and chucking the whole lot in the bin. Fortunately I came to my senses and realised just how much I'd spent on ingredients for the cake!)
On the plus side, it was easy to put together. I followed the CC's recipe exactly (apart from running out of raisins and having to put in 260g rather than 320g) so I won't reproduce the recipe here, you can hop over to the CC's blog (you should do that anyway because it's a fab blog!).
So, after having complained for the whole post about it, was it worth it in the end??? Well, surprisingly, the answer is a quite resounding YES!!!! I took some for J to try and we both agreed that it's a really delicious cake. My fears about it being dry were unfounded (yes, the very edge is a little dry and burnt, but can easily be cut off) because it's moist and tasty, and the raisins are really moist and sweet. I can't explain it very well, but the cake had a flavour that neither of us could identify and in the end put down to the buttermilk. But it was a gorgeous flavour! The only thing I can do is recommend you try this cake for yourself. I'd make it again, but perhaps use a 9" square tin rather than an 8" tin or try adjusting the recipe to make a smaller quantity.
You'll have to forgive the photographs of this one, I was tired and it was dark and I was cross that the recipe had taken so long that I just wanted to get it cut up and into the freezer. If I get a chance, I'll try and get a better picture to post. However, there are 14 more pieces still in there as I post this, so plenty to be enjoyed yet.... I think it could be good with custard as a pudding. Mind you, I think most things are good with custard!

LinkWithin

Related Posts Plugin for WordPress, Blogger...