Showing posts with label waitrose. Show all posts

Sunday, 28 April 2013

Nigella's Buttermilk Birthday Cake - A Sunrise


I've seen quite a few brightly coloured cakes around recently, on the Pink Whisk and then BBC Good Food published their recipe for a Rainbow Cake too. Dan Lepard has been in on the act with his Rainbow Cupcakes too. I decided that I didn't want to go the whole hog and do a six or seven layered cake and decided instead to stick to three layers. I decided to go for red, orange and yellow - a sunrise. I know this isn't the best set of photos ever but I really had to mess around with the white balance to even get this far!

I wanted a reliable cake recipe and I've made Nigella's buttermilk birthday cake recipe quite a few times (the original recipe has three eggs and I can see from the scribbles in my book that I've scaled it to two and four egg versions) and it's a good recipe for adapting to different tin sizes.

Batter divided with food colouring added

I made the recipe just as stated (there's a copy from the Guardian as a PDF here, which I assume is reproduced with permission so I will link to it) and then divided the mixture into three (I handily remembered to weigh my mixing bowl before adding the ingredients so it was easy to divide the mixture exactly). I added the food colouring and mixed well before dividing between tins and baking for around 20-25 minutes (although I can't remember exactly how long). Although I have far too many 8"(20cm) round tins, I have two sets of two which are the same within the set but annoyingly don't match each other. So I baked two whilst one set of batter waited and then baked the final cake.

The cakes were quite thin, but this was perfect because three full thickness cakes wouldn't have given a very good cake: buttercream ratio. 


After letting them cool I made a white chocolate buttercream, sandwiched the cakes together with some of it and then spread the rest over the top and sides of the cake so as to hide the interior colour. A scattering of pearlescent hundreds and thousands (very pretty, stocked by Waitrose) finished the cake in style.

Pearlescent hundreds and thousands

All round very successful - it was very well received at work and this is a great cake mixture to work with. I was pleased with how it turned out but next time will be braver with the food colouring because my colours were a little on the subtle side.


I'm entering this into the Forever Nigella challenge, founded by Maison Cupcake. The theme this month is 'Colourful' and is being hosted by Elizabeth of A Girl in her Kitchen. I think this fulfils the brief!

Wednesday, 20 March 2013

Not Quite Edd Kimber's Cinnamon Buns


Way, way back in October there was a feature in the Waitrose Kitchen magazine about baking books. Presumably to round up the books that were released last autumn in time for the Christmas present buying. There are quite a number of books featured, one of which is Edd Kimber's second book, 'Say it with Cake'. The recipe given from this book is his Cinnamon Buns.

I had a desire to make something different (and a little indulgent) for breakfasts at the time and decided to give the recipe a go. I'm not sure why it's taken me so long to get round to writing these up, because they're actually very good! I've had a quick look around the net and can't find an authorised reproduction of the recipe, but it is a reasonably standard enriched milk dough, with a little butter and a little sugar added along with an egg. 

After proofing

The recipe was for 16 buns and I can see from my photos that I only made nine, so I'm assuming I halved the recipe. And since the recipe for the dough contained an egg, I'm certain I missed this out. The filling in the recipe consists of butter, light brown soft sugar, currants and cinnamon, 3 tablespoons of it! I have a bit of an on-off relationship with cinnamon and am usually more off it than on. The thought of three tablespooons (or even one and a half for my halved recipe) was rather a lot and I decided to switch for mixed spice, which I am really very fond of. It does contain cinnamon, but tempered with the flavours of other spices too, which just makes it much more appealing to my tastebuds. I also decided to leave out the currants (I never claimed to be following the recipe exactly!).


There is a topping of cream cheese, icing sugar and milk given to drizzle across the buns, but because I was going to be freezing these I decided that I would use a simple glace water icing instead, which worked just as well. 

Soft and super sticky

These were gorgeous - the enriched dough was soft and sweet and I was really taken with these buns. I was glad I used mixed spice for the filling and missed out the currants (they're another thing I can take or leave) and the incredibly sticky filling and sticky icing on the top made these a very delicious breakfast indeed. An excellent recipe and one I should return to.

Sunday, 10 March 2013

Golden Syrup Banana Cake


I frequently pick up the recipe cards that are available in the supermarkets. I think I must have picked up over a hundred over the years, and due to my squirrelling tendencies they don't tend to get culled very often. In my defence, however, occasionally, I will recall a recipe card with something I thought looked particularly good, but for whatever reason didn't get made at the time of picking up the card. That's the case with this recipe.

It was on a card from Waitrose (who do tend to have particularly interesting looking recipes - to my mind at least) and was for 'Sticky honey, almond and banana cake'. There was the immediate problem of having to substitute for the almonds - both ground in the cake and flaked on the top, but that was easily solved by substituting plain flour for the almonds and leaving off the topping.


You can find the original recipe here on the Waitrose website, and apparently I've been meaning to make it for a year now, having first seen the recipe in March last year. I also thought that since I was already adapting the recipe I'd make it cheaper by using golden syrup instead of honey (and for bonus points my golden syrup was on offer when I bought it!). I decided to use an 8" square tin (20cm square), which is about 15% smaller than the stated tin size, so I was prepared to give it a little longer in the oven than the stated 30-45 minutes.

So here is my adapted version...

Golden Syrup Banana Cake
Ingredients
125g self raising flour
50g plain flour
100g butter
100g light muscovado sugar (or light brown soft sugar)
100g golden syrup
1 very ripe banana, mashed
2 medium eggs, beaten

Method
- Preheat the oven to 180C/Gas 4. Grease and line an 8"/20cm square tin with parchment paper.
- Melt the butter, sugar and syrup. Remove from the heat and allow to cool slightly (I didn't leave mine very long at all).
- Mix together the flours in a bowl and add the melted mixture followed by the mashed banana and beaten eggs.
- Beat well (I did this by hand) to give a smooth mixture (well, smooth aside from the lumps of banana...) and pour into the prepared tin.
- Bake for around 35-40 minutes until risen and golden and a cake tester comes out clean.
- Allow to cool on a wire rack.

I served mine cut into 12 fingers.


This is a really useful recipe for when you need to use up just one banana that is well past it's eating best (in my opinion at least). Although it doesn't look anything special the cake was good - fairly moist (although it doesn't really look it) and with a subtle banana flavour. I didn't really get much flavour from the syrup, I'm sure the combination of honey and almond would have been much more flavoursome, but I did enjoy the cake as it was. I'll make it again, but now I know that the syrup flavour isn't particularly strong I think I'll add some spice next time - perhaps mixed spice, nutmeg or ground cardamom.

A very quick and easy bake, and I bet children would love to help with this one!


I'm going to send this to Credit Crunch Munch. It helpfully uses up that last overripe banana in the fruit bowl attracting fruit flies, uses syrup instead of expensive honey and is quick and easy to make. Credit Crunch Munch is hosted by Helen of Fuss Free Flavours and Camilla of Fab Food for All. The host this month is Helen.

I'd enter it into Dom's Random recipes too as the theme this month is cuttings, memories and clippings and I guess recipe cards would count. But I be lying if I said that the selection was random - I needed to use up the banana!

Tuesday, 20 November 2012

White Chocolate Chocolate Cookies


These are the result of me picking up the Waitrose recipe cards instore on a recent shopping trip. Yes, I could do my shopping online, but then I'd miss out on this kind of thing. Some might say this would be good for both my bank balance and waistline and I'd be inclined to agree on both counts, but then my life is more fun with cookies in it than without, so I'm prepared to make sacrifices...

This recipe was originally for Chocolate and Macadamia Cookies and is in association with Green and Black's. You can find the original recipe here, but as I can't have macadamia nuts I have adapted it slightly by adding more chocolate.


White Chocolate Chocolate Cookies
Ingredients
115g butter, softened
60g icing sugar
100g plain flour
20g Green and Black's Cocoa powder
1/2tsp vanilla extract
100g white chocolate, chopped (I didn't use G&B here)

Method
- Preheat the oven to 180C/Gas 4.
- Cream the butter and sugar together until pale. Add the flour and cocoa powder to the butter mixture and beat in with the vanilla extract.
- Stir in the chopped white chocolate.
- Roll the mixture into 16 walnut sized balls and place on two parchment lined baking sheets.
- Bake for about 12 minutes (the recipe specifies 15 but mine were overdone by then) but check at 10.
- Allow to cool on a wire rack, or devour whilst still warm and full of melty chocolate.

Tips: 
* Definitely don't leave them for 15 minutes. My first tray were definitely overdone and bordering on bitter and burnt which is such a pity (I ate them anyway...). The second batch, left in for less time, and with the door opened a couple of times to check on progress were much better.
* Green and Black's Cocoa is the way to go here - it's so much darker in colour than (for example) Cadbury's that although I have never actually dipped my finger into both of them to do a taste test comparison, I'm sure that the G&B has a better depth of flavour for this kind of recipe.


Slightly crumbly round the edges and softer and chewier in the middle I did enjoy these. They aren't a 'Millie's Cookie'/American Cookie style with a very chewy centre (I guess because this recipe is eggless) but they are delicious all the same and very quick and easy to make, bake and importantly, eat!

If you visit the Waitrose website you can find more than 5000 recipes - I think I am required to say this in order to be able to publish their recipe, but actually it's entirely not a problem because I really would recommend their website anyway - full of delicious recipes.

Saturday, 3 November 2012

Apple and Pear Parkin


It seems appropriately cold to be thinking about warming autumnal flavours and for me, that's ginger, mixed spice and treacle. I particularly love the traditional northern cake known as Parkin. I have made a couple of other versions in previous years - click to find my traditional parkin recipe and a recipe I used from Dan Lepard. Both of these are delicious, but as ever, tastes change and my fickle taste buds wanted something new and different. This year I was browsing a little magazine which I think came as part of Waitrose Kitchen - Waitrose's own cookery magazine. This was a little booklet focusing on autumn flavours and contained a recipe for a fruity parkin. I had never really thought to add fruit to a parkin before but then thought 'why not!'.


The recipe didn't quite appeal in the form it was in, so this is more of an 'inspired by' rather than an adaptation - I've changed quite a few bits of it! I can't see it on their website at the moment, but I have changed it quite considerably so give my version below.


Apple and Pear Parkin
Ingredients
65g butter
165g self raising flour
1 heaped tsp ground ginger
scant tsp bicarbonate of soda
65g medium oatmeal
1 small conference pear
1 small apple (I used an Egremont Russet)
100g black treacle
100g golden syrup
3 pieces stem ginger in syrup, chopped
75ml milk

Method
- Preheat the oven to 170C/Gas 3. Grease and line an 8"/20cm square tin.
- Mix together the flour, ginger, oatmeal and bicarbonate of soda in a bowl.
- Heat the butter, treacle, golden syrup and chopped ginger together in a pan until the butter has melted but the mixture isn't boiling.
- Remove from the heat and stir in the milk.
- Add to the flour mixture. I added a little at a time - this allows you to stir it in gradually and prevents lumps and pockets of flour forming.
- Pour into the prepared tin. Slice the apple and pear finely and lay on the top of the mixture, scattering in a random-ish fashion (I placed mine to get a good mixture of the different fruits across the top).
- Bake for about 45 minutes until the centre feels firm to the touch (I can't remember quite how long mine took).
- Serve warm as a dessert with icecream or creme fraiche or cold as a cake.


Normally, parkin benefits from having a few days for the treacle and golden syrup to draw in moisture and make the top sticky and moist - this is certainly the case for my traditional parkin recipe - it just carries on getting better and better. Here, however, the fruit on the top of the parkin means that it needs to be eaten the same day or the next day. You'll be relieved to find (as was I) that the top of the parkin is already delectably sticky and moist after only a day of waiting. In fact, I would venture to say that it is stickier and moister than either of my previous parkins. Just delicious. And this means that if you want to bake a quick batch of this for Bonfire Night this year, there's still ample time to do so!


This is fabulous - sticky, moist and full of gingery flavour. I would possibly add more ground ginger next time, and more chopped ginger, because really, can there ever be such a thing as too-much-ginger. I don't think so! I loved the ginger in the cake and the sticky top but to be honest the fruit didn't really add anything other than aesthetics (which is important, but not as important as flavour) and a good, chewy textural contrast but I think I'd leave them off next time so that the keeping qualities are improved (and I can keep more of it for myself rather than giving it away - selfish ulterior motive ;-)). Definitely a make again.


Since both apples and pears are in season right now and this makes good use of them, and as the season in a broader sense is calling to me for ginger and spice, I am submitting these to Ren at Fabulicious Food for her Simple and in Season linky, hosted this monthhttp://www.renbehan.com/2012/11/simple-and-in-season-november.html by Ren herself.


I am also submitting them to Bookmarked Recipes hosted by Jac of Tinned Tomatoes, as I first saw these when I was in the depths of revision and even though I knew I didn't have time to make them straightaway I knew without a doubt that they would be on my plate this season and recommend you add them to yours too.


Sunday, 19 August 2012

Yorkshire Teabread


I have tried quite a number of teabreads over the years and I am always game for trying a new and different one. Teabread is a useful cake to have around - it keeps well and makes a good snack, being not too sweet. I always think it's especially good spread with a good layer of butter! This recipe came from one of the Waitrose recipe cards which caught my eye as I was doing some shopping recently. I like the fact that it even states on the recipe card that it was created to celebrate Yorkshire Day on the 1st August. I may be a little late, but better late than never.


I can't find the recipe on the Waitrose website at the moment, but will keep checking to see if it's there. The recipes I usually use involve making strong tea (Yorkshire tea would be perfect here!) and soaking the dried fruit overnight. This recipe specifies making the tea and then leaving the fruit for at least an hour. I actually left mine about six hours, because I was doing other things, so it had plenty of time to plump up. I increased the spice in the recipe slightly - 1/4tsp isn't much so my 1/4tsp was rather generous! I also couldn't locate my glace cherries (for a good reason... being that most of my kitchen was relocated to my living room and things were piled on top of each other!) so used dried cranberries instead.


Quite a small loaf - just a 1lb (450g) tin and quite shallow, but tasty nevertheless. The teabread curdled quite badly as I was making it and I really wondered how on earth it would turn out to be edible, but I needn't have worried. This was really delicious. There's a lot less fruit in it than the teabreads I usually make, but this isn't necessarily a bad thing, it's just different. The most noticeable and surprising thing about this cake was how soft it was - really, really tender and delicate. I guess the curdling didn't really matter at all then! Apologies for the particularly dark photographs - as part of moving everything in my kitchen out, my usual lightbox was out of action hence the more-than-usually rubbish photos!


I am entering this teabread into the Best of British challenge, hosted by Karen at Lavender and Lovage, and organised by Karen and Fiona of London Unattached. Many thanks to them for organising this challenge, which is being sponsored by New World Appliances for the first six months.


And as it is T for Teabread, I am also entering it into Alphabakes. This month the host is Ros of The More than Occasional Baker, and her co-host is Caroline of Caroline Makes.

Sunday, 5 August 2012

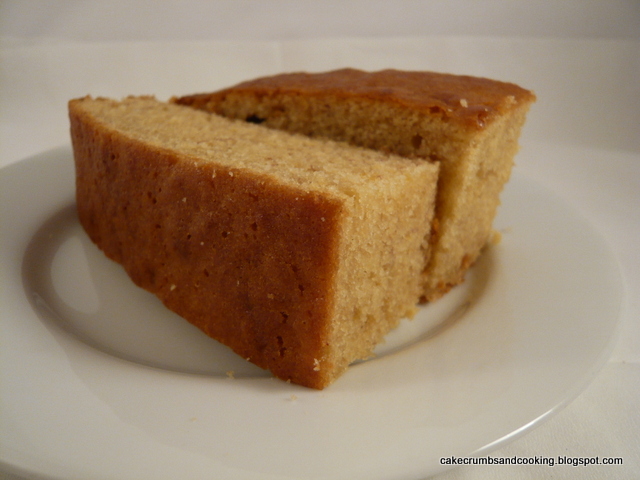
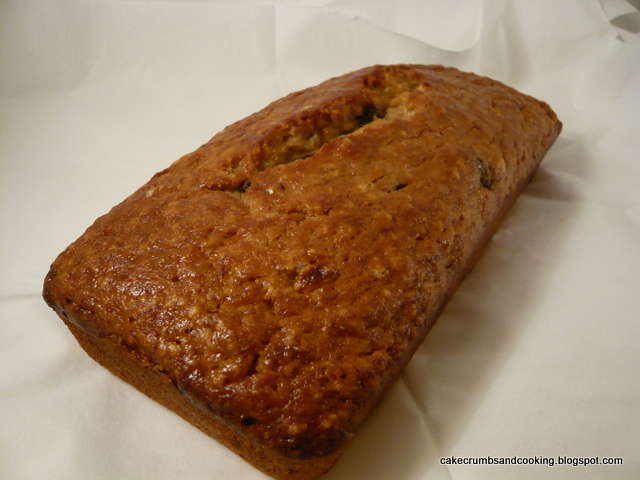
The Most Amazing Banoffee Chocolate Cake


This is one of the times when I genuinely wish that the pictures of this cake did better justice to the flavour of the cake. I suppose I can accept that it was never going to look absolutely stunning - loaf cakes rarely do, but this recipe is an absolute stunner and I thoroughly recommend it.

It came from one of the recipe cards that Waitrose have in their stores for customers to pick up free of charge. This one is (rather unsurprisingly) in association with Nestle Carnation. I do love a bit of Carnation Caramel, and thought I had a tin in my cupboard, so picked up this card. It turned out that my tin was over a year out of date so I ended up buying another tin anyway! I did have the requisite over-ripe bananas though so it wasn't a complete loss.


You can find the recipe here on the Waitrose website. I was slightly concerned after mixing up all the ingredients that the cake would overflow the tin, but luckily this wasn't the case. My cake neede a bit longer than the time specified and I think I covered it for the last  part of the baking time too, to prevent it overbrowning. 


Such a luscious cake - I particularly love the soft bit on the top of the loaf where it has cracked open. I used dark chocolate for the chocolate chunks and they were a great contrast to the sweet cake. Don't be mistaken, this is a sweet cake, but not excessively so and rather than just pure sweetness it is caramelly sweetness, i.e. extra delicious. My bananas for this cake were very overripe, but even so I was very struck by just how bananary this cake was - I have made other banana cake recipes with bananas of equal over-ripeness that have tasted nowhere near as bananary as this cake did. I think the combination of the caramel and the banana combined to boost the banana flavour.


I don't think this was a particularly cheap recipe (not least because the tin of Carnation caramel alone was £1.56) but it did allow me to use up three very over-ripe bananas heading for the compost heap and only uses one (expensive) egg and a little butter and sugar. I would definitely make this cake again and it was very popular at work too.

Saturday, 17 September 2011

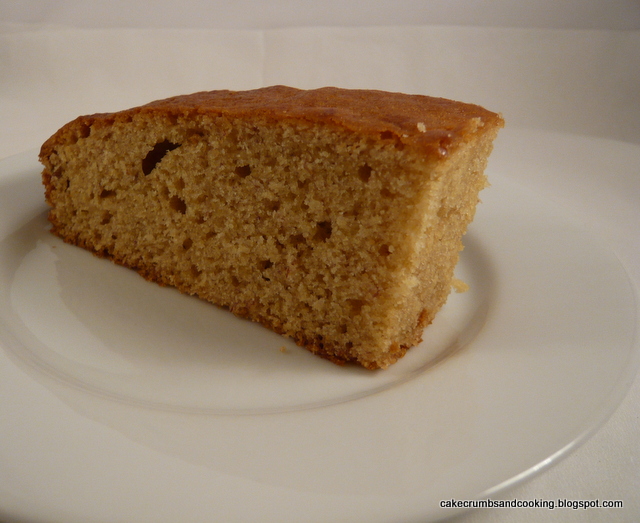
Banana bread - simplest ever?


I spotted this recipe in the current issue of the Waitrose Kitchen magazine and was pleased to have a home for the two bananas that were threatening to overwhelm me with banana-smell every time I entered the kitchen. I don't really know why I bought them in the first place - I went through a phase (a very long one, a couple of years probably) of having a banana every single day for breakfast (yes, I'm very much a creature of habit). But I've recently moved on from bananas to apples. Don't know how long this phase will last... anyway, it meant that my bananas had moved from ripe to the almost-beyond-edible stage that is perfect for baking.

The original recipe is here, but I adapted it because I obviously didn't want to put walnuts in there (hello raisins) and I didn't have soured cream. In all honesty I cannot remember what I substituted in the place of the soured cream. I have a feeling that it was most likely to be yogurt, but perhaps milk. Rubbish memory!


Successful though, and I'd make this again. Waitrose called it 'Simplest ever... banana bread'. I'm not sure I quite agree with that - in the absence of a food processor I rubbed the butter into the flour but it certainly wasn't difficult in any way. I opted out of the specified cream cheese topping on the basis of keeping qualities, and also I happen to love the way that banana bread becomes moist and sticky on the top after a couple of days. Mmmm, sticky!


Banana bread
Ingredients
75g soft butter, cubed
175g plain flour
1 tsp baking powder
125g caster sugar
2 tbsp yogurt/milk
1 large egg, lightly beaten
1 tsp vanilla extract
2 small, very ripe bananas, peeled
50g raisins

Method
- Preheat the oven to gas 4/180C. Grease a non-stick 2lb/900g loaf tin with butter and line with baking parchment.
- Place the flour and baking powder in a bowl and rub in the butter until the mixture resembles breadcrumbs. Add the sugar.
- Combine the yogurt/soured cream, egg and vanilla extract in a small bowl/jug and add the bananas, mashing them until all well mixed.
- Add the wet ingredients to the dry and mix well until combined. Add the raisins and mix in.
- Pour/dollop into the prepared tin, level the surface and bake for 40-45 minutes until risen, golden and a skewer inserted into the middle comes out clean.
- Allow to cool on a wire rack.

It's a fairly shallow loaf, which is just a reflection of it being a fairly small amount of ingredients, I wasn't expecting a massive rise. I guess you could make it in a smaller tin if the shallow-ness bothers you. It was nice and moist and the raisins had plumped up well during cooking. I had forgotten how nice banana bread is, and especially with raisins in it, providing a textural contrast and a hit of fruity sweetness.

Tasty - yes. Make again - yep, probably. Well received with colleagues - happily yes! A success all round really then.

Monday, 7 June 2010

Fruity summer berry cake

Hmm, I struggled to find a title for this. The original recipe is from the Waitrose magazine, and can be found here, titled Summer fruit and almond cake. The picture in the magazine looked so inviting that I couldn't resist making it, hoping to speed the arrival of summer in my corner of the country and the inclusion of a packet of defrosted frozen summer fruits reminded me of the stash of fruit in my freezer. Rather than use a mixture of summer fruits, I decided on exclusively redcurrants and then decided to use a couple of relatively ripe (unusual for this time of year here!) peaches I'd picked up in the supermarket on a whim. Peach and redcurrant seemed an appealing combination, the slightly tart redcurrants counteracting the sweetness of the cake and the juicy peach adding texture. Mmm, I could just taste it!


The recipe was easy to put together, it's one of those where lining the tin is more hassle than making the actual cake and it would have been even quicker if I'd just used a bag of frozen fruit - no chopping of peaches then! I obviously had to change the recipe a little to sub out the almonds (although I'd definitely recommend leaving them in with this fruit combo - peaches and almonds are often paired together and although I'm not in a position to pass judgement, I'm sure everyone else isn't wrong). Instead of using 150g self raising flour and 100g ground almonds, I used 175g self raising flour and 75g fine semolina. I used just over 200g of redcurrants, and 2 small/medium sized peaches, just on the verge of ripeness, but not dripping with juice.


The photo above isn't great anyway, but the cake did catch a little round the edges - I think it was the juices of the fruit caramelising on the outside of the tin, so I'm not sure what I could do about it next time. The actual cake wasn't overcooked.

I think next time, I might be tempted to remove the berries from the stalks whilst still frozen - they made a bit of a mess coming off once defrosted, and I think they might have kept their shape better if they'd defrosted individually.


This was a really delicious cake - I love the inclusion of fresh seasonal fruit in cakes - bursts of peachy sweetness and slightly tart redcurrant, just as I had imagined. The cake was moist and more-ish, it's just a shame there isn't any of it left!

Tuesday, 27 April 2010

Sticky apple and ginger cake

How can such an unassuming cake taste so delicious? This is definitely not a cake that's going to win any prizes in the looks department, but seriously - what it lacks in appearance it more than makes up for in flavour and texture. I suppose I could have decorated it, but I wasn't sure what type of icing would complement it - a simple glace water icing made with ginger syrup might have been good, but it doesn't need it.

The original recipe came from a recent issue of the Waitrose magazine (which I'm buying at the moment because it's only £1 and I just can't resist!). It's a recipe for a ginger and apple simnel cake, but I've missed that boat for this year and I can't eat marzipan anyway, so it didn't seem a hardship to miss off the marzipan. Add it if you're a fan by all means.

Apart from leaving off the marzipan I made only a couple of minor changes to the recipe - I only had 280g light muscovado sugar left rather than 300g, I only used 125g crystallised stem ginger because that was the size of my packet of that (although next time I'd add more probably - it baked into a luscious sticky chewiness and even though pretty much all of the ginger sank to the bottom of the cake this didn't matter because it meant that you got a lovely gingery 'hit' in some mouthfuls to contrast with the gloriously buttery sweet soft cake of the other mouthfuls).
The other change I made which I was actually really pleased with was to use an eating apple instead of a cooking apple. When it came to grating it, I decided that instead of using the coarse side of my box grater, I would grate the apple on my Microplane grater. This meant that rather than being distinct pieces the apple was essentially pulp, which I think must have contributed to the gorgeous moist texture of the cake. It also got rid of a rather large slightly mealy apple that was sitting in the fridge and on my conscience!

NB That's not my box grater, but it's similar in style! The microplane grater is sold as coarse, but it isn't really - it produces mush!!!

I just can't say strongly enough how delcious this was for a ginger lover - the cake was moist and rich and sticky and gingery and just fabulous! Have I said enough? Make it, you won't regret it. Everyone else loved it too - apart from those on diets who had to resist.... mean? am I ever!!!

LinkWithin

Related Posts Plugin for WordPress, Blogger...