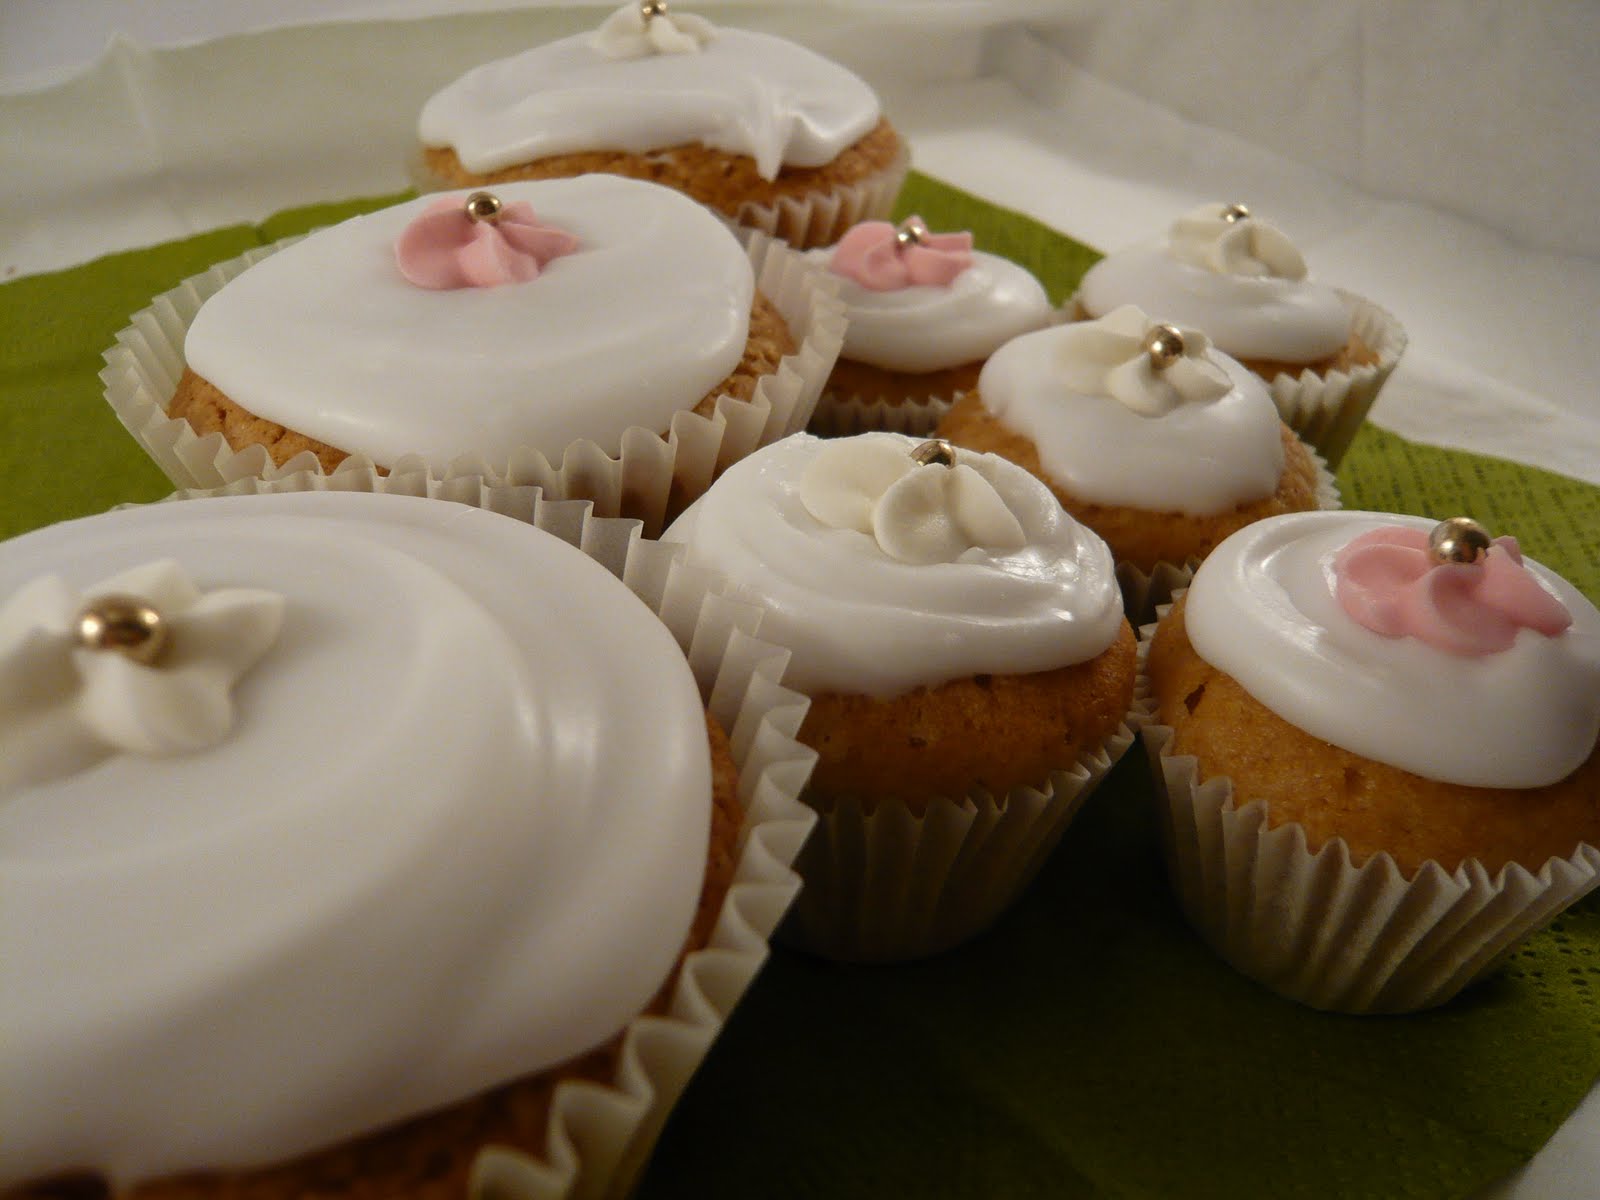
Showing posts with label icing. Show all posts

Monday, 13 May 2013

Banana and Blackcurrant Cupcakes


I wanted to say Banana and Blackcurrant Buns because that's how I think of these (and who doesn't love a bit of alliteration!) but then I wondered if the wider world would be confused by the use of 'bun' to describe a small cake. So I went with cupcakes. But if I start referring to buns, that's what I mean.

Anyway, enough musing on descriptions. I had ripe bananas. Quite a lot of them so I knew that I needed to use some to bake with. I quite fancied a simple little recipe, with the addition of banana and after a little searching came up with this BBC Good Food recipe for Dotty Banana Fairy Cakes. And then I wondered how I could make them more interesting. A while ago I bought some 'Fruit Flakes' which seem to be marketed to the parents of small children as a lunchbox addition. At least that's the way it seems to me. I don't think these are a particularly wholesome treat, in that they're fairly highly processed, but there's nothing too spooky (the usual sugar, thickeners, flavour, colour....) on the ingredients list either. I forget why I ended up buying them. I had some blackcurrant ones and decided to add them to my recipe too, to see whether they'd work or not.


Banana and Blackcurrant Cupcakes
Ingredients
100g butter, softened
100g caster sugar
2 medium eggs
150g self raising flour
1 very ripe banana, mashed
50g fat free yogurt
2 packets of blackcurrant 'Fruit Flakes'
For the icing
65g blackcurrant jam (I used Bonne Maman)
130g icing sugar

Method
- Preheat the oven to 180C/Gas 4. Place 11-12 cupcake liners into a muffin tin. I got 11 from this mixture, but you could make 12 slightly smaller ones.
- Beat the butter and sugar until light and fluffy.
- Add the eggs, flour and mashed banana and beat again.
- At this stage my mixture looked quite dry so I decided to add 50g fat free yogurt.
- Fold in the fruit flakes and divide between the cases.
- Bake for 25-30 minutes until risen and golden.
- Allow to cool.

For the icing, mix the jam and icing sugar and very, very carefully and slowly add water to your desired consistency. Dollop the icing onto the cakes and spread it around. It will slowly spread on its own too....


I had lots and lots of positive feedback about these from colleagues, one of whom said these definitely ranked among the best cakes I have made. I thought they were good, but perhaps not quite that good! The icing worked really well - the blackcurrant jam (although sweet) meant that the icing wasn't sickly sweet as the blackcurrant bursts were slightly sharp (I love blackcurrant jam, I can eat it off the spoon...) and the cake was good too, light and moist. The banana flavour was in the background and the fruit flakes worked well. Because they're processed, the flavour is concentrated and therefore not lost on baking. They didn't melt away during baking and provided a nice burst of blackcurrant flavour in the cake. I have also (ages ago and haven't got round to blogging the experiment) tried the strawberry fruit flakes the same way and they're equally successful. According to their website the available flavours are strawberry, blackcurrant, orange, tropical and raspberry. I've seen the orange locally but would be interested to find the raspberry (not that I've made a particular effort to find them!).

Unadorned strawberry version


This is not a sponsored post, I bought this random stuff myself!

Saturday, 16 June 2012

Creme Fraiche Bundt Cake


As I looked in my fridge the other day I realised that the pot of creme fraiche earmarked for mushroom stroganoff and rapidly approaching its use-by date wasn't destined to end up on my dinner plate paired with mushrooms, rice and all manner of other delicious things. No mushrooms for a start.... Time for a rethink, and a visit to BBC Good Food for some quick inspiration.

I didn't find inspiration to use my pot of creme fraiche as it was, but did find a recipe for a sour cream bundt cake. Well, by my logic, both soured cream and creme fraiche are dairy products with an acidic tang and since I had half fat creme fraiche it was a similar fat content to the stipulated soured cream too. The substitution seemed reasonable to me.


I followed the recipe pretty much as given and used my bundt tin that when full to the brim holds 2 litres of water. For the method I creamed butter and sugar as specified but then just added the rest of the ingredients in one go - seems to work fine! My ingredient modifications were to use self raising flour as I wanted more of a rise than I thought plain flour plus the specified tsp of baking powder would give, and I also used a different glaze. The glaze specified in the recipe is a butter one and it just seems to look a little odd from the photo - sort of grainy and split and not very attractive. Instead I decided to use a plain glace icing - 125g (or so, it's always a little vague when making glace icing) plus a little splash of vanilla extract (this gave a rather attractive golden hue to the icing) and some hot water. Judicious addition of the water will give you a glaze that is thin enough to spoon onto the cake, but thick enough to run down the sides attractively.


A very tasty cake - the crumb is quite close and dense in a good way. It was a richly buttery and moist cake, perfect for a slice with a cup of something hot in the middle of the afternoon. The vanilla flavour of the cake was good, but adding vanilla to the icing too really helped with the flavour - the sweetness of the icing was obvious, but the subtle hint of vanilla worked really well.


As this has vanilla in both cake and icing I am submitting it to Alphabakes this month, where the letter is 'V'. Vanilla isn't the most original submission admittedly, but I don't often use vanilla in glace icing - I will be doing in the future though as it worked really well. Alphabakes is hosted this month by Ros at The More than Occasional Baker and cohosted by Caroline of Caroline Makes.


Tuesday, 5 June 2012

Jubilee Vanilla Cupcakes with Triple Coloured Buttercream Icing

New cupcake stand!

I have to say that I've really enjoyed this Jubilee holiday. No street parties or barbeques here, but just enjoying the festivities that the nation are engaged in, and the lovely, pervasive relaxed atmosphere. And watching our Queen on the television. Happiness.

Unfortunately (for my bank account) I have been well and truly sucked in by all the Jubilee merchandise. I'm sure I'm a dream target audience for marketing types - I tend to see, think 'Oh, that's nice...' and buy. Then later on think.... but I don't need two new mugs/a cake stand/teatowels/millions of themed cupcake cases/ma'amite..... Bother. I guess I'll use them up eventually, just don't be surprised when my Christmas cupcakes are still being presented in Jubilee cases! And I've used the cupcake stand for the pictures here. It's not too Jubilee, so hopefully it'll get another few outings.


I wanted a simple cupcake recipe here, because my focus was on the decoration. A while ago when my June 2012 issue of Delicious. magazine arrived I was flicking through and saw their two-tone cupcake icing (pg 88) and then later on in the issue their 'Technique of the Month' on page 101 is how to do this two-tone icing. Really wanted to try this. Then I saw Jules' amazingly decorated cupcakes. Now I really, really wanted to have a go, and the Jubilee seemed as good a time as any.

Now mine aren't a patch on Jules' version - you must hop across to see what I mean (and she has other stunning designs too) but I'm pretty pleased for a first attempt.


Vanilla cupcakes
Ingredients (makes 12)
175g Stork margarine
175g caster sugar
3 eggs (med/large)
110g self raising flour
65g plain flour
1 tsp vanilla extract

For the buttercream frosting (enough to frost 16 happily)
160g unsalted butter, softened
320g icing sugar
1 tsp vanilla extract

Method
- Preheat your oven to gas 4/180C. Place 12 (Jubilee themed) cases in a muffin tin.
- Cream the Stork and sugar until very light and fluffy.
- Add the eggs, flours and vanilla and beat well until all combined and smooth.
- Divide between the cases and bake for 20-25 minutes until risen and light golden.
- Remove and allow to cool on wire rack.

For the buttercream - beat the butter alone until light and creamy, then gradually add the icing sugar, beating well after each addition. I added mine in 4 lots of 80g. This just helps to avoid the spread of icing sugar all over the kitchen. I object to breathing icing sugar! Add the vanilla extract and a little boiled water to achieve the texture you want.

Coloured and into three piping bags

Now for the interesting bit.....
- Divide the buttercream between three bowls (or two additional bowls to the one you started out in). Add the colours you want to the intensity you want them.
- Fill three piping bags with each of the colours - one colour per bag
- Put your nozzle into a fourth bag and then place the other three inside, trying to ensure they are evenly placed and all down to the base of the bag and poking into the nozzle. 
- You're all set - pipe away!

All three bags inside the fourth

There is enough buttercream to frost sixteen cakes - I wasn't sure how much to start out with and wanted to make sure I had enough. Luckily I've had a bit of a baking day today and there were some other cupcakes sitting round ready to be iced by the time I was doing these ones, so the buttercream wasn't wasted. I'll hopefully get round to posting my other baking exploits soon, but being Jubilee themed this one is already on the late side!

Next time I will definitely invest in some gel colours - I just couldn't get the intensity I wanted using the Silver Spoon colours commonly available in the supermarkets explaining why mine are rather pink and pale blue rather than red and royal blue! I also noticed that they buttercream colours started to look a little split/curdled too. I'm not sure why this was, but hopefully gel colours will help there too. I also really, really need a Wilton 1M tip. Amazon here I come. I'm sure they'll be well received at work in spite of my perceived imperfections!


Sunday, 14 August 2011

Review: The Great British Bake Off - How to Bake.....


When the Great British Bake-Off was on the BBC last year, I really enjoyed watching the contestants progress through the rounds, seeing what they would come up with for the various different challenges, and seeing how they all interpreted the 'technical challenge' recipes set by Mary Berry and Paul Hollywood. I can't say I've baked many of either Mary or Paul's recipes, not owning any books by them. Quite a few of the recipes from the first series are available here, on the BBC Food website. The new series starts on Tuesday 16th August, 8-9pm, BBC2. There will be 11 episodes and I'm looking forward to it!

I'm sure you can probably guess where this is leading... I was recently contacted by someone from Random House, the publishers who are behind the book that accompanies the new series of the Great British Bake Off to see if I would like to review the book. Now I didn't immediately jump at this offer, because I wasn't sure if the book would contain anything new or indeed, anything I wanted to bake, but after a delay and some umming and ahhing I decided to accept their offer. A book speedily arrived.

Disclaimer: Clearly, this is a publicity exercise for the book, and I received my copy free of charge. However, I have not been paid to write this review, and the opinions contained are my own - good or bad.

The book is laid out in chapters, presumably according to the order of the challenges that the participants will undertake in the TV series; Cakes, Biscuits and Teatime Treats, Bread, Pies and Savoury pastry, Tarts and Sweet Pastry, Patisserie, Puddings and Desserts and finally, Celebration Cakes. The recipes are predominantly by Linda Collister, with some of the technical challenge recipes (7 in total) by Mary Berry or Paul Hollywood, with some 'Best of the Bake Off' recipes in each chapter which are the contestant's own. I really like Linda Collister's baking, from another book that I already own by her, which swayed me to accepting this offer. And although initially dubious I'm glad I did.


The book is well laid out, and beautifully photographed and although some of the recipes don't have corresponding photos there are some very indepth step by step recipe photographs, for the 'How to Make the Perfect....' (one of these in most chapters) and the technical challenge recipes, which is a good idea. I appreciate photos of what I'm aiming for, being more of the inspired by photos than intimidated by them school of thought.


As I went through the book I was glad I'd accepted the offer because there are quite a few recipes that I wanted to bake straightaway, and more that I would like to bake when I have more time or want to challenge myself with something new (pastry and patisserie chapters, I'm thinking of you!). Some of the particularly delicious sounding recipes (well, to my mind anyway) are Rhubarb and Custard Cupcakes, Brandy Snaps, Sticky Maple-Apple Traybake, Monkey Bread, Stilton, Potato and Caramelised Onion Pie, Chocolate, Fennel and Ginger tarts and Chocolate Fudge Hot-Pot Pudding but there are many more calling out my name. I have lots of baking books but I really could spend a long time just baking from this one!

So what did I decide to make to start? I chose Stem Ginger Shortbread, Sticky Orange Marmalade Cake, and Chocolate Velvet Cup Cakes with Chocolate Fudge Frosting.


The stem ginger shortbread was lovely and easy to make, and eat. Perhaps not as crumbly as some I have made before, not my best, but a lovely basic recipe all the same. The sticky orange marmalade cake was lovely - again easy to make (are you seeing a theme emerging here!) but it looked really lovely and showed off my lovely homemade orange marmalade off to good effect. The only slight problem I had with it was that it sunk slightly when it cooled and had overbrowned slightly in the oven. I removed the very top layer of over-browning because the marmalade glaze on the cake and the icing would hide the top of the cake, but I found myself berating myself for not managing to make it perfectly and imagining what Mary Berry and Paul Hollywood would have said had my cake been up for judging. I'm sure that the dip in the middle wouldn't have gone down well, but I think they would have been pleased with the final taste and texture!

My favourite was the chocolate velvet cup cakes with chocolate fudge frosting. These can be found right at the back of the book, in the celebration cakes chapter, and it would be a shame to miss them, because they're delicious!


Chocolate Velvet Cup Cakes with Chocolate Fudge Frosting (reproduced with permission)
Ingredients
175ml semi-skimmed or full-fat milk (I used semi-skimmed aka 2%)
100g dark chocolate (70% cocoa solids)
125g caster sugar
60g unsalted butter, softened
1/2 tsp vanilla extract
1 large free-range egg, at room temperature, beaten
150g self raising flour, sifted

Method
- Preheat the oven to 180C/gas 4. Pour the milk into a small, heavy-based pan (preferably non-stick). Chop the chocolate and add to the milk with one-third of the sugar. Set over the lowest possible heat and leave until melted and smooth, stirring frequently. Remove from the heat. If necessary, give the liquid a quick whisk to amalgamate, then set aside until needed.
- Put the butter into a mixing bowl and beat until creamy with a wooden spoon or an electric mixer. Add the rest of the sugar and the vanilla and beat thoroughly for about 4 minutes or until the mixture is very light and fluffy.
- Gradually add the egg, beating well after each addition and scraping down the sides of the bowl from time to time. Using a large metal spoon fold in the flour in 3 batches alternatley with the chocolate liquid. When completely amalgamated spoon the mixture into the paper casess so they are evenly filled.
- Bake for 15-18 minutes or until the cakes are well risen and spring back when gently pressed with a finger. Remove the tray from the oven and leave to cool for about 2 minutes, then transfer the cup cakes to a wire rack and leave to cool completely before icing.

Chocolate fudge frosting
Enough for 12 cupcakes
100g dark chocolate (70% cocoa solids), chopped or broken up
1 rounded tablespoon golden syrup
50g unsalted butter

- Put the chocolate, golden syrup and butter into a heatproof bowl. Set over a pan of steaming hot but not boiling water (don't let the base of the bowl touch the water) and melt gently, stirring frequently. As soon as the mixture is smooth remove the bowl from the pan and cool, stirring frequently.
- When very thick and on the point of setting, swirl the frosting on top of the cup cakes using a round-bladed knife. Quickly add any decorations and leave to set.

My notes:
- My chocolate mixture did look a bit grainy, but it seemed to work ok.
- I inadvertently added half of the sugar to the milk mixture (why can't I divide 125g by three and get 40g not 60g???) but just put the rest in with the butter and it was fine!
- They actually took 15 minutes to bake!!! Yay, I usually find my cakes need longer than stated!
- Don't worry that the batter is very runny. I sort of spoon/poured it into the cases feeling very dubious indeed with visions of flat pancakes coming out of the oven only to be greeted by the beauties in the pic below!


I love this chocolate fudge frosting! It was beautifully bitter (I used Green and Black's 72% cooking chocolate) to offset the smooth sweetness of the cakes.
- Don't be greedy like me, and increase the quantities by 50%, you'll have far too much to fit on the cakes!
- The frosting took about 2 hours at ambient temperature (about 20C here) to reach almost-setting point, and until then was pretty much liquid. Have faith, and patience and you'll be rewarded!
These were utterly delicious. The cake was soft and smooth, moist and sweet and was offset really well by the slightly bitter chocolate frosting. I think this will be my go-to recipe for chocolate cupcakes from now, with the added advantage of needing less butter and eggs than a standard recipe and tasting fabulous! I'll also try and remember to make the frosting too, I much, much prefer it to chocolate buttercream which I tend to find too sickly sweet.


And if you've managed to get all the way to the end of that.... I have been offered two copies of the book to give away to my readers, but because it's a heavy book I'm sorry that this is only open to UK readers. Apologies to all my international visitors. To have a chance to win a copy of this book;
1. Become a follower of Cake, Crumbs and Cooking, if you aren't already.
2. Leave me a comment and let me know what your baking nemesis is - does pastry make you pale? do your scones leave people speechless? and what is your absolute favourite thing to bake?

This will close at midnight on the 20th August and I'll pick the winners by random number generator. I'll then contact you by email so if your email isn't obvious on your blog/website, please leave it in your comment :-)

Sunday, 17 April 2011

Lemon and elderflower cupcakes plus Dr Oetker

I was recently contacted and asked if I would like to receive some of Dr Oetker's baking products to experiment with and use in my baking. I replied in the affirmative and received the basket of goodies in the photo at the end of the post. There are some interesting products in their range for bakers like me who are essentially a bit rubbish when it comes to creating homemade decorations for baked goods and it was interesting to receive some of them. I have to admit to being surprised that Scotbloc is still produced, and more surprised to be sent it as a food blogger - not a product I would use, although I recognise it has its place (T can vouch for this - he put it in that place in my house....)
I decided to use the delicate wafer daisies to decorate some little spring inspired cupcakes, baked in some of their pretty cupcake cases. When I think of spring, lemon always springs to mind, and shortly after that, elderflowers. This is partly because there is a large elderflower in my garden and I am watching it with a beady eye to see when it starts to flower... until then elderflower cordial from Bottlegreen is excellent!
The recipe for these is adapted from a couple of sources - I sort of made it up as I went along. I was pleased that the wafer daisies had survived transit related traumas - there were 11 whole and 2 broken ones. Lemon and elderflower cupcakes Ingredients 60g softened butter 110g golden caster sugar 80g self raising flour 60g plain flour 2 eggs
3tbsp elderflower cordial
zest 1/2 small lemon

For the icing
120g icing sugar
elderflower cordial, plus a little water

Method

- Preheat the oven to gas 4/180C. Place your cupcake liners in a bun tray (smaller than a muffin tin).

- Cream the butter and sugar until well mixed.

- Beat in the flour, eggs, elderflower cordial and lemon zest until well mixed.

- Divide between the cake cases.

- Bake for 20-25 minutes until pale golden.

- Remove and allow to cool on a wire rack.


- When cool decorate using the glace icing (mix icing sugar with enough elderflower cordial to make a thick icing) and place a daisy on the top.


They were pretty successful, although the elderflower flavour didn't come through very strongly in the cupcakes. It was strengthened by the elderflower in the icing though, and overall they worked well, reminding me that spring is well and truly on its way. Yippee!!!

With thanks to Sarah at Brando for Dr Oetker.

Thursday, 17 February 2011

Romantic Rose Hearts

Mmm, I know, I'm late for Valentines Day. I guess you won't really be interested in making Valentines day cupcakes now, but I'm going to post them anyway because there's nothing to say that you can't surprise your loved one on a different day of the year - after all, love doesn't just happen on one day of the year. And you never know if they think you've forgotten Valentine's day and then turn up with a plate of these the reaction might be even more positive. And anyway, I'm not waiting a year to post them!


Romantic Rose Hearts
Ingredients
55g butter, softened
110g golden caster sugar
1 large egg
75g self raising flour
65g plain flour
1 tsp rosewater
60ml semi skimmed milk, at room temperature

125g icing sugar for the icing

Method
- Preheat the oven to 180C/Gas 4. Line the edges of a silicone heart mould with 8 holes as best you can - I just put a strip of parchment around the vertical sides.
- Cream the butter and sugar until the mixture is light and fluffy.
- Add the egg and beat well to mix.
- Add some of the flour, beat to combine, add some milk, beat to combine and repeat until all milk and flour are added.
- Add the rosewater and mix in.
- Divide the mixture between the holes of the mould.
- Bake for 25 minutes until well risen and golden.
- Allow to cool until you can handle the mould then really gently try and release the cupcakes. I always struggle here, but just try the best I can!

Make the glace icing - mix 125g icing sugar with about 2tsp rosewater and a little extra water as required to make a thick icing. Pour/drizzle over your cooled cupcakes.

Share with your loved one (or in my case, grateful colleagues!).


I was really pleased with the way these rose and peaked - bursting hearts of love (hmm....!). The recipe is adapted from the Primrose Bakery recipe book and I like using this proportion of ingredients - the egg doesn't tend to curdle when it's added (I usually manage to curdle most of my cake mixtures) and the mixture of plain and self raising flour gives a substantial cupcake.

The rose flavour is fairly subtle, especially in the cake, and builds as you keep eating.


As an aside - does anyone else have trouble with silicone moulds? I thought the point of them was that they were non-stick. As you can see, mine really aren't. I would have really struggled to release the cupcakes if I hadn't put a piece of parchment around the edges. As it was I lost a fair amount of the base of some of the cakes, and they really did stick. This mould has been used a few times - so neither new nor old. Any ideas?

Friday, 19 November 2010

Earl Grey Cupcakes

I can't believe I haven't updated for so long - I really am still alive and have actually been baking quite a lot recently, but being busy at work has put paid to having any time to blog about any of it! I now have an enormous backlog of things to blog, so decided to make a start with these.

I mentioned a while ago that I had bought the Primrose Bakery Cupcake recipe book (at a bargain price) and I'm so glad that I did - I've made lots out of it (possibly more than any other book I own, certainly for the number of recipes in it) and there are lots more bookmarked to make. I don't know what made me decide on Earl Grey as the next flavour to make after the Lemon Cupcakes - I don't drink tea as I don't really like it! I had, however, bought a mixed packet of tea bags for the odd occasion when a desire to make teabread strikes, and in the mix there were earl grey teabags. This recipe seemed as good a time as any to use them up and see what tea in a cupcake is like.


The recipe is very similar to the vanilla cupcake recipe here, the introduction of the earl grey tea flavour is via steeping tea bags in warm milk and allowing to cool before adding to the cake mixture. I found with the lemon cupcakes that they were quite large and so decided to see if I could get more out of the mixture by making mini cupcakes too, which was a successful tactic - I had a dozen full sized and a dozen mini cupcakes and none looked as though I had skimped on the batter.

Good? Yep! I was really pleased with these. The tea flavour was really subtle and as I had expected this to be the case I went with an unflavoured glace icing so as not to interfere with the flavour. Good decision as the icing added the necessary sweetness without masking the subtle flavour. I think if you didn't know what the flavour was it would be hard to guess, but there was just a hint of perfumed aroma more than anything I suppose. Hard to describe but delicious to eat.


As an aside, I also made a coffee layer cake for a colleague's (significant) birthday recently from the book. It differed slightly from my previous coffee cakes because the recipe says that at the end, just before spooning the mixture into the prepared tins, you marble through the extremely strong coffee mixture, creating a beautiful marbled cake. When the cake is cooked and cool it is drenched in a coffee syrup, making it incredibly moist before being sandwiched and topped with a coffee buttercream icing. I decorated it with chocolate coffee beans (very popular at work!). I wish I'd managed to get a photo of it because it looked incredibly light and moist and very pretty with the marbling, but I was too embarrassed to photograph it at work... The birthday girl was delighted though, and many compliments were received from the assembled crowd at work when it and the other presents were given. Definitely a make again recipe and I might borrow the idea of the syrup for other cakes too.

Thursday, 21 October 2010

Black and Blue Cakes and an Anniversary

I don't often remember anniversaries associated with my blog (having forgotten both 'blogiversaries' and my first 100!) but this post is my 200th! I have to say that when I started blogging I didn't really realise that I would keep going for quite so long, and how important it would become. I'm constantly looking for new things to make (and the list of 'to make' is getting longer the more I look at other people's inspiring blogs) and really enjoy it. I absolutely love reading people's comments here and try my hardest to comment on other people's blogs because it creates such a sense of community and getting to know people who are possibly half way around the world but share interests. So thank you for reading my blog, I hope you carry on enjoying it, commenting on it and that I carry on baking for it!

Anyway, onto the recipe now...the spark of inspiration for this cake came from a feature in the October Sainsbury's Magazine by Dan Lepard. The cover for this issue pictured one of the cakes featured in the article - a double chocolate fudge cake. I would have bought the magazine anyway, but mmmm, yum! Inside I found recipes for Mini vanilla cranberry blondies, Blueberry mascarpone cheesecakes, Lemon drizzle cakes, Sweet potato and orange cupcakes, Mochaccino walnut cakes and the aforementioned double chocolate fudge cakes. Oh to be able to eat nuts.... Anyway I digress, what really appealed to me was that the mochaccino walnut cakes were baked in 4" pork pie tins, but as someone who has baking tins to rival the local cookware department in John Lewis (or similar... actually not quite there yet, but aiming high!) I couldn't quite justify the purchase of two more tins just to make a recipe that contains things I'm allergic to.

However, the idea of almost individual cakes just wouldn't go. And then I visited J and discovered (with great excitement) that she already has these tins (and in her case it's even justified - they make perfect small Christmas cakes) and was willing to lend them to me - deal done! So now I just needed to decide what to bake in them. The ongoing 'using up out of the freezer' saga demanded some form of frozen berry be added and I also wanted to use some of the jam that is accumulating in my fridge (I think when I baked these I had about five different jars open, which is approximately four too many to my mind) so the stage was set for these black and blue cakes.

Black and Blue mini cakes
Ingredients
120g softened butter
120g caster sugar (half golden half normal because I ran out)
2 eggs
150g self raising flour
90g frozen blueberries
65g mixed fruit jam (mine was hedgerow fruit containing the blackberries of the title)

For the filling and icing
100g icing sugar
50g jam (I used blackcurrant)

100g jam to fill the cakes

Method
- Preheat the oven to 180C/Gas 4. Grease and line two deep 4" pork pie tins.
- Cream the butter and sugar until light and fluffy.
- Add the eggs one at a time, beating inbetween each addition.
- Fold in the flour until well combined and then add the frozen blueberries and finally the jam, folding both through to mix, but leaving the jam streaky. I added my blueberries frozen in the hope that they might not sink. I don't think it worked particularly well...
- Bake for 35-45 minutes until well risen and golden.
- Allow to cool a little before turning out to cool completely on a wire rack.

For the icing, mix the jam with the icing sugar.

To decorate, halve your cakes, spread generously with jam and place the top half back on. Spoon over the icing, allowing it to dribble down the edges if you wish.

I cut these into 6 pieces each, although Dan's recipe suggested four pieces for each cake - it would certainly have been easier to cut into fewer pieces! The cakes were rather flat when they came out, which was a little disappointing, but good for decorating. I did find that it was difficult to pick up the pieces of cake to eat - the top was very gooey with icing, and the bottom tended to get left behind, but they seemed pretty popular at work - sweet with jam and refreshing little bursts of blueberry.
As you can see, most of the blueberries sank! I probably shouldn't admit this but one of the most satisfying things about making these cakes was finishing two pots of jam up that had been started thereby liberating two jam jars and some shelf space in my fridge - woo-hoo! I'll have to think of another use for these tins before giving them back to J.

Sunday, 17 October 2010

Primrose Bakery Lemon Cupcakes


Well, it's apparently Chocolate Week this week and I am a bad blogger because I have nothing chocolate to blog about at all. This is a pretty poor admission for a confirmed chocoholic (a day does not pass without the divine brown substance passing my lips!). However, there are plenty of chocolate treats already on the blog, so you can peruse them here if you wish! Why am I talking about chocolate in a post on Lemon Cupcakes? Well, if I'd made these a month ago I could have blogged about them in National Cupcake week (13th - 19th September) - I'm really not very organised at all am I!?!

I was visiting J a couple of weeks ago and whilst shopping together I spotted one of my favourite cheap bookshops so made a beeline for the entrance, and then (naturally) gravitated quickly to the cookery section (with J sighing in the background). I saw lots and lots of books that I wanted to buy, but managed to restrict myself to just two (with J asking whether I really needed any more cookery books - no, I don't ever need any more, I just want them!). One of these was 'Cupcakes from the Primrose Bakery'. I was slightly doubtful about buying this book, I do already have quite a few cupcake cookery books and even I wondered if this purchase was going to be justified or not. I'm pleased to report that my first recipe has definitely made me glad that I bought the book (and at a bargain price too!).

I have enjoyed the cupcakes from the Hummingbird bakery book, which are so light they almost dissolve in your mouth as you eat them, but these are different. I can't think of a complimentary way to say this but they are denser, with more weight and heft to them. You feel like you've eaten something rather than just inhaled it, and I rather like this about these cupcakes. So now I feel that I've got two good recipes for cupcakes depending on the desired texture in the resulting cake. Win! I'm looking forward to trying out some of the different flavour combinations in the book too - Honey and Granola, Earl Grey, Caramel, Pumpkin - yum!

I followed the recipe as printed, even warming my milk up to room temperature in the microwave (loving my new microwave! - haven't had one for about seven or eight years). I omitted the specified tbsp of sour cream as I didn't have any, and added a little more milk. These appeared to be done at 25 minutes (as specified in the recipe) by the skewer test, but were very pale so I left them in for a further 5 minutes to brown a little more.


The texture of the cake is lovely and close - dense, but in a really good way! As you can see, I didn't make a buttercream for the top, instead choosing a refreshing glace icing made with lemon juice. Delicious, and colleagues agreed - these were very popular!

Friday, 17 September 2010

Lemon syrup cake with passionfruit icing

I love lemon drizzle cake, or lemon syrup cake, whatever you want to call it - you know the one, where you bake the cake and as it comes out of the oven, stab it all over (remarkably therapeutic!) and pour a simple syrup of lemon juice and sugar over the top, pouring on more than you think can possibly be absorbed and then leaving it in the tin to cool. Delicious. I don't make it often enough. However, the presence of lemons and a desire to make this cake made me wonder if I could tart it up a little, perhaps make it a little more presentable and fragrant? And much as I adore all out lemon for the flavour, I thought passionfruit and lemon might be a good combination too. So the cake was born.

Lemon syrup cake with passionfruit icing
Ingredients
100g softened butter
120g caster sugar
135g self raising flour
2 large eggs
grated zest of 2 unwaxed lemons
2-3 tbsp milk curdled with the juice of 1/2 lemon

For the syrup
100g icing sugar
juice 1 lemon

For the icing
200g icing sugar
15g butter
pulp of 2 passionfruit

Method
- Preheat the oven to gas 4/180C. Grease and line a small, shallow baking tin 9 x 6 1/2" (23 x 16cm) with parchment paper.
- Cream the butter and sugar until light and fluffy.
- Add the eggs and flour and mix well to combine. Add the curdled milk and mix in.
- Fold in the lemon zest (I find if I use my electric handwhisk at this stage all the zest wraps itself around the beaters, losing the point of adding it!)
- Spoon into the prepared tin and bake for 30 minutes until light golden and a cake tester comes out clean.
- While the cake is baking, heat 100g icing sugar and the juice of a lemon in a saucepan until boiling and clear.
- Stab/skewer the cake all over and then carefully pour over the hot syrup.
- Allow to cool in the tin.

- For the icing, mix the icing sugar, butter, 2tsp water and the pulp of two passionfruit in a bowl sitting over a pan of hot/simmering water, until the butter is melted.
- Allow to cool a little before pouring over your cake.

The icing does set a little, but is still very sticky. I also found that the icing sort of came away with the surface of the cake when I was trying to cut it up, making it a sticky, messy sort of job!

Yum! Really good! The cake was deliciously moist and lemony from the zest and syrup, but light too and the passionfruit icing was sticky and perfumed in a really good way, adding a different flavour to the lemon. Lemon seems to be a universally liked flavour (apart from for the Caked Crusader!) and colleagues were really impressed with this cake, with a couple of new 'No, this one's my favourite' comments being heard!

Wednesday, 16 June 2010

Chocolate Berry Cake

This cake was one of Dan Lepard's recent Saturday columns in the Guardian, and when I saw the picture, I was determined to try it as soon as possible (which I did, I'm just behind with posting!). I couldn't resist the combination of jam and chocolate and liked the idea of beating more jam into the icing too - sounded like a good way to give a flavour boost to the icing.


I didn't want a full 8" cake, so decided to halve the recipe and bake it in a deep 6" tin, having done the calculations to tell me that if anything, this would make the cake very slightly shallower. I therefore decided that the cooking time would be about the same. Unfortunately as you can see from the above photo this wasn't really the case. Yes, it's not a great photo, but the top was quite dark, as were the sides towards the top. However, this didn't matter too much as the cake had conveniently cracked around the outside so I decided to lop off the burnt top and discard it before proceeding with the icing. This also had the advantage of providing a more even top for the icing. My fault for halving Dan's recipe, and for not checking sooner.


There we go, all better with lush icing cascading down the sides. I had thought that the inclusion of yogurt and golden syrup in the cake would make for a moist cake, but this didn't seem to be the case. I don't think this was entirely my fault for overcooking the cake slightly, because Suelle over at Mainly Baking also made the cake and she found it on the dry side. However, I didn't share her lack of icing problem. This could be because although I started with the right amount of jam and chocolate I just added icing sugar and water until I felt I had a sufficient quantity of icing to cover the cake thickly and hide the 'overdone' parts and any remaining cracks! I guess this also explains why I couldn't really taste the jam in the icing, although I did use a good quality raspberry jam.

This isn't a cake I'll make again because although I enjoyed eating it (as did my colleagues!) it was on the dry side and the raspberry jam just didn't come through as well as I had hoped. On the plus side, it lasts well in a cake tin and is a great robust cake for carrying about - there is no fear of it crumbling into nothingness in your bag, so a good one for a lunch on the move.

Thursday, 15 April 2010

Custard Creams - sometimes it's fun to play with your food...

I'm such a lucky person aren't I? T bought me some lovely biscuit cutters in the shapes of various mini-beasts for Easter instead of buying me an Easter egg (he did buy me chocolate in bar form though, far better in my opinion!) and I couldn't wait to use them, I've had cookie-cutter envy ever since seeing these adorable bush buddy cutters on Johannas fab blog, Green Gourmet Giraffe.


I spent Easter with my family, and J had made some custard cream biscuits for us that a friend of hers had made and after trying them I was determined to make some of my own and see if they were as delicious as J's biscuits. So the combination of desires led to custard cream biscuits in extremely cute shapes! And I got to have fun playing not only with icing the finished biscuits, but also with photographing them..... Note the way the lion is hunting the spider in the photo above, and the fact that the scary spider has red eyes - mwah-hah-hah. As an aside I only made one spider on the basis that spiders are scary and indeed, all the others were eaten well before the spider. It was only after some of his legs had broken off that people were willing to approach him.... coincidence? I think not!

Well, I did have to make some in more traditional shape too - not square like the commercial ones, but two layers sandwiched together with buttercream icing. Mind you, most of the mini-beasts were sandwiched too, and they had decorations on the top as well!

Aren't the caterpillars lovely?! OK, recipe:

Custard Cream biscuits with buttercream filling
Ingredients (you could easily double these to make more biscuits)
85g softened butter
85g self raising flour
28g custard powder
30g icing sugar

Buttercream icing
50g butter, very soft
100g icing sugar, plus more

Method

- Preheat the oven to 170-180C/Gas 3-4. I know this doesn't seem accurate, but J's friend said to use Gas 3, but I found Gas 4 fine. I don't think it's critical because you'll have to watch them carefully anyway.
- Cream together the butter and sugar until light and fluffy.
- Add the flour and custard powder and mix well to combine. The mixture may seem a little dry, but doesn't require any additional liquid - it will come together to form a soft dough.
- If you are making the traditional type biscuits, take small amounts of dough and mould into balls in your hands. Put on a baking tray lined with silicon baking parchment and push down very slightly - you want them to be rounded - they don't rise during cooking.
- If you are making cut out shapes, roll out small amounts of the dough at a time on a lightly floured surface, cut your shapes and very carefully transfer to the baking tray.
- Repeat until all dough is used up.
- Bake for around 8-15 minutes. Yes, this is a massive time span for such small biscuits, but if you roll the dough fairly thinly, they'll not take very long to cook and if you form mounded balls they'll obviously take a lot longer. Sorry to be so unhelpful, but the biscuits are done when they are not quite starting to turn golden brown. The best thing I can suggest is to bake a small batch first and keep checking to get an idea of how quickly they are cooking in your oven given how thick/thin they are. I know this sounds difficult but it really isn't. Just remember you don't really want them coloured and they'll be a bit soft when you take them out.
- Leave on the tray for a minute or so and then very carefully transfer to a wire rack to finish cooling.

In the meantime, prepare your buttercream - beat half the quantity of butter to icing sugar (e.g. 50g softened butter to 100g icing sugar) together until very light in colour and fluffy. I often add a little more sugar when I feel the mixture can take it. If you are colouring the buttercream, divide it into smaller bowls and add colouring paste/gel/liquid until you achieve the colour you are looking for. Only you can know this! I used make-shift piping bags by putting the buttercream into a small plastic food bag and snipping a tiny corner off the bag to get a hole to pipe through.

All that remains for you to do is have fun decorating. I guess children would love doing this, but I loved doing it too, what can I say?


Oh, and then you get to eat your creations. Which in this case is fantastic because these light little biscuits just crumble, dissolve and melt in your mouth. Although sharing the same name as their commercial cousins these are light-years away in both taste and texture. All of my colleagues loved them, and it goes without saying that J and T love them. So thanks to Brenda for giving the recipe to J, and to J for persuading me to try her delicious biscuits because I'm not normally a fan of buttercream, here it's great!


Gratuitous photo of snails - aren't they fab!!!

Monday, 5 April 2010

Collapsing Chocolate Creme Fraiche Cake - Happy Birthday T!


Did you really think I'd leave you over Easter without a chocolate cake of some sort? I think it must be the law to eat chocolate at Easter (although it has to be said that I lack the will power of even a gnat and therefore didn't give up chocolate for Lent....) so here is this year's offering.

It was also T's birthday on Easter Sunday (which doesn't happen all that often, the coincidence I mean, obviously both Easter and the birthday happen each year without fail...), so Happy Birthday T, it was really lovely to spend the day together and you'll get your present when you've decided what you want (hint, hint!). So this cake was for T's birthday.

I had creme fraiche in the fridge and wanted to use it up, and vaguely remembered seeing a cake with creme fraiche instead of butter in it. I'd made this cake before, but it had sadly risen like a souffle and then collapsed into an ugly, inedible (and it's not often that happens) heap. (I hasten to add that this was my fault - I changed the type of flour and used half fat instead of full fat creme fraiche, still it contributed to my avoidance of any cake using separated eggs!) Determined to both avoid a repeat of this catastrophe and also to use the creme fraiche, I used this recipe for inspiration, but essentially made up my own cake! Note to self: when making up cakes and diligently writing down ingredients, method, oven temperature and cooking time, do not record this vital information on a scrap of cardboard. With the best will in the world, you will lose it (again....second time in as many weeks.... sigh).

Creme fraiche chocolate cake
Ingredients
3 eggs
125g caster sugar
250ml tub full fat creme fraiche (I used a French style one)
115g self raising flour
30g dark cocoa powder (Green and Blacks is good)

For the chocolate icing
40g butter
25g golden syrup
50g dark chocolate (70% solids)
160g icing sugar (I used a mixture of normal and unrefined because I ran out of normal...)

Method
- Grease and line the base and sides of an 8" deep cake tin. Preheat the oven to Gas 4/180C.
- Whisk the eggs and sugar together until well combined, about 2-3 minutes with an electric hand whisk.
- Add the creme fraiche and beat until combined.
- Sift in the flour and cocoa powder and fold together until there are no more streaks of flour in the mixture.
- Pour into the lined tin and place in the oven. I put mine on a baking tray because I was using a loose based tin and was worried about mixture escaping. I'm happy to report that nothing escaped!
- Bake for around 40-45 minutes (this is where my little bit of cardboard with timings written on it would have come in really handy. That or a better memory, I'd be good either way!) until a cake tester comes out clean and the cake feels firm to the touch. The surface of my cake had cracked quite a bit, but it didn't matter as I was planning on icing it anyway.
- Turn out carefully and leave to cool on a wire rack. The cake will sink.

- When the cake is cool, make the icing.
- Melt butter, syrup and chocolate in a pan then add icing sugar. Beat briskly until smooth and pour onto cake. I found I had a little too much icing, but no matter, it tastes good warm on vanilla icecream! Scatter with decorations of choice - Cadbury's mini eggs here. Yum!

The glaze is one I've used before, and is fudgy and grainy and delicious! It went perfectly with the fudgy cake, and, ahem, disguised the fact that the cake was perhaps not standing as tall as it might have been. Nothing like a pool of icing to level off a slightly sunken cake. I should have called it sunken souffle cake, pretended it was exactly as I was expecting and no-one would have been any the wiser! I see Delia has a similar idea....

Taste? Ooooh, yum! You can see from the picture above just how dense and fudgy the cake was - really good. Not too sweet and the cake and icing went together really well. T cut himself a good big slice to enjoy with cream - well it was his birthday and Easter sunday after all. J and I enjoyed it greatly too.

LinkWithin

Related Posts Plugin for WordPress, Blogger...