Showing posts with label muscovado. Show all posts

Monday, 27 May 2013

Chocolate Chunk Banoffee Cake


The last time I was casting around for ideas to use up the inevitable overripe bananas sitting in my kitchen I saw one of my more recent cookery book purchases, one which definitely deserves more of my attention. The book is 'The Birthday Cake Book' by Fiona Cairns, and is full not only of amazingly decorated cakes and biscuits (many of which are around different birthday party themes) but also really interesting cake recipes. I sometimes find that books can concentrate too much on the decoration of the cake and the actual cake itself is neglected. Which is slightly daft because however good the cake looks, ultimately it is going to be eaten!


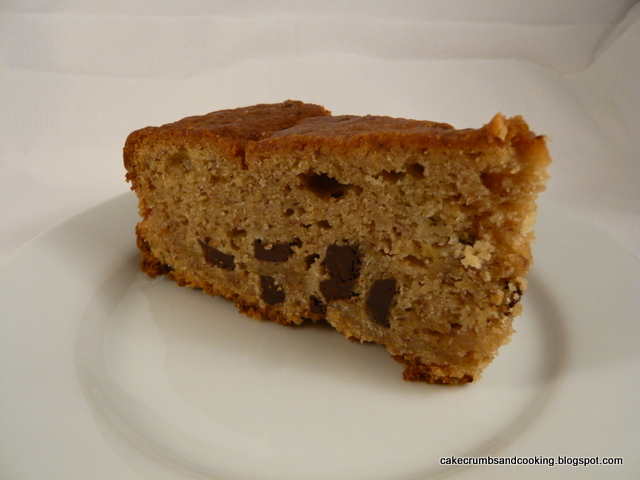
One of the cakes in the book is a Banoffee Cake - in the book this is baked in two 13cm (6") square cake tins, which are then stacked and decorated to look like playing dice - very clever. I used the basic recipe as I wanted to use up my ripe bananas but made a few small changes. I left out the spices (nutmeg and cinnamon) and added a 100g bar of 70% dark chocolate, broken up into small chunks. I also wanted to bake it in an 8"/20cm round tin. This meant that the cooking time was 60-70 minutes (longer than I had expected really, so perhaps check slightly before this time if you make it).


I had intended to add either a chocolate frosting or some other kind of decoration, but ended up running out of time to do this so the cake went to work naked. It was really successful though - banana cakes can sometimes be heavy, dense and almost wet and although this one was quite dense, it was in a pleasant way. It felt substantial and I think the banoffee of the name comes from the toffee flavour imparted by using light muscovado sugar in the recipe. I enjoyed the chocolate chunks in it very much - the bitterness of the chocolate contrasted well with the sweet cake and I would definitely make it again. 

This is not a sponsored post - I bought and liked this book!

Sunday, 14 April 2013

Crystallised Ginger Pear Cake


I'm never quite sure about pears. I do really like them, but it depends on my mood as to whether I want a lusciously ripe and dripping Williams pear or a hard crunchy Conference, preferably cold from the fridge. So I bought pears and then decided that I didn't really want them at all. And we all know that pears usually go from rock-hard to soft-and-squishy in the blink of an eye so I decided that I ought to use these ones up. One found a home in this rather good cake.

Pear and ginger are a good combination of flavours and I love the fudgy toffee-ish depth of flavour that light muscovado sugar brings. Pear has a fairly subtle flavour sometimes and I didn't want to overwhelm it in the actual cake, so I left my ginger just for the top of the cake rather than the batter itself.


Crystallised Ginger Pear Cake
Ingredients
120g butter, softened
120g light muscovado sugar
2 large eggs
1/2 tsp vanilla extract
160g self raising flour
1 medium sized ripe but firm pear, chopped (mine was a green Williams)
35g crystallised stem ginger, chopped very small

Method
- Preheat the oven to 180C/Gas 4. Grease and base line a 7"/18cm round cake tin.
- Cream the butter and sugar until light and fluffy.
- Add the vanilla, eggs and flour and beat until combined. The mixture will be very stiff.
- Add the chopped pear (my pieces were about 1cm cubes, or slightly smaller) and mix to combine.
- Spoon into the cake tin and level as best you can (again, the mixture is stiff).
- Scatter over the finely chopped ginger.
- Bake for 35-45 minutes (I can't quite remember how long this took now) until risen and golden and a cake tester comes out clean.
- Allow to cool on a wire rack


This was really successful. The cake was soft and moist and because the pear was still relatively underripe when I used it, it hadn't turned to mush whilst baking and retained a bite in the cake, making for a nice contrast of taste and texture. The ginger on the top worked well too, providing a crunch and a little hit of heat. A success.

Wednesday, 20 March 2013

Not Quite Edd Kimber's Cinnamon Buns


Way, way back in October there was a feature in the Waitrose Kitchen magazine about baking books. Presumably to round up the books that were released last autumn in time for the Christmas present buying. There are quite a number of books featured, one of which is Edd Kimber's second book, 'Say it with Cake'. The recipe given from this book is his Cinnamon Buns.

I had a desire to make something different (and a little indulgent) for breakfasts at the time and decided to give the recipe a go. I'm not sure why it's taken me so long to get round to writing these up, because they're actually very good! I've had a quick look around the net and can't find an authorised reproduction of the recipe, but it is a reasonably standard enriched milk dough, with a little butter and a little sugar added along with an egg. 

After proofing

The recipe was for 16 buns and I can see from my photos that I only made nine, so I'm assuming I halved the recipe. And since the recipe for the dough contained an egg, I'm certain I missed this out. The filling in the recipe consists of butter, light brown soft sugar, currants and cinnamon, 3 tablespoons of it! I have a bit of an on-off relationship with cinnamon and am usually more off it than on. The thought of three tablespooons (or even one and a half for my halved recipe) was rather a lot and I decided to switch for mixed spice, which I am really very fond of. It does contain cinnamon, but tempered with the flavours of other spices too, which just makes it much more appealing to my tastebuds. I also decided to leave out the currants (I never claimed to be following the recipe exactly!).


There is a topping of cream cheese, icing sugar and milk given to drizzle across the buns, but because I was going to be freezing these I decided that I would use a simple glace water icing instead, which worked just as well. 

Soft and super sticky

These were gorgeous - the enriched dough was soft and sweet and I was really taken with these buns. I was glad I used mixed spice for the filling and missed out the currants (they're another thing I can take or leave) and the incredibly sticky filling and sticky icing on the top made these a very delicious breakfast indeed. An excellent recipe and one I should return to.

Tuesday, 25 December 2012

Christmas Chai Inspired Cupcakes with Chocolate Buttercream


One of the best things about festive baking is using all of the warming spices that just seem to fit in so beautifully at this time of the year. I love using mixed spice, ginger, cinnamon and allspice to create that heady Christmassy aroma but this time I wanted to combine them in a light cupcake recipe with chocolate .

I had seen a recipe for chai cupcakes in the BBC Good Food magazine (October 2011) by Edd Kimber that used chai teabags to give the flavour but as I didn't want to use teabags I decided to adapt the recipe. I think I've not really used chai spices at all, simply my own mix using what I know I enjoy (and what was available in my baking stores!) but I'm going to stick with the name anyway. I think you'd need to use cardamom and perhaps a pinch of cloves to make them more authentically chai.

If you look really hard you can just about make out my Christmas tree cupcake cases....

Chai Inspired Spiced Cupcakes with Chocolate Buttercream
Ingredients
225g butter
225g light muscovado sugar
4 eggs
225g self raising flour
110g buttermilk
1 1/2tsp ground ginger
1 tsp ground cinnamon
1/2 tsp ground allspice

Chocolate Buttercream ***makes tonnes, far more than you need - see below***
200g butter
200g icing sugar
150g milk chocolate
50g dark chocolate
1/2tsp vanilla extract

Method
- Preheat the oven to Gas 4/180C. Line at least 18 muffin holes with paper cases - see comment below.
- Melt the chocolate (either in the microwave or over a bowl of hot water) and set aside to cool to room temperature.
- Cream the butter and sugar until light and fluffy.
- Add the eggs, flour and spices and beat until well combined.
- Add the buttermilk and beat again until the mixture is uniform.
- Divide between the cases. Bake for 20-25 minutes until well risen and golden.
- Allow to cool on a wire rack. 

- Cream the butter until very soft and fluffy. Add the (cooled) chocolate and half of the icing sugar and keep creaming. Add the remaining icing sugar and vanilla extract and continue to beat until well combined and fluffy. Add a little milk or (boiled) water if necessary to make the frosting softer.
- Pipe or spread onto your cupcakes. Decorate as desired.

Notes:
- There was too much mixture for 18 cases (I was using cupcake rather than muffin size cases - i.e. bigger than fairy cases but smaller than muffin cases - if you used muffin cases I guess it would have been ok). I ended up using three silicon cases too to take the excess. Which worked fine.
- There was far, far too much buttercream. If I'd been piping it there probably wouldn't have been quite such an excess - making swirls always takes more buttercream than you think - but if you're just spreading them like in my photos I think half the amount of buttercream would be ample.

Rudolph makes a festive appearance...

These were lovely - the spicing was quite delicate and the chocolate buttercream worked well with the cakes. The original recipe specified soured cream but I didn't have that - the buttermilk substitute worked very well in my opinion and gave lovely, soft, moist cakes. A winner, just that the quantities were a little off!

Since this recipe contains both chocolate and cinnamon, I am going to submit it to We Should Cocoa, founded by Choclette of Choc Log Blog (this month's host) and Chele of Chocolate Teapot. The theme for December is, of course, cinnamon. Yum.


As a Christmas-scented recipe I'm also submitting this to Calendar Cakes hosted by Rachel at Dolly Bakes and Laura at Laura Loves Cakes. The theme this month is (unsurprisingly!) Christmas!


Saturday, 22 December 2012

Chocolate Cake with Vanilla Buttercream


The theme for this month's Teatime Treats is Chocolate. A pretty wide theme really, so I'm sure there will be lots and lots of delicious submissions to browse when the round up is published. There are lots of chocolate-y things that I've made that I could share for this event, but it seems rather appropriate to share this one. The recipe for the chocolate cake came from Karen at Lavender and Lovage  (one of the co-hosts for TTT which is being hosted this month by Kate at What Kate Baked) and has become one of my favourite chocolate cake recipes. 

It's quick and easy to make and the only ingredient that you might not already have around is the creme fraiche. I've made this cake twice already - once as little cupcakes (quicker than waiting for larger cakes to bake) and once as a two layer cake. Both times were very successful and I think the cakes look very pretty too.


Karen gives the recipe as an all-in-one recipe but I often find that my butter isn't soft enough for an all in one method using a Kitchenaid stand mixer (although it is usually ok with an electric hand mixer) so I have adapted the method slightly. The recipe is reproduced with Karen's permission:

Chocolate Cake with Vanilla Buttercream
Ingredients
140g creme fraiche (I used a French style one, it's very thick, solid in fact)
125g unsalted butter
200g light muscovado sugar
1 tsp vanilla
4 eggs
170g plain flour
50g cocoa powder
1 tsp baking powder (I think mine was fairly generous)

Method
- Preheat the oven to 180C/Gas4 . If making a large cake, grease and line two 8"/20cm shallow round cake tins. If making cupcakes, place liners in muffin tins (I made 18 using this recipe).
- Cream together the butter and sugar until the mixture has changed colour and is light and fluffy.
- Add the creme fraiche and continue to mix.
- Add the vanilla, eggs, flour, cocoa powder and baking powder and mix, starting slowly to prevent a cloud of flour enveloping your kitchen.
- When fully mixed divide between the prepared tins/muffin cases and bake for 20-25 minutes for small cakes and 30-40 minutes for larger cakes.
- Allow to cool on a wire rack.


Vanilla buttercream
90g butter
200g icing sugar (plus extra to get desired consistency)
1 tsp vanilla extract

- Beat the butter until very soft (using electric mixers unless you particularly feel in need of a work out) and then add half of the sugar. Starting slowly, beat it until well combined. Add the rest of the sugar and the vanilla extract (or more to taste) and continue to beat until very soft and fluffy. You may need to add a little milk or do as I do and add a little warm water from a boiled kettle.
- Spread or pipe your buttercream as desired.


I love this cake, and the vanilla buttercream complements is beautifully. It isn't that often that I make one recipe twice in close succession but this is a fab recipe and may become my go-to chocolate cake recipe. Yes, it needs creme fraiche, but it isn't a hardship to have creme fraiche in the fridge - it has a long shelf life and if you don't end up using it for chocolate cake it has a multitude of other uses (or a spoon may suffice, perhaps with a chopped banana to assuage lack-of-fruit-and-vitamins thoughts....). It's moist, light and chocolate-y and is very easy to throw together at the last minute. Thanks for a great recipe Karen!


Saturday, 8 December 2012

Little Maple Banana Cakes


Each year at least one of the magazines that I subscribe to (yes, I subscribe because I'd only end up buying them each month, and so it works out much cheaper this way!) has a freebie calendar, which is usually really useful. I don't actually use a calendar on the wall that much any more, preferring an electronic means of keeping track of where I'm supposed to be and what I'm supposed to be doing, but I still like to have the calendar on the wall. (I think this harks back to my childhood, where all events were meticulously recorded on the calendar lest we forgot something...)


This year, the calendar is from the BBC Good Food magazine, and it's a good one. I have sometimes found that when the calendars are sponsored by certain companies every single recipe contains their ingredient. This is fine if they've got a reasonable range to choose from, but it gets a bit old to have 'X-brand' cheese in every single recipe. Anyway, this year the sponsor is Dr Oetker, but happily almost none of the recipes have a sponsored ingredient in them, they're just good BBC Good Food recipes.

Anyway, this is leading somewhere, I promise. I have spent most of the year walking past this calendar and seeing the recipes each month (January - Frosty yogurt orange cake, February - Passion fruit cupcakes, March - Sultana tea loaf) and haven't made any of them yet. Until now. Turning over the page just over a month ago I was greeted by Little banana cakes with maple pecan frosting. So far so unexciting. Not really a recipe for me as I can't eat pecans. But then I realised that adapting this recipe would be perfect for some of the ingredients I had around needing using up. Maple syrup and a very ripe banana (just the one lonely one - not helpful for the majority of recipes, which require many very ripe bananas; I'm sure I'm not the only one out there to only get one small ripe banana left over...) called my name.


An adapted recipe ensued:

Little Maple Banana Cakes
Ingredients
50g butter, softened, plus extra for greasing
80g light muscovado sugar
105g self raising flour
40g maple syrup
1 large egg
1 very overripe banana, mashed (mine weighed 70g after removing the skin)
30g raisins

Frosting
Usual method for making buttercream, if you want (i.e. about half butter to sugar - I'd be tempted to use about 40-50g butter for six cakes and therefore about 100-140g icing sugar)
Flavourings as desired (orange, lemon, maple syrup etc)

Method
- Preheat the oven to gas 4/180C. Grease a 6 hole muffin tin well with butter (or, obviously, use 6 holes of a 12 hole tin...)
- Cream the butter and muscovado sugar (if you don't want to do this step separately then either use a hand mixer, NOT a stand mixer or make sure your butter is super, super soft - I thought mine was, but clearly not - the butter wouldn't mix into the rest of the ingredients using a stand mixer and I ended up decanting into a different bowl and blitzing with a hand mixer).
- Add the rest of the ingredients except the raisins and beat well until combined.
- Stir in the raisins and divide between the prepared tins.
- Bake for 20-25 minutes.
- Turn out onto a wire rack and allow to cool.

If topping with buttercream, make up as usual (beat butter until soft, add icing sugar in a couple of batches, beating until well combined, light and fluffy - I usually add a splash of water to make the mixture easier to beat) and add flavourings as desired. Maple syrup might be good here.

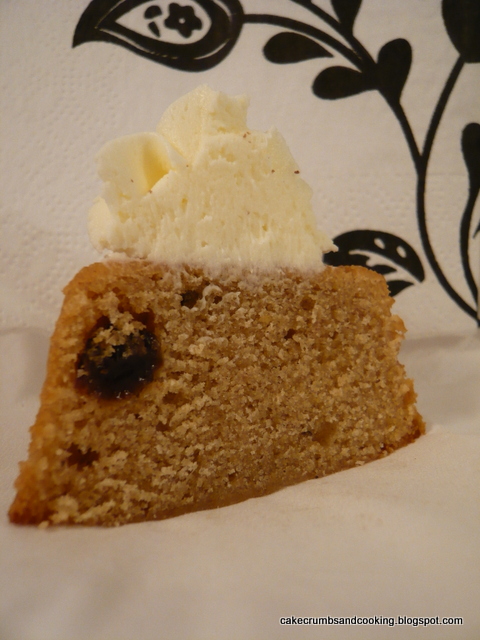
I love, love, loved these. They aren't too sweet, they aren't too banana-ry and the flavour of the maple syrup doesn't come through strongly. That makes them sound a failure doesn't it, none of the constituent flavours being readily identifiable. But in fact, the whole is greater than the sum of the parts. The cakes are moist and deliciously dense, sweet but not overly so, and the maple syrup adds undertones and is subtle. The raisins are plump and juicy and really add to the overall cake by providing a contrasting chewy texture. They develop a delicious sticky top after a day or so and soften slightly around the edges, really, really good. So successful in fact that I have made second and third batches for myself already. In the second batch I added about 50g dark chocolate, and this was one of those occasions were the chocolate was an intrusion, unwarranted and detracted from the deliciousness of the cakes as they were. Needless to say, the third batch didn't contain chocolate and was much the better for it.
LinkWithin

Related Posts Plugin for WordPress, Blogger...