Showing posts with label chocolate icing. Show all posts

Sunday, 24 March 2013

Dan Lepard's Chocolate Lamingtons

Lamingtons with successful glaze - mark 2

Well, sort of. Last year, Dan's recipe for double chocolate lamingtons was published in the Guardian, ahead of ANZAC day. I made them at the time, and used the glaze that he recommended for coating them. However, since I avoid coconut (as one of those things to which I might be allergic but don't fancy finding out about) I didn't want to actually coat the lamingtons and dip them in desiccated coconut, I just wanted to glaze the cakes. 

Lamingtons the first time round - with a rather runny glaze used in the middle and on the top

I rather fancied Suelle's take on the cake, which you can find here Chocolate and Coconut Layer Cake. She had the rather brilliant idea of halving the coating quantities and splitting the cake in half, sandwiching it together with the glaze and spreading it across the top. I decided to go for this too but unfortunately I was in a bit of a hurry to get the cake iced and my glaze was steadfastly refusing to thicken, which as a coating I think you'd probably expect. My lamingtons were good, but rather messy to eat and the glaze wasn't really what I wanted. I think I possibly used a different chocolate to Suelle and that's why my glaze took so long to set. I refrigerated a little of it and it did eventually thicken up. 


As with many cakes I make that end up turning out not quite right, I intended to remake the cake (very successful) and ice it with a different icing. But as usual, time slides and I didn't get round to remaking the cake. Then as part of the step-by-step baking series that Dan is now doing for the Guardian, he published a more conventional lamington recipe recently, for Australia Day (26th January) and also a twist on this recipe,  Macadamia Ginger cake with lamington icing. These two recipes reminded me of how successful the chocolate lamington cake had been and how I had intended to give it another go. And so I did.


I used the double chocolate lamington cake recipe, as stated here and then taking inspiration from the macadamia ginger cake with lamington icing, used an approximation of the lamington icing from that cake to ice mine with. As with my first attempt, the cake was successful. I did note that it took longer to bake than stated (about 10-15 minutes longer) and the top surface seemed a little darker than I would have liked. However, once the icing was on not only was this not noticeable, there was no hint in the taste of the cake that it had caught at all, so the dark surface was obviously just in my mind.

Dan states for the lamington icing that you need a half batch of the lamington icing, plus 75g dark chocolate. I used the quantities stated below (which are approximately 1/3 of the amount stated, plus 30g dark chocolate) , which gave a generous covering for an 8" (20cm) square cake, as you can see in the pictures. 


Lamington icing
130g dark chocolate (I used G&B 72% cooking chocolate)
10g cocoa powder
100g caster sugar
65ml milk

Method
- Bring the milk, caster sugar and cocoa powder to the boil in a small pan, whisking.
- Add the chocolate, stir until melted, allow to thicken if necessary and then use to spread over your cake.

* I found that it was difficult to beat all of the small lumps of cocoa out of the icing, therefore I would recommend sifting it first. I also ended up transferring the sugar/cocoa/milk mixture to a small bowl to try and beat some of the lumps out of it before adding the chocolate. The mixture thickened quickly when I added the chocolate and was easily spreadable - I could happily spread the mixture right to the edge of the cake without fear that it was going to run off.


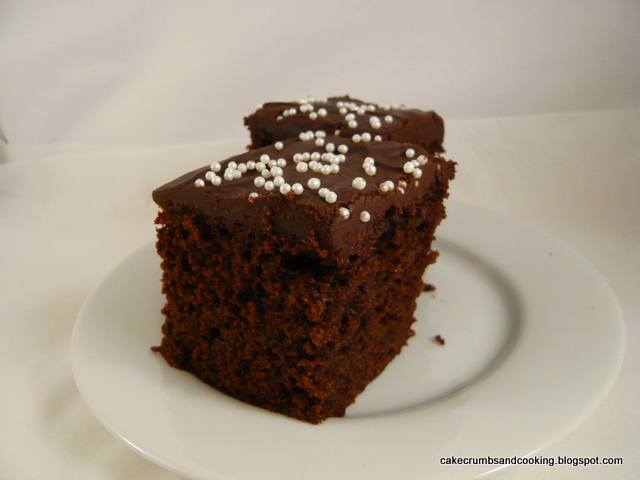
The actual cake was lighter than I expected and as you might expect from the ingredients, really quite sweet. I'm not sure why, but the top 1/3 of the cake seemed to be more aerated than the lower portion - you can see this in the picture above. The icing was very successful - it was less sweet than I was expecting and I would definitely use it again (I'm not that keen on super sweet icings as a rule). The icing doesn't dry to a gloss, but to a matt finish. I also decorated my cake with hundreds and thousands, and these needed to be added quickly while the icing was still wet enough to hold them, otherwise they just rolled off....


I'm entering this into We Should Cocoa, the monthly chocolate blogging challenge set up by Choclette of Choc Log Blog and Chele of Chocolate Teapot. The host this month is Lucy of The Kitchen Maid and she has chosen 'Fame' as the theme. Lamingtons are a famous Antipodean treat and Dan Lepard is a famous baker so I think these qualify!

Tuesday, 25 December 2012

Christmas Chai Inspired Cupcakes with Chocolate Buttercream


One of the best things about festive baking is using all of the warming spices that just seem to fit in so beautifully at this time of the year. I love using mixed spice, ginger, cinnamon and allspice to create that heady Christmassy aroma but this time I wanted to combine them in a light cupcake recipe with chocolate .

I had seen a recipe for chai cupcakes in the BBC Good Food magazine (October 2011) by Edd Kimber that used chai teabags to give the flavour but as I didn't want to use teabags I decided to adapt the recipe. I think I've not really used chai spices at all, simply my own mix using what I know I enjoy (and what was available in my baking stores!) but I'm going to stick with the name anyway. I think you'd need to use cardamom and perhaps a pinch of cloves to make them more authentically chai.

If you look really hard you can just about make out my Christmas tree cupcake cases....

Chai Inspired Spiced Cupcakes with Chocolate Buttercream
Ingredients
225g butter
225g light muscovado sugar
4 eggs
225g self raising flour
110g buttermilk
1 1/2tsp ground ginger
1 tsp ground cinnamon
1/2 tsp ground allspice

Chocolate Buttercream ***makes tonnes, far more than you need - see below***
200g butter
200g icing sugar
150g milk chocolate
50g dark chocolate
1/2tsp vanilla extract

Method
- Preheat the oven to Gas 4/180C. Line at least 18 muffin holes with paper cases - see comment below.
- Melt the chocolate (either in the microwave or over a bowl of hot water) and set aside to cool to room temperature.
- Cream the butter and sugar until light and fluffy.
- Add the eggs, flour and spices and beat until well combined.
- Add the buttermilk and beat again until the mixture is uniform.
- Divide between the cases. Bake for 20-25 minutes until well risen and golden.
- Allow to cool on a wire rack. 

- Cream the butter until very soft and fluffy. Add the (cooled) chocolate and half of the icing sugar and keep creaming. Add the remaining icing sugar and vanilla extract and continue to beat until well combined and fluffy. Add a little milk or (boiled) water if necessary to make the frosting softer.
- Pipe or spread onto your cupcakes. Decorate as desired.

Notes:
- There was too much mixture for 18 cases (I was using cupcake rather than muffin size cases - i.e. bigger than fairy cases but smaller than muffin cases - if you used muffin cases I guess it would have been ok). I ended up using three silicon cases too to take the excess. Which worked fine.
- There was far, far too much buttercream. If I'd been piping it there probably wouldn't have been quite such an excess - making swirls always takes more buttercream than you think - but if you're just spreading them like in my photos I think half the amount of buttercream would be ample.

Rudolph makes a festive appearance...

These were lovely - the spicing was quite delicate and the chocolate buttercream worked well with the cakes. The original recipe specified soured cream but I didn't have that - the buttermilk substitute worked very well in my opinion and gave lovely, soft, moist cakes. A winner, just that the quantities were a little off!

Since this recipe contains both chocolate and cinnamon, I am going to submit it to We Should Cocoa, founded by Choclette of Choc Log Blog (this month's host) and Chele of Chocolate Teapot. The theme for December is, of course, cinnamon. Yum.


As a Christmas-scented recipe I'm also submitting this to Calendar Cakes hosted by Rachel at Dolly Bakes and Laura at Laura Loves Cakes. The theme this month is (unsurprisingly!) Christmas!


Friday, 14 September 2012

Butterscotch Chocolate Cupcakes


These were something I had to be able to produce rather quickly, one evening after work recently. One of my colleagues was moving jobs, to a more senior post and I wanted to make some cupcakes for her - after all, what kind of baking colleague would I be if I didn't provide some form of leaving cake!

As such, it wasn't the time to try out new exciting recipes, but to stick to a tried, tested and trusted recipe, but with a little twist - added chopped chocolate. I do enjoy the contrast in texture of biting into a piece of chocolate in the midst of the soft cupcake, and chopping the chocolate fairly small means that it doesn't all sink.


For myself, it's dark chocolate all the way, but I had a bar of Green and Black's Butterscotch chocolate which is a dark milk chocolate (34% cocoa) with little butterscotchy pieces in it (rather more-ish as I nibble a little as I type).

Butterscotch Chocolate Cupcakes
Ingredients
175g softened butter
175g caster sugar (or a mixture of caster sugar and light muscovado)
150g self raising flour
3 large eggs
20g cocoa powder
50g Butterscotch Milk Chocolate, chopped

For the frosting
100g milk chocolate (I used Green and Black's 34% milk chocolate here)
40g butter

Method
- Preheat the oven to gas 4/180C. Place 12 liners in a muffin tin.
- Cream together the butter and sugar until very light and fluffy.
- Add the eggs, flour and cocoa powder and continue to beat until well mixed.
- Fold in the chopped chocolate and divide between the prepared cases.
- Bake for around 25 minutes until they are risen and springy and a cake tester comes out clean.
- Allow to cool on a wire rack.
- When cool, make the frosting - melt the chocolate and then add the cubed butter, stirring until it has all amalgamated. You may need to allow it to cool a little before using, but when the texture seems thick enough to hold, spread onto the cupcakes and sprinkle with decorations of your choice.


I guess I probably don't need to say that these went well - I gift boxed some for my colleague who was leaving to take home for her family and then the rest were enjoyed by my other colleagues. Good Luck in your new job S.


It's nearly National Cupcake Week - you can check out their website (and naturally follow them on facebook and twitter if that's your thing!) for more info, but this means that this month's Calendar Cakes challenge (hosted alternately by Rachel of Dolly Bakes and Laura of Laura Loves Cakes) is Cupcakes. So I am entering these into the challenge. Super easy and very tasty!


Sunday, 22 July 2012

Chocolate Chunk Traybake with Fudgy Chocolate Icing


A large, yet easy to make cake to feed many hungry people...


Chocolate Chunk Traybake with Fudgy Chocolate Icing
Ingredients
225g butter
110g caster sugar
110g light muscovado sugar
splash vanilla extract
4 medium eggs
210g self raising flour
25g cocoa powder
150g 70% chocolate, chopped into chunks (I used Green and Blacks)

Method
- Preheat the oven to gas 4/180C. Grease and line a traybake tin (8x12") with parchment paper.
- Cream the butter and sugars until light and fluffy.
- Add the vanilla, eggs, flour and cocoa powder and mix together until everything is well incorporated.
- Stir in the chocolate chunks.
- Spoon into the tin and level out. Bake for 35-40 minutes until well risen and a cake tester comes out clean.
- Leave to cool in the tin a little.
- Very carefully turn out. I wasn't careful enough and mine broke up into three large slabs. This isn't the end of the world though, because the delicious fudgy frosting will glue it back together!!!

Fudgy Chocolate Icing
250g dark chocolate (150g)
125g butter (75g)
200g icing sugar (120g)
5tbsp milk (3tbsp)
Bag of Twirl bites

- Melt the chocolate and butter over a pan of hot/simmering water.
- Remove from the heat, stir and beat in the sugar and milk until well mixed.
- Leave to cool until a spreadable consistency, then spread over the cake.
- Decide how many pieces you are going to cut the cake into and then mentally mark it out. Place a Twirl bite in the centre of each piece, then cut up before eating!

I have made a similar icing to this before, but was reminded of it when I came across the Hungry Hinny's post on her fabulous Chocolate Bunny cake and realised that this icing was just what I needed for this cake. It's a lush, fudgy chocolatey icing - just perfect and lovely to work with too. As you can see from the date on the Hungry Hinny's post I made this cake a while ago (I hadn't actually realised it was that long ago!) and I recall not making quite as much as the full recipe. I think I scaled it down to 3/5 of the amount specified and have put these amounts in brackets. If this is the amount I made, it still provided a generous covering for my cake, and a little extra for the baker!


This cake was lovely, lovely! I do so enjoy a cake with chunks of chocolate in it and the fudgy icing was just the right choice too. It's very reminiscent of something my mum used to make in quantity (vast, vast quantity) for our cake stalls when my brother and I were much younger. She used to make about 120 little chocolate buns (there were no cupcakes in the days of my childhood - you had buns or fairy cakes!) spread them with Cadbury's chocolate (the height of sophistication in the 80s when all the other mums were using Scotbloc chocolate flavoured cake covering) and then top them with a little piece of Cadbury's flake. They were always immensely popular on the school fete cake stall - often manned by my mum as a stalwart of the PTA. I like to think of this traybake as a posher version of my mum's chocolate buns - it has a richer cake base with the inclusion of light muscovado sugar, and all that delicious dark chocolate with a luscious icing too, but then harks back to my childhood with the topping of a Twirl bite - essentially just a tiny bit of flake covered in chocolate.


I think this would be perfect for a cake stall so am sending it to Karen of Lavender and Lovage for her Tea Time Treats Challenge, which this month is all about Cake Stall Bakes. TTT is co-hosted by Kate of What Kate Baked.


Sunday, 8 April 2012

White Chocolate Easter Cake


A sweet and simple cake to fill you and your family with sweetness and light this Easter.

The recipe comes from BBC Good Food and can be found here. It was originally intended to be a charity baking recipe to raise money for BBC Children in Need in 2010. I modified it only slightly by adding 140g chopped chocolate to the cake batter before baking, and then iced it with a different frosting.


White Chocolate Icing
150g white chocolate (I used Lindt)
40g unsalted butter
vanilla - see below
- Melt the chocolate and butter together over a pan of hot (or simmering) water. Do not allow to overheat.
- Allow to cool to spreading consistency, and spread over the cake.
- Decorate with mini eggs. Cadbury's are my all time favourite.

The frosting wasn't really a particular success - there wasn't quite enough to go around and I had to leave part of the cake bare. I'd use 200g at least in the future. Or use the recipe supplied by BBC Good Food!!! I added a little vanilla to the melted chocolate and butter mix, but I don't recommend this because it caused the previously smooth mixture to seize and go grainy. It still tasted good, but didn't look great. I used it anyway.

Chocolate mostly at the bottom of the cake....

Quick and easy (well, if you've remembered to soften your butter sufficiently, I hadn't really!) and therefore perfect to whip up at the last minute to feed a houseful of visitors over this Easter weekend. It will be much appreciated by the small, sweet loving people in your life. This is a lot of white chocolate and is therefore really quite sweet! Moist, light and chocolatey this was appreciated by my colleagues as a pre-Easter treat. Expect to find most of the chocolate at the bottom of the cake (annoying!). I had to very carefully prise the cake off its parchment lining and still lost a fair amount of the chocolate on the way.


Happy Easter everyone, I hope you have a peaceful time with family and friends, celebrating and eating chocolate.

I'm entering this cake into TeaTime Treats, run by Kate of What Kate Baked (this month's host) and Karen of Lavender and Lovage.

Saturday, 24 December 2011

Cream cheese chocolate orange cake - We Should Cocoa


After last month's apple chocolate challenge, this month Choclette has been kind to us and given us orange to pair with chocolate, a classic combo. Chocolate and orange work so well together that this month the challenge has been to come up with something different. Well, I haven't really done something different, but I have made a really rather good cake, and that should be counted a successful challenge I think!


It came about as I found I had half a tub of cream cheese in the fridge with no immediate plans. Trawling round I found that I had made a cake containing cream cheese relatively recently. It was a good cake and deserved another outing, but in a modified form.

This is based (heavily) on Dan Lepard's Ginger chocolate chip pound cake, modified to suit my requirements.

Cream Cheese Chocolate Orange Cake
Ingredients
100g unsalted butter, melted
200g caster sugar
125g full fat cream cheese
3 medium eggs
1 tsp vanilla extract
220g plain flour
30g cocoa powder
2 tsp baking powder
100g dark chocolate, chopped,
grated zest of one large orange

Chocolate fudge frosting
100g dark chocolate, chopped
50g unsalted butter
1 rounded tbsp golden syrup

Sprinkles to decorate

Method
- Preheat the oven to Gas4/180C. Grease and line an 8"/20cm square cake tin.
- Mix together the butter and caster sugar. While the butter is still warm, beat in the cream cheese. This was really satisfying, and gave a beautifully creamy, glossy mixture.
- Beat in the eggs one at a time until combined then add the vanilla and orange zest.
- Sift in the flour and cocoa powder and beat until combined.
- Stir in the chocolate chips.
- Spoon into the tin and bake for 40-45 minutes until a skewer/cake tester comes out clean or with only a few crumbs remaining.
- Leave to cool on a wire rack and in the meantime, make the frosting.
- Melt the butter, chocolate and golden syrup over a pan of hot water.
- Allow to cool until spreading consistency, this will take a couple of hours.
- Spread the frosting over the cake and sprinkle with decorations as desired.

My cake took 45 minutes to bake, and then I partially covered it with foil and gave it another 5 mins or so to finish cooking the centre.


This was a lovely cake and the orange flavour came through really well without being overpowering or artificial, which is something I sometimes find with orange flavoured chocolate items.

It was a little dry though, and would probably have been better eaten with either a big blob of vanilla ice cream, or some pouring cream as a dessert, or perhaps even better than both of those, with some orange flavoured custard - hot enough to make the topping go all gooey. Mmmm, yum! However, there were no complaints, and it disappeared rapidly enough when taken in to work!

Tuesday, 1 November 2011

World Vegan Day - Vegan Chocolate Cupcakes


Disclaimer - the little sugar rose is sadly not vegan - I forgot to buy vegan-friendly decorations and since most of my recipients are not vegan I guessed they wouldn't mind!

Well, the clue is in the title - these are indeed vegan chocolate cupcakes to celebrate world vegan day, which is held each November 1st, to celebrate the founding of the world's first vegan society in 1944 by Donald Watson. Information shamelessly taken from the homepage of World Vegan Day. Check it out for more information! World vegan day has only been going since 1994 though!


I am not vegan, I am not even vegetarian (although the frequency that meat or fish appears on my plate is vanishingly small!) but I am a complete magpie - I like to be able to pick and choose the things that appeal to me most. October has just been VeganMoFo, a celebration of the massive variety of amazing vegan food produced and eaten by a talented, imaginative and committed group of people. VeganMoFo, the Vegan Month of Food is designed to showcase whatever the person blogging wants to talk about, as long as it's vegan. One of my favourite vegetarian blogs, Johanna at Green Gourmet Giraffe has been participating in MoFo this year, and she has produced some amazing things, as have so many other blogs I regularly read. The massive commitment here comes because the bloggers commit to posting either every week day, or every single day of the month. There really are so many inspiring blogs out there!


But anyway, back to the task in hand, vegan cupcakes. I bought Vegan Cupcakes Take Over the World (VCTOTW) quite a while ago mostly because I was annoyed that so many people were raving about recipes that I couldn't access (mostly on the Post Punk Kitchen forums) and I wanted a bite of the cherry (cake!) too...

These are the first cupcakes I've made from the book, and as luck would have it, one of the only three cupcake recipes on the PPK blog. It's a really interesting little book, with loads of different ideas that I definitely need to explore further. You can find the recipe here, with the original US cup measurements, but because I prefer to weigh I will give my measurements here. I will leave you to link for the method.I also used the melty chocolate ganache on pg 143 of the book rather than the choc mousse topping given in the link (though that does look particularly delicious!). I made a couple of minor amendments to suit what was available in my storecupboard.

Vegan Chocolate Cupcakes
Ingredients
225ml soya milk
7ml white wine vinegar
150g white caster sugar
70ml(g) light olive oil
1tsp vanilla extract
1/2tsp chocolate extract
125g plain flour
30g cocoa powder
3/4tsp bicarbonate of soda
1/2tsp baking powder
1/4tsp salt

Oh yum! These are fabulous. They are so soft, light and moist and with such a deep, rich red chocolatey colour and aroma that you couldn't fail to be pleased by them. The topping was amazing too - it was just sweet enough, and stayed soft and slightly gooey sticky, and really complemented the cupcakes very well indeed. A tiny, minor point is that personally I found the cake a touch sweet, but other colleagues commented that it wasn't too sweet - opinions obviously vary!


Once again, as with my avocado chocolate cupcakes, I was really impressed by the dark red colour of these cupcakes and work colleagues seemed to like them too. I had a recipe request from someone who prefers to avoid eggs and my lovely vegan colleague was really pleased that I had made cupcakes that she could have, and I was thrilled that she enjoyed them.

I think these could definitely become one of my go-to recipes - the method is easy because you don't have to soften butter or do any creaming step, and there is no worry that the eggs will curdle the mixture. All of the ingredients are storecupboard, even the milk, as it is easy to buy long-life cartons of soya milk, so there is never any excuse to not be able to whip up a batch.

As I said earlier, I'm not vegan, but these are seriously amazing cupcakes, and more fool you if you skip making them because you aren't willing to accept alternative ingredients!!!  

Monday, 24 October 2011

Chocolate cream cake with a jammy middle


It seems that round here, chocolate is the theme for the month, what with all of the chocolate containing goodies I made for Chocolate Week, and the preceeding double chocolate ricotta scones (oh so good!) and now this rather delicious chocolate cream cake. I shall have to make some more fruity cakes to balance it all out and make sure my ginger pear cake doesn't feel lonely... what can I say though, I love chocolate.

Anyway, I saw this chocolate cake recipe by Dan Lepard on the BBC website a while ago and was intruiged by the use of double cream in the ingredients. I can always rely on Dan to come up with something I haven't seen before, and I usually want to try them out. In this recipe the conventional amount of butter is replaced by the combination of a smaller amount of butter, a little oil and the double cream, all contributing to the fat content of the recipe but also to the liquid content.


I have to confess that I didn't have exactly the right ingredients in the house, so made a couple of small substitutions. Specifically I didn't have milk, so decided that I would use 120ml double cream plus 60ml water instead of 100ml double cream and 80ml milk. I suppose my cake ended up with a little more fat in it than the original recipe, but not by too much, and the liquid content was the same. I also went a different direction for my filling and topping. You can find the original recipe here, along with a video (next confession - I didn't watch the video before making the cake, but I'm sure it's an excellent video - the BBC ones always are!)

Chocolate cream cake with a jammy middle
Ingredients
100g unsalted butter
250g light muscovado sugar
50ml light olive oil
25g cocoa powder
2 tsp vanilla extract
4 medium free-range eggs
60ml water
120ml double cream
300g plain flour
3 tsp baking powder

For the filling and topping
A 340g jar of your preferred jam, I used blackcurrant
150g 37% cocoa solids chocolate
40g unsalted butter

Method
- Preheat the oven to gas 4/180C. Grease and line a 9"/22cm square cake tin. This was my guess, see rant later...
- Melt the butter over a low heat and then pour into a bowl with the sugar, oil, cocoa powder and vanilla extract. Beat well until smooth.
- Whisk in the eggs followed by the water and double cream. Yay, no curdling or splitting here!
- Sift in the flour and baking powder and mix until smooth.
- Spoon into the prepared tin and level. Cover with foil.
- Bake for 30 minutes covered then remove the foil and continue to bake. The recipe specifies 20 minutes, mine required about 35-40 minutes more, which is a lot extra. After an additional 20 minutes there was still liquid batter on my cake tester, but I was worried that I had overcooked it by leaving it so much longer, and that it would be dry.
- Allow to cool a little in the tin and then completely on a wire rack.

To decorate
- Melt the chocolate and butter together in a small bowl over warm water. Leave to cool a little.
- Split the cake in half, spread the jam over the middle and replace the top.
- Spread the chocolate mixture over the top, smoothing out until evenly spread. I found I had enough for a reasonable layer, not too thick, but not too mean!


Can I take exception with the instructions on the BBC here please... I'm not sure if Dan's original was transcribed properly, but 20cm is not 9", it's 8". 2.5cm = 1inch therefore 20/2.5 = 8. I also want to know if my cake tin is supposed to be round or square.... OK, rant over.

This really was an easy cake to make - melt and mix, my favourite kind!

It was an excellent cake - I needn't have worried about it being dry, it wasn't! The jammy middle and not-too-sweet topping provided a good contrast to the soft, chocolatey cake. I'm glad I tried this recipe - new techniques are always good to try, and this will be a good cake to have in the repertoire. (Much appreciated by colleagues too - I think they quite like chocolate cake!)

Sunday, 16 October 2011

Devil's Food Cake with Treacle Chocolate Fudge Frosting


Yes, this cake is just as rich and delicious as the title suggests! Well, I did want to go out on a high note at the end of Chocolate Week.

This is actually an amalgamation of recipes from two different authors. The original Devil's Food Cake is a(nother!!) recipe from the Great British Bake Off cookery book. I don't think I've used a book this much for ages, and definitely recommend it (and not because I didn't have to pay for my copy, just because it's a great book!). The treacle chocolate fudge frosting is a Dan Lepard recipe. It was originally published in his How to Bake guide that was given away free with the Guardian about four years ago, but has also been included in his new book, Short and Sweet (which is like Ottolenghi's Plenty, i.e. a collection of the recipes published over the years in his Guardian column, How to Bake) in an amended format.


Just a side note about this book; Short and Sweet is a great book, I would thoroughly recommend buying it (partly because I love cookery books, partly because I think Dan Lepard's recipes are great) but the book is a compilation of recipes already available on the Guardian website, so don't buy it under the illusion that you will be getting hundreds of brand-new-never-seen recipes from the master baker. This is in no way to criticise or put down the book, and I will enjoy using it, as all of the recipes are now collected into handy sections - bread, cakes and so forth, rather than me trying to remember when the recipe I think I want was published by the Guardian online.

Anyway, back to the cake in hand (or in the tummy actually!).... I will give you the recipe now, and leave you to imagine just how good this is... and it really, really is....


Devil's Food Cake
Ingredients
4 tbsp cocoa powder
175ml boiling water
1tsp bicarbonate of soda
100g dark chocolate (70% cocoa solids)
125g unsalted butter, softenend
350g caster sugar
2 large eggs, at room temp
1 tsp vanilla extract
300g plain flour, sifted
125ml sour cream, at room temp
Note to myself - I actually had room temp eggs and sour cream  for once!

Method
- Preheat the oven to Gas 4/180C. Grease and line two loose based 8"/20cm round cake tins.
- Pour the boiling water over the cocoa powder in a heatproof bowl and mix until smooth. Add the bicarbonate of soda and leave to cool.
- Melt the chocolate in another bowl and then leave to cool.
- Beat the butter until well softened then beat in the caster sugar. The recipe states until light and fluffy, but with this much sugar, the ratio means that it won't go light and fluffy.
- Beat the eggs with the vanilla and add gradually to the sugar/butter mixture, beating after each addition.
- Fold in the flour in three batches, alternating with the soured cream.
- Mix the cocoa and chocolate together and then fold into the cake mixture. Fold together thoroughly, until no streaks remain (I wasn't quite careful enough about this, and has a few tiny streaks).
- Divide the mixture between two tins and bake until risen and just firm. The recipe states 30 minutes. Mine were no-where near at 30 minutes and needed about 45-50. Much, much longer.
- Leave to cool a little in the tins (mine sank slightly) and then cool completely on a wire rack.


Treacle chocolate fudge frosting
As I said, this is based on this recipe, first published online, but modified in Short and Sweet.
The modifications are to remove the egg yolks and boiling water from the recipe, otherwise, the recipe is exactly as stated.

I halved the recipe, which gave ample to fill and top my cakes, but wouldn't have been enough to go round the edge of the cake too.

I have to take exception to the method given for the frosting though. I followed Dan's instructions and ended up with lumps of cornflour (and cocoa) that I couldn't satisfactorily get rid of. I decided to give up and start again rather than risk lumps of uncooked cornflour in my icing, very annoying. Thinking about it, I should have thought that this might happen. When I was being taught about cornflour, I was told to slake it in a little cold liquid before adding it to hot to prevent lumps forming, as you would when making (Bird's!) custard. So I repeated the icing, slaking the cornflour in 50ml of the milk, adding the cocoa and mixing that in too (difficult!) and then proceeding. This was far more successful!

The icing is really weird - it reminded me of making these chocolate custard muffins - you're making a cooked icing and the cornflour causes it to thicken to a very thick consistency - very odd!!! But rather delicious!

Use the icing while still warm, as it is much easier to use that way.


This was an absoutely amazing cake - rich and fudgy and oh so gloriously chocolatey!!! The frosting was actually a really good choice - it tasted quite treacly on its own, but combined with the soft, sweet chocolate cake it was the perfect soft, gooey partnership.

An amazing cake, perfect for a celebration, perfect to mark the end of chocolate week! I've really enjoyed baking and eating all these chocolate treats, and I hope you've all enjoyed reading about them!

Sunday, 14 August 2011

Review: The Great British Bake Off - How to Bake.....


When the Great British Bake-Off was on the BBC last year, I really enjoyed watching the contestants progress through the rounds, seeing what they would come up with for the various different challenges, and seeing how they all interpreted the 'technical challenge' recipes set by Mary Berry and Paul Hollywood. I can't say I've baked many of either Mary or Paul's recipes, not owning any books by them. Quite a few of the recipes from the first series are available here, on the BBC Food website. The new series starts on Tuesday 16th August, 8-9pm, BBC2. There will be 11 episodes and I'm looking forward to it!

I'm sure you can probably guess where this is leading... I was recently contacted by someone from Random House, the publishers who are behind the book that accompanies the new series of the Great British Bake Off to see if I would like to review the book. Now I didn't immediately jump at this offer, because I wasn't sure if the book would contain anything new or indeed, anything I wanted to bake, but after a delay and some umming and ahhing I decided to accept their offer. A book speedily arrived.

Disclaimer: Clearly, this is a publicity exercise for the book, and I received my copy free of charge. However, I have not been paid to write this review, and the opinions contained are my own - good or bad.

The book is laid out in chapters, presumably according to the order of the challenges that the participants will undertake in the TV series; Cakes, Biscuits and Teatime Treats, Bread, Pies and Savoury pastry, Tarts and Sweet Pastry, Patisserie, Puddings and Desserts and finally, Celebration Cakes. The recipes are predominantly by Linda Collister, with some of the technical challenge recipes (7 in total) by Mary Berry or Paul Hollywood, with some 'Best of the Bake Off' recipes in each chapter which are the contestant's own. I really like Linda Collister's baking, from another book that I already own by her, which swayed me to accepting this offer. And although initially dubious I'm glad I did.


The book is well laid out, and beautifully photographed and although some of the recipes don't have corresponding photos there are some very indepth step by step recipe photographs, for the 'How to Make the Perfect....' (one of these in most chapters) and the technical challenge recipes, which is a good idea. I appreciate photos of what I'm aiming for, being more of the inspired by photos than intimidated by them school of thought.


As I went through the book I was glad I'd accepted the offer because there are quite a few recipes that I wanted to bake straightaway, and more that I would like to bake when I have more time or want to challenge myself with something new (pastry and patisserie chapters, I'm thinking of you!). Some of the particularly delicious sounding recipes (well, to my mind anyway) are Rhubarb and Custard Cupcakes, Brandy Snaps, Sticky Maple-Apple Traybake, Monkey Bread, Stilton, Potato and Caramelised Onion Pie, Chocolate, Fennel and Ginger tarts and Chocolate Fudge Hot-Pot Pudding but there are many more calling out my name. I have lots of baking books but I really could spend a long time just baking from this one!

So what did I decide to make to start? I chose Stem Ginger Shortbread, Sticky Orange Marmalade Cake, and Chocolate Velvet Cup Cakes with Chocolate Fudge Frosting.


The stem ginger shortbread was lovely and easy to make, and eat. Perhaps not as crumbly as some I have made before, not my best, but a lovely basic recipe all the same. The sticky orange marmalade cake was lovely - again easy to make (are you seeing a theme emerging here!) but it looked really lovely and showed off my lovely homemade orange marmalade off to good effect. The only slight problem I had with it was that it sunk slightly when it cooled and had overbrowned slightly in the oven. I removed the very top layer of over-browning because the marmalade glaze on the cake and the icing would hide the top of the cake, but I found myself berating myself for not managing to make it perfectly and imagining what Mary Berry and Paul Hollywood would have said had my cake been up for judging. I'm sure that the dip in the middle wouldn't have gone down well, but I think they would have been pleased with the final taste and texture!

My favourite was the chocolate velvet cup cakes with chocolate fudge frosting. These can be found right at the back of the book, in the celebration cakes chapter, and it would be a shame to miss them, because they're delicious!


Chocolate Velvet Cup Cakes with Chocolate Fudge Frosting (reproduced with permission)
Ingredients
175ml semi-skimmed or full-fat milk (I used semi-skimmed aka 2%)
100g dark chocolate (70% cocoa solids)
125g caster sugar
60g unsalted butter, softened
1/2 tsp vanilla extract
1 large free-range egg, at room temperature, beaten
150g self raising flour, sifted

Method
- Preheat the oven to 180C/gas 4. Pour the milk into a small, heavy-based pan (preferably non-stick). Chop the chocolate and add to the milk with one-third of the sugar. Set over the lowest possible heat and leave until melted and smooth, stirring frequently. Remove from the heat. If necessary, give the liquid a quick whisk to amalgamate, then set aside until needed.
- Put the butter into a mixing bowl and beat until creamy with a wooden spoon or an electric mixer. Add the rest of the sugar and the vanilla and beat thoroughly for about 4 minutes or until the mixture is very light and fluffy.
- Gradually add the egg, beating well after each addition and scraping down the sides of the bowl from time to time. Using a large metal spoon fold in the flour in 3 batches alternatley with the chocolate liquid. When completely amalgamated spoon the mixture into the paper casess so they are evenly filled.
- Bake for 15-18 minutes or until the cakes are well risen and spring back when gently pressed with a finger. Remove the tray from the oven and leave to cool for about 2 minutes, then transfer the cup cakes to a wire rack and leave to cool completely before icing.

Chocolate fudge frosting
Enough for 12 cupcakes
100g dark chocolate (70% cocoa solids), chopped or broken up
1 rounded tablespoon golden syrup
50g unsalted butter

- Put the chocolate, golden syrup and butter into a heatproof bowl. Set over a pan of steaming hot but not boiling water (don't let the base of the bowl touch the water) and melt gently, stirring frequently. As soon as the mixture is smooth remove the bowl from the pan and cool, stirring frequently.
- When very thick and on the point of setting, swirl the frosting on top of the cup cakes using a round-bladed knife. Quickly add any decorations and leave to set.

My notes:
- My chocolate mixture did look a bit grainy, but it seemed to work ok.
- I inadvertently added half of the sugar to the milk mixture (why can't I divide 125g by three and get 40g not 60g???) but just put the rest in with the butter and it was fine!
- They actually took 15 minutes to bake!!! Yay, I usually find my cakes need longer than stated!
- Don't worry that the batter is very runny. I sort of spoon/poured it into the cases feeling very dubious indeed with visions of flat pancakes coming out of the oven only to be greeted by the beauties in the pic below!


I love this chocolate fudge frosting! It was beautifully bitter (I used Green and Black's 72% cooking chocolate) to offset the smooth sweetness of the cakes.
- Don't be greedy like me, and increase the quantities by 50%, you'll have far too much to fit on the cakes!
- The frosting took about 2 hours at ambient temperature (about 20C here) to reach almost-setting point, and until then was pretty much liquid. Have faith, and patience and you'll be rewarded!
These were utterly delicious. The cake was soft and smooth, moist and sweet and was offset really well by the slightly bitter chocolate frosting. I think this will be my go-to recipe for chocolate cupcakes from now, with the added advantage of needing less butter and eggs than a standard recipe and tasting fabulous! I'll also try and remember to make the frosting too, I much, much prefer it to chocolate buttercream which I tend to find too sickly sweet.


And if you've managed to get all the way to the end of that.... I have been offered two copies of the book to give away to my readers, but because it's a heavy book I'm sorry that this is only open to UK readers. Apologies to all my international visitors. To have a chance to win a copy of this book;
1. Become a follower of Cake, Crumbs and Cooking, if you aren't already.
2. Leave me a comment and let me know what your baking nemesis is - does pastry make you pale? do your scones leave people speechless? and what is your absolute favourite thing to bake?

This will close at midnight on the 20th August and I'll pick the winners by random number generator. I'll then contact you by email so if your email isn't obvious on your blog/website, please leave it in your comment :-)

LinkWithin

Related Posts Plugin for WordPress, Blogger...