Sunday 27 May 2012

Spelt Raisin Breakfast Loaf


It's been a while since I last made a fruit loaf for my breakfast - I've been eating hot cross buns for a good while now. Delicious but sadly all gone. I haven't baked with spelt for a while either, and find it a good flour to use for breakfast breads as it doesn't seem to have the slight bitterness that wholemeal flour sometimes has.

A mixture of wholegrain spelt and strong white flour ensures that the loaf rises well and keeps its shape, yet still has the goodness of wholemeal flour contained in it. Although this is a fruit containing loaf, it isn't sweet - I don't really want too much added sugar for my breakfast (I get that through the rest of the day...) so I don't add sugar to my loaves usually. Here the flame raisins provide a little natural sweetness to kick start the day.


I have used these rather lovely Fairtrade raisins in my loaf - they are enormous!


The ones to the right are normal raisins for comparison! The flame raisins are darker too. They are from Chile and distributed by Traidcraft. You can find out more about Fairtrade here on Traidcraft's website, and you can also see the huge range of products they stock here. I admit that I don't always use fairtrade ingredients, but I don't really have an excuse because they are becoming (and have already become) much easier to get hold of - all of the major supermarkets have pretty extensive Fairtrade lines, and in some cases only stock the fairly traded version of a product (I think bananas certainly fall into this category for some of the supermarkets).


Spelt Raisin Breakfast Loaf
Ingredients
150g wholemeal spelt flour
60g raisins
225g boiling water
150g strong white flour
1tsp instant yeast
1tsp salt

Method
- Weigh 75g of the wholemeal spelt into a large mixing bowl, add the raisins and pour over 225g boiling water. Mix well and leave for a while until cooled (not completely cold, but cooler).
- Add the remaining spelt flour and white flour, yeast, salt and mix to a soft dough. I found I needed probably about 25ml more water to allow the dough to come together.
- Leave for about 20 minutes to rest.
- Knead briefly and leave for a further 30 minutes or so to rest.
- Prod out the dough to a rectangle, roll the short side towards you into a tight roll and place on a baking tray lined with parchment paper.
- Leave to proove until increased in size. Mine didn't take all that longer - 30 minutes perhaps, perhaps a little more.
- Preheat the oven to gas 7/220C. Bake for 10 minutes then reduce the heat to gas 6/200C and bake a further 20 minutes. Turn over the bake the base for 10 more minutes at gas 6.
- Remove from oven and allow to cool on a wire rack.

The method may seem a little odd, but pouring boiling water over the flour is a technique I learnt from one of Dan Lepard's recipes (although it was a while ago so I can't remember which one!) and is supposed to be a very old technique - a portion of the flour is effectively 'cooked' by the boiling water and is supposed to help the loaf stay fresher for longer. I can't say I've tested this because my loaves are cut for the freezer as soon as they're cool - it's the only way I can keep them fresh enough for the rate I eat them. However, the technique also helps in a second way here - my flame raisins are quite shrivelled and dry, so sitting in the cooked flour mixture allows them to plump up nicely - making them juicier to eat and less likely to burn whilst baking too.


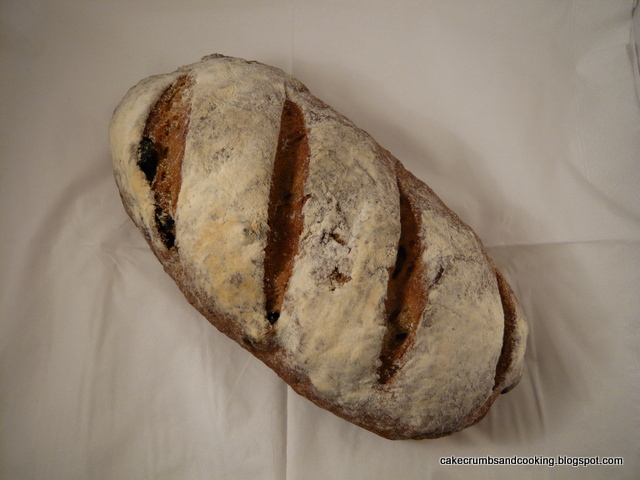
As I had hoped, this was an absolutely delicious bread. Not packed full of raisins, which wasn't the effect I was aiming for anyway - this is a loaf of bread with the occasional added raisin, rather than raisins held together by dough, if you see what I mean. It was very much enjoyed buttered for breakfast and would make fantastic toast, if you're so inclined! In fact, there's another one in the oven as I type!


I am entering this bread into this month's Fresh From the Oven challenge, which is Breakfast Fruit Breads, hosted this month by Sarah of La Cuisine de Sarah with a round up to be published by Michelle of Utterly Scrummy Food for Families and also into Breakfast Club (founded and hosted this month by Helen of Fuss Free Flavours), where the theme this month is Fairtrade ingredients.


Friday 25 May 2012

Chocolate Peanut Butter and Jam Cupcakes - Disaster Averted

Success

Regular readers will know that I have had numerous failures over the time that I have been blogging. I tend to share them because I hope that I have learnt something from my mistake (this is likely to be wishful thinking) and so that other people can learn from my mistakes. Sometimes a failure is just because I don't happen to like the end result, even if it was probably intended to turn out that way, sometimes a failure is down to a dodgy recipe and (quite often) a failure may just be down to my ineptness. It happens.

On the small side... wonder why?!

The majority of the failures are still edible, if not perfect. I had to share this one though because it was very nearly destined for the bin. I often use self raising flour, more often than I use plain flour. Guess what - this recipe is plain flour plus baking powder, or in my case, not plus baking powder. Fail. I realised as I checked the cakes after a while in the oven that the reason they really didn't seem to be rising very much (or at all...) was the fact that they were missing the vital raising agent. Not one of my finer moments. And so they were mentally destined for the bin.

But when they came out they just looked so dinky and more importantly smelled so, so delicious (can you imagine how good a cake containing peanut butter and light muscovado sugar smells while it is baking - it's delightfully nutty and yet caramelly too in a rich, complex way) that I couldn't resist a peek inside one of the cakes. Hmm, not too bad at all. Clearly not a well risen, light cake, but not the disasterous dense soggy mess that I had anticipated.


Plan B. Add jam. Peanut butter and jam (jelly for my American readers) is a combination made in heaven and the jam would also add moisture to the buns - they were a little on the dry side. Then as an added extra, melted chocolate dolloped onto the top would round off this treat very nicely. So I dug out a little cone from each cake, lopped a little of the soft crumb off, added a little raspberry jam and replaced the lid. When all my cakes were doctored with jam I melted chocolate (Cadbury's Dairy Milk here because although I'm a dark chocolate fiend there is something rather lovely about peanut butter and milk chocolate) and smoothed it generously over the top.


Need I really tell you that these went well at work? I'm going to make them again with the added raising agent because I think they'll be stunning with a little more lift. So my lesson here is not to write off a potential disaster until I've had a good inspection and a sneaky nibble too.

In fact, they were so good that I have already made them again with the added raising agent and as anticipated they were even better than before. The flavour is gently peanut buttery complemented by the jam and finished off with sweet chocolate - utterly delicious. Yum, even the memory of these is making me crave peanut butter!


Now the challenge for We Should Cocoa (hosted by Choclette) this month is almonds and is being guest hosted by Laura (@laura_howtocook) of How To Cook Good Food. When she announced the theme as almonds I was obviously disappointed, being allergic to them. However, I quickly tweeted and asked if I could make something with a different nut, and being rather lovely she said yes, this wouldn't be a problem. So hopefully these peanut butter cupcakes will be an honorary almond entry from someone who really wanted to enter, but didn't want to make herself ill..... And you could just as easily make them with almond butter too :-)

As the recipe has come straight from one of my books (a baking book from Marks and Spencer) I don't feel able to share the recipe here, but this combination is fabulous - I'm sure a search for a cupcake recipe with smooth peanut butter and light muscovado sugar will yield good results - or feel free to email me/leave a comment and I'll share that way!

Monday 21 May 2012

Floral Honey Cake


When this month's alphabake challenge was announced as the letter 'H' I had a quick think about which ingredients would fit. Hmm, more difficult than it sounded this month. I think we were eased in relatively easily with L, M and B. H is more tricky. I turned to my baking books and had a look in the indexes, which confirmed that there is actually very little under H. Two ingredients popped up time and again. Hazelnuts and Honey. I subsequently had a harder think and came up with a number of other H's; hummingbird, herbs, horlicks (?!) and then a hedgehog slice.


But actually I love honey so I decided to keep it simple and go for one of the obvious options (hazelnuts having been ruled out by allergy). I love the diversity of honey - the different colours, textures and flavours and just think it's such a wonderful natural product. What bees do for our life is utterly amazing and I wouldn't like to imagine life without them. (Wasps on the other hand ... begone nasty wasps)

I nearly bought heather honey to make this a double H entry, but then saw this beautiful Leatherwood honey. I've had this before and as the jar describes, it's strong and floral in scent, and I knew it would come through beautifully in a cake.

I kept the other ingredients simple to allow the flavour of the honey to shine through and sing. I used light muscovado sugar because this is such a beautiful caramelly complement to the honey.


Floral Honey Cake
Ingredients
60g butter
40g light muscovado sugar
40g honey (mine was tasmanian leatherwood honey)
1 large egg
80g self raising flour

Method
- Preheat the oven to Gas 4/180C. Grease and line a 6"/15cm round tin. I was using a loose based tin so did the whole base and side lining thing to try and avoid cake mix getting in the tin seams which makes it a pain to clean.
- Cream the butter, sugar and honey until light and fluffy.
- Add the egg and flour and continue to beat until all well combined and light.
- Scrape into the prepared tin and spread around/level off a bit.
- Place in the oven and bake for 30 minutes until springy to the touch and/or a cake tester inserted comes out clean.
- Allow to cool a little then remove from the tin and allow to cool completely on a wire rack.

This is such a lovely little cake, as I knew it would be, having made it before! It is moist and delicious and the honey flavour is utterly amazing. The added bonus of making this cake is that the whole time it is baking, the house smells of molten honey, which must be one of the most delicious scents known to man (well, to me!) during baking.


This cake is my entry into the alphabakes challenge this month, with the letter H. Alphabakes is hosted by Ros of The More than Occasional Baker and Caroline of Caroline Makes. The host this month is Caroline.


I am also entering this into Teatime Treats. The theme this month, alternately hosted by this month's host Karen of Lavender and Lovage and Kate of What Kate Baked is Floral or Flowers. I think my honey cake with honey from leatherwood flowers will qualify - after all if there were no flowers we would have very little honey!


Saturday 19 May 2012

Blueberry Banana Cake


I had an excess of very ripe bananas in my kitchen recently - bought for another recipe and it then turned out that I didn't need quite as many as I had thought I would. It had got to the stage of being able to enter the front door of the house and the banana smell hit me - I didn't even need to go into the kitchen! It was time for the bananas to be used up in cake. 


And although it's not blueberry season here in the UK yet, and won't be for a number of weeks yet I imagine, it must be blueberry season in Spain because the imported blueberries in the supermarkets are now being discounted from their expensive winter prices to something approaching affordable. After such a long time without soft fruit it is a treat to buy them to savour. A few remaining ones found their way into this cake. 


Blueberry Banana Cake
Ingredients
90g butter, softenend
120g light muscovado sugar
2 medium eggs
1 well ripened banana, mashed
150g self raising flour
55g blueberries
demerara sugar for sprinkling

Method
- Cream the butter and sugar until light and fluffy.
- Add the eggs, flour and banana and beat well until combined.
- Spoon into a lined 8" (20cm) cake tin (I used a preformed liner) and dot the top with the blueberries.
- Sprinkle with demerara sugar and bake for 35-40 minutes until a cake tester comes out with only a few crumbs sticking to it.
- Allow to cool.
- Eat!


Really, really delicious. I love the combination of bananas and blueberries and this cake was a complete hit, both with me and with my work colleagues too. I sometimes find that banana cakes can be (bear with me, as this sounds slightly dim) overwhelmingly banana-ry. I do enjoy eating bananas, and like their flavour, but the flavour of a banana loaf can sometimes be almost too intense, and the texture verging on wet rather than moist and light. This is a different kind of banana cake; a banana containing cake. The moisture from the banana is there, but the cake is light and the flavour is more subtle, whilst still being present. The blueberries add a welcome burst of juicy fruitiness and their own subtle flavour isn't too overwhelmed by banana. I think I'd fold through an additional handful of blueberries into the actual cake batter next time, to see if they float or sink. Oddly, the little strands of red that you usually get in banana cakes were absent here, perhaps there wasn't enough banana for them to be noticeable, or perhaps it's to do with the composition and maybe pH of the cake. Who knows, and to be honest, when it's this delicious who really minds anyway!


A perfect balance. Here it's all about the cake; with a lovely crunchy demerara sugar topping no icing is necessary. I can see more cakes like this on the horizon and I'm sure it would work well with raspberries too. I'm entering this into Javelin Warrior's 'Made with Love Mondays' promoting making things from scratch. Well, not only is this made from scratch, I've made the recipe up too!


Tuesday 15 May 2012

Sweet Potato Bread (Yeasted)


Do you ever stare at random ingredients and wonder what would happen if you tried to incorporate them into a recipe you've made before? Just me? Having unsucessfully attempted to find a (published) recipe that would use sweet potato as part of a yeasted loaf, I decided to create my own. This is bread, it isn't sweet - it's just that I used a sweet potato!

Yeasted Sweet Potato Bread
Ingredients
350g strong white bread flour
1 tsp instant yeast
1 tsp salt
1 smallish sweet potato (mine weighed 130g before peeling)
200-250ml warm water

Method
- Peel the sweet potato and chop into little pieces. Microwave with a splash of water (or steam it) until tender.
- I was intending to mash the potato with a fork but it wasn't happy with this, so I blitzed it with about 100ml of the water until it formed a smooth puree using a handheld stick blender.
- Mix the flour, salt, yeast, sweet potato puree and remaining water in a large bowl. You want a fairly soft dough. Leave for a few minutes to start the process of the flour absorbing some of the water.
- Knead briefly. Leave for a while. I got distracted so don't know how long this was, maybe 30-45 minutes.
- Knead briefly again and leave again. The dough grew a lot!
- Knock back gently and then leave to relax again for about 10 minutes. Grease a 2lb loaf tin.
- Pat the dough out to a rectangle and roll up tightly. Squash it down into the tin, cover and leave to increase in size.
- I don't think mine took very long, perhaps 30 minutes or so, but it will depend on the temperature of your kitchen and so forth.
- Preheat the oven to gas 7/220C. Flour and slash the loaf. Bake for 8 minutes, turn the heat down to Gas 6/200C and bake for a further 25 minutes. Turn out of the tin, return to the oven upside down and allow the base of the loaf to brown for about 10 minutes.
- Allow to cool on a wire rack.


This has to be one of the softest, lightest white (well, pale orange really!) loaves I've ever made! The crust was never crunchy - I guess the sweet potato prevented this, and the crumb is superlight and supersoft. Although I can't taste the sweet potato in the final loaf (I wasn't really expecting to) the colour is definitely there - the bread is a beautiful shade of orange! I think this would be perfect for children - the bread is easy to make, and really soft and pleasing to eat. It wouldn't be my bread of choice all the time - I do really, really enjoy a chewy crunchy crust on my loaf, and a sturdier crumb, but this one does have a place in the repertoire of breads I've made.


I think it would make a perfect family loaf so I'm going to share this with Family Friendly Fridays, being hosted this month by Clare of The Vegetarian Experience and founded by Ren of Fabulicious Food.


Friday 11 May 2012

Marmalade and Apricot Loaf Cake


I really need to start planning more seriously before buying. And then follow through on those plans. Before Christmas I had a vague, half formed idea in my head that it would be really good to make dried apricots in brandy as a gift for my lovely mother. Sadly, time ran away with me and they never did get made. I did accomplish the first step of the plan to make them though... I bought the dried apricots. Really quite a lot of apricots as it happens, because the Kilner jar I was planning on using can take quite a lot of fruit and I thought having a few spare wouldn't be a problem.

I think you're probably getting the idea of where this post is going. Yes, I now need to use up rather a lot of dried apricots. The loaf made a small dent in the bag, but the journey of a thousand miles and all that...


It's a surprisingly good combination. Marmalade and apricot, apricot and marmalade. The apricots (and don't be put off their appearance - I favour the unsulphured dried apricots which are naturally darker than their sulphur dioxide preserved sunny cousins) are intensely sweet and the marmalade adds that bitter edge to counter the sweetness. I was pretty impressed given that I was just glancing around to see what on earth I could do with all these apricots! (Other ideas welcome....)

Hmm, apparently this was such an off-the-cuff loaf that I didn't bother to make a note of either the ingredients or the method. This is annoying and slightly distressing because I want to share this loaf cake, and I want to be able to make it again. Ah well, my (very vague) memories of making it will just have to suffice.

Marmalade and Apricot Loaf Cake
Ingredients (I think I used something approximating the list given below...)
125g softened butter
125g caster sugar
2 eggs
2tbsp homemade marmalade (probably about 40g)
60g dried apricots, chopped small (I used unsulphured and they were rather dry - I was worried they'd shrivel up and be nasty and chewy but they weren't)
125-150g self raising flour (I genuinely can't recall this)
there may or may not have been a spoonful of yogurt in there...

Method - more secure than the ingredients list, as I can remember what I did!
- Preheat the oven to gas 4/180C. Grease and line a 2lb loaf tin. Cream together the butter and sugar until light and fluffy. Add the eggs, marmalade and flour and continue beating until well combined. Fold through the apricots and spoon into the prepared tin. Bake for around 40-50 minutes. I recall thinking that 35 minutes would be enough for this rather shallow loaf cake, but mine took about 50. Remove from the tin and leave to cool on a wire rack.


As I said earlier, this is a successful combination - bitter shreds of peel, sweet chunks of apricot and a rich buttery cake to offset it all. Rather happily consumed by my work colleagues. And rather appropriately, I started this blog 400 posts ago with a marmalade cake for my very first post :-) I have indeed reached 400 posts and although those who find the time to blog every day will no doubt scoff at my measly total, I'm rather proud of myself!

Sunday 6 May 2012

Chocolate Gingerbread Bundt Cake

Well turned out

Well, it turns out that the naff, wet weather we've been having recently has fooled my brain into wanting warming wintery cakes (that and chocolate, but the chocolate's pretty much a given around here...). What does this mean for me? Well, soft and spicy is often the way to go. These ginger and treacle scones have been keeping me going in the ginger stakes, but I really wanted something more cake-y than scones too. (And there might be an update to the scone recipe appearing soon - I remade them with a few tweaks that I want to record).

See the little bits of ginger trying to hide?

Enter this recipe from the ever reliable (and oh-so-easy-to-search) BBC Good Food website. It looks the part and the promise of rich deep flavour from the combination of spices, dark chocolate and stout was a winner. Except I don't generally have 100ml Guiness or stout just hanging around waiting to be used in a cake recipe. No fear, milk will make an adequate substitute, giving a different but equally satisfactory result.

The tin specified by the recipe is a 2 litre bundt tin. I poured water into mine and it held exactly 2 litres. Good result you would think! But actually, I didn't want to run the risk of the cake overflowing the edges of the tin and giving me cause to scrape remains from the base of the oven so I scaled the recipe back to 2/3 of that specified. I've given my quantities below. From past experience of this type of gingerbread, the batter goes in rather runny and even though I can never imagine it becoming coherent cake, it magically does, and usually rises well too. Hence the caution with the tin. I think (with hindsight) that the tin would have contained the full amount of batter, but as expected, the cake did rise quite well too, so I wasn't upset with having chosen to scale back the recipe.

Soft and moist and utterly luscious


Chocolate Gingerbread Bundt Cake
Ingredients (scaled to 2/3 of original recipe)
100g unsalted butter
66g golden syrup
50g treacle
115g dark muscovado sugar
90g dark chocolate (should have been 115g but 90g is what I had!)
2 balls stem ginger, chopped
65ml milk (I used semi skimmed)
1/2 tsp bicarb (scant)
135g plain flour
scant tsp baking powder
2 tsp ginger
1 tsp ginger
1/2 tsp allspice
2 eggs

In step two you add the bicarbonate of soda with the instruction that it will foam and froth up. I added my bicarb and for a couple of moments wondered if it was somehow past its best (yet still being well within its best before date) but then lo and behold, the foaming started. It wasn't uncontrollable, but it was a really weird mixture! Just don't be alarmed! I have to say that the technique of mixing the liquid into the dry works far, far better than adding the flour to the liquid ingredients. I have tried the dry into wet method before (as specified by Nigella for her gingerbread recipe) and inevitably end up with lumps of dry flour in the mixture, even if I sift the flour. From now on wet gradually into dry is the way forward.

Spot the pieces of ginger - yum!

I managed to leave my cake a full 4 days before cutting it (wrapped in clingfilm) and was rewarded with a deliciously moist, spicy cake full of flavour and a hint of chocolate, adding to the rich aromas and flavours of the cake. The cake wasn't overwhelmingly gingery or spicy but the spices all complemented each other well, being more than the sum of their parts, with the chocolate adding to this effect. The little chunks of stem ginger were really lovely too, and happily didn't all sink to the bottom as can sometimes be the case with gingerbreads. Can you tell I really, really love gingerbread? I'd thoroughly recommend this recipe, definitely a keeper.


Wednesday 2 May 2012

Chocolate Pear Crumble Cake


I like pears raw, but I like them cooked too, so having bought a few too many I set about making them into a delicious cake to share with my colleagues. Pears and chocolate are always a good combination so chocolate was my next ingredient of choice for the cake and light muscovado sugar to add that depth of flavour that complements chocolate so well.

You can see the gorgeous chunks of soft pear in the cake and you could even kid yourself it was part of your five a day! (Disclaimer - it isn't ;-))


Chocolate Pear Crumble Cake
Ingredients
140g butter, softened
140g light muscovado sugar
210g self raising flour
15g cocoa powder
2 eggs
2 medium conference pears (mine weighed 260g total, before peeling), peeled, quartered and cored

For the crumble
45g plain flour
10g cocoa powder
40g butter
35g demerara sugar

Method
- Preheat the oven to gas 4/180C. Grease and line an 8"/20cm tin. I used a premade parchment paper liner and used my springform tin.
- For the crumble, melt the butter and then add the flour, cocoa powder and sugar. It should form a stiffish paste rather than a dry crumble.
- Cream together the butter and sugar until light and fluffy. Add the flour, cocoa powder and eggs and continue mixing until well combined.
- Chop the peeled pears into the mixing bowl (my pieces were about 3/4cm big) and fold them in by hand. It's quite a stiff mixture.
- Spoon into the prepared tin and level as best you can.
- Crumble over the crumble mixture - just break little chunks of the mixture onto the top of the cake.
- Bake in the preheated oven for around 45 minutes (although I confess I can't remember exactly how long mine took) until a cake tester comes out clean.
- Allow to cool, or alternatively serve warm with ice cream, cream or custard for dessert.


Love the texture of cooked pear - slightly grainy and it didn't disappear into the background of the cake. The soft moist pear and cake are complemented well by the slightly crunchy crumble topping, it was a thoroughly enjoyable cake to make and eat. One of my colleagues said this was her favourite cake yet - high praise indeed!


LinkWithin

Related Posts Plugin for WordPress, Blogger...