Saturday 29 October 2011

Pear and ginger buttermilk muffins


These came about because I had a surfeit of various ingredients that I wanted to get rid of make into something delicious. First on the agenda - half a carton of buttermilk. Next up, a half used tub of half fat creme fraiche. Thirdly, some rather ripe pears that I am singularly failing to eat in raw-fruit-good-for-you form. Finally, crystallised stem ginger. I suppose the last one didn't really need using up as such, but with it being autumn now, spice seems right and the pear/ginger combo appealed.


I based my muffins on a buttermilk muffin recipe in a little book I have had for years, Susan Reimer's 'Muffins - fast and fantastic'. But I've adapted the recipe so much I very much doubt the author would recognise it.

Pear and ginger buttermilk muffins
Ingredients
300g plain flour
1 tsp bicarbonate of soda
1/2 tsp salt
90g white caster sugar
2 tsp ground ginger
1 egg
130ml buttermilk
90g half fat creme fraiche
80ml water
85g unsalted butter, melted
90g crystallised stem ginger, chopped
2 small ripe pears (I used conference, and they weighed 180g before peeling) peeled, cored and chopped
demerara sugar for sprinkling

Method
- Preheat the oven to 200C/Gas 6. Line a 12 hole muffin tin with papers.
- Sift together the flour, salt and bicarbonate of soda. Stir in the ground ginger and sugar.
- Mix together the wet ingredients, beating the egg into them.
- Melt the butter.
- Pour the wet ingredients into the dry and mix to almost combine.
- Add the chopped pear and ginger and continue until just mixed.
- Divide between the cases, scatter with demerara sugar and bake for 25 minutes until well risen and golden brown.


These were lovely - full of juicy chunks of ripe pear and little nubbles of crystallised stem ginger. Yum! I have to admit that they weren't quite gingery enough for me, in spite of having used 2tsp ground ginger in them. Perhaps a tbsp would have been better. They were nice and gingery when you encountered one of the (frequent) chunks of stem ginger though - yum! The pear is very subtle - I wonder if using tinned pear would up the pear flavour a little as it was more of a texture (a good one though!) in these muffins.

Tasty and warming for a cold autumn day.

Monday 24 October 2011

Chocolate cream cake with a jammy middle


It seems that round here, chocolate is the theme for the month, what with all of the chocolate containing goodies I made for Chocolate Week, and the preceeding double chocolate ricotta scones (oh so good!) and now this rather delicious chocolate cream cake. I shall have to make some more fruity cakes to balance it all out and make sure my ginger pear cake doesn't feel lonely... what can I say though, I love chocolate.

Anyway, I saw this chocolate cake recipe by Dan Lepard on the BBC website a while ago and was intruiged by the use of double cream in the ingredients. I can always rely on Dan to come up with something I haven't seen before, and I usually want to try them out. In this recipe the conventional amount of butter is replaced by the combination of a smaller amount of butter, a little oil and the double cream, all contributing to the fat content of the recipe but also to the liquid content.


I have to confess that I didn't have exactly the right ingredients in the house, so made a couple of small substitutions. Specifically I didn't have milk, so decided that I would use 120ml double cream plus 60ml water instead of 100ml double cream and 80ml milk. I suppose my cake ended up with a little more fat in it than the original recipe, but not by too much, and the liquid content was the same. I also went a different direction for my filling and topping. You can find the original recipe here, along with a video (next confession - I didn't watch the video before making the cake, but I'm sure it's an excellent video - the BBC ones always are!)

Chocolate cream cake with a jammy middle
Ingredients
100g unsalted butter
250g light muscovado sugar
50ml light olive oil
25g cocoa powder
2 tsp vanilla extract
4 medium free-range eggs
60ml water
120ml double cream
300g plain flour
3 tsp baking powder

For the filling and topping
A 340g jar of your preferred jam, I used blackcurrant
150g 37% cocoa solids chocolate
40g unsalted butter

Method
- Preheat the oven to gas 4/180C. Grease and line a 9"/22cm square cake tin. This was my guess, see rant later...
- Melt the butter over a low heat and then pour into a bowl with the sugar, oil, cocoa powder and vanilla extract. Beat well until smooth.
- Whisk in the eggs followed by the water and double cream. Yay, no curdling or splitting here!
- Sift in the flour and baking powder and mix until smooth.
- Spoon into the prepared tin and level. Cover with foil.
- Bake for 30 minutes covered then remove the foil and continue to bake. The recipe specifies 20 minutes, mine required about 35-40 minutes more, which is a lot extra. After an additional 20 minutes there was still liquid batter on my cake tester, but I was worried that I had overcooked it by leaving it so much longer, and that it would be dry.
- Allow to cool a little in the tin and then completely on a wire rack.

To decorate
- Melt the chocolate and butter together in a small bowl over warm water. Leave to cool a little.
- Split the cake in half, spread the jam over the middle and replace the top.
- Spread the chocolate mixture over the top, smoothing out until evenly spread. I found I had enough for a reasonable layer, not too thick, but not too mean!


Can I take exception with the instructions on the BBC here please... I'm not sure if Dan's original was transcribed properly, but 20cm is not 9", it's 8". 2.5cm = 1inch therefore 20/2.5 = 8. I also want to know if my cake tin is supposed to be round or square.... OK, rant over.

This really was an easy cake to make - melt and mix, my favourite kind!

It was an excellent cake - I needn't have worried about it being dry, it wasn't! The jammy middle and not-too-sweet topping provided a good contrast to the soft, chocolatey cake. I'm glad I tried this recipe - new techniques are always good to try, and this will be a good cake to have in the repertoire. (Much appreciated by colleagues too - I think they quite like chocolate cake!)

Wednesday 19 October 2011

Ginger pear cake


I have once again proved to myself that my willpower is non-existent, at least when it comes to the buying of new cookery books, and in this case more specifically, baking books. Yes, the new Primrose Bakery Book jumped into my basket as I walked around the supermarket a few days ago. I did have a quick flick through it though first, to make sure there were recipes in there that I wanted to make. There were.

When I got home I started looking through properly and deciding what to make first. A very tough decision because, as with their last book on cupcakes, there are so many things in there I wanted to make. However, with all of the beautiful autumn fruit around at the moment I couldn't help but see the ginger pear cake calling out to me from the page.

It took quite a while to pull together - there's a creamed butter and sugar mixture to be spread onto the base of the tin, then the pears to peel, slice and arrange and then the cake to make, with lots of different ingredients, but none of it was difficult (apart from trying to find all of my spices! I have a sneaking suspicion that my ground cloves are well out of date, but never mind).


As the book has only just been released I can't find any mention of this recipe on the internet and I followed it quite closely so don't feel it is right to reproduce it. For my own memory and notes I used 2/3 of the topping ingredients and two pears and then changed the spice mix a little. I ended up using 2tsp ground cinnamon, 2tsp ground ginger, about 1/4tsp ground cloves and probably about 1/2 tsp ground nutmeg (but I got bored grating it!!!).

I used my springform tin and because I know this tin has leaked in the past, wrapped it in some tin foil before putting it in the oven. I'm very, very glad I did, because most of my sticky topping appeared to be trying to escape from the tin when I took it out of the oven. Sticky is an understatement too, I'm so glad I caught it in the tin foil!


Really weirdly, when I cut into the cake I found that there were some very odd tunnels in it. I'm wondering if this is an effect caused by the sugar/butter combination in the base of the tin somehow traveling up through the cake mixture - any other ideas?


Really good cake though - nice subtle pear flavour in the topping, combined with the stickiness of the caramel type layer and then the soft cake underneath, all interspersed with delicious bits of chopped ginger - you can just see one in the picture above.


I think this is a perfect autumn cake, and would also make a perfect autumn dessert - just serve with plenty of delicious hot custard. And because this is so perfectly autumnal I am submitting it to the lovely Kate of What Kate Baked for her autumnal baking challenge.

Sunday 16 October 2011

Devil's Food Cake with Treacle Chocolate Fudge Frosting


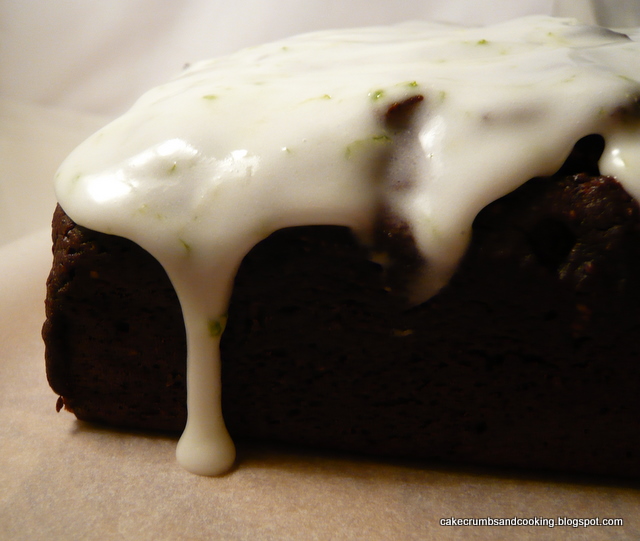
Yes, this cake is just as rich and delicious as the title suggests! Well, I did want to go out on a high note at the end of Chocolate Week.

This is actually an amalgamation of recipes from two different authors. The original Devil's Food Cake is a(nother!!) recipe from the Great British Bake Off cookery book. I don't think I've used a book this much for ages, and definitely recommend it (and not because I didn't have to pay for my copy, just because it's a great book!). The treacle chocolate fudge frosting is a Dan Lepard recipe. It was originally published in his How to Bake guide that was given away free with the Guardian about four years ago, but has also been included in his new book, Short and Sweet (which is like Ottolenghi's Plenty, i.e. a collection of the recipes published over the years in his Guardian column, How to Bake) in an amended format.


Just a side note about this book; Short and Sweet is a great book, I would thoroughly recommend buying it (partly because I love cookery books, partly because I think Dan Lepard's recipes are great) but the book is a compilation of recipes already available on the Guardian website, so don't buy it under the illusion that you will be getting hundreds of brand-new-never-seen recipes from the master baker. This is in no way to criticise or put down the book, and I will enjoy using it, as all of the recipes are now collected into handy sections - bread, cakes and so forth, rather than me trying to remember when the recipe I think I want was published by the Guardian online.

Anyway, back to the cake in hand (or in the tummy actually!).... I will give you the recipe now, and leave you to imagine just how good this is... and it really, really is....


Devil's Food Cake
Ingredients
4 tbsp cocoa powder
175ml boiling water
1tsp bicarbonate of soda
100g dark chocolate (70% cocoa solids)
125g unsalted butter, softenend
350g caster sugar
2 large eggs, at room temp
1 tsp vanilla extract
300g plain flour, sifted
125ml sour cream, at room temp
Note to myself - I actually had room temp eggs and sour cream  for once!

Method
- Preheat the oven to Gas 4/180C. Grease and line two loose based 8"/20cm round cake tins.
- Pour the boiling water over the cocoa powder in a heatproof bowl and mix until smooth. Add the bicarbonate of soda and leave to cool.
- Melt the chocolate in another bowl and then leave to cool.
- Beat the butter until well softened then beat in the caster sugar. The recipe states until light and fluffy, but with this much sugar, the ratio means that it won't go light and fluffy.
- Beat the eggs with the vanilla and add gradually to the sugar/butter mixture, beating after each addition.
- Fold in the flour in three batches, alternating with the soured cream.
- Mix the cocoa and chocolate together and then fold into the cake mixture. Fold together thoroughly, until no streaks remain (I wasn't quite careful enough about this, and has a few tiny streaks).
- Divide the mixture between two tins and bake until risen and just firm. The recipe states 30 minutes. Mine were no-where near at 30 minutes and needed about 45-50. Much, much longer.
- Leave to cool a little in the tins (mine sank slightly) and then cool completely on a wire rack.


Treacle chocolate fudge frosting
As I said, this is based on this recipe, first published online, but modified in Short and Sweet.
The modifications are to remove the egg yolks and boiling water from the recipe, otherwise, the recipe is exactly as stated.

I halved the recipe, which gave ample to fill and top my cakes, but wouldn't have been enough to go round the edge of the cake too.

I have to take exception to the method given for the frosting though. I followed Dan's instructions and ended up with lumps of cornflour (and cocoa) that I couldn't satisfactorily get rid of. I decided to give up and start again rather than risk lumps of uncooked cornflour in my icing, very annoying. Thinking about it, I should have thought that this might happen. When I was being taught about cornflour, I was told to slake it in a little cold liquid before adding it to hot to prevent lumps forming, as you would when making (Bird's!) custard. So I repeated the icing, slaking the cornflour in 50ml of the milk, adding the cocoa and mixing that in too (difficult!) and then proceeding. This was far more successful!

The icing is really weird - it reminded me of making these chocolate custard muffins - you're making a cooked icing and the cornflour causes it to thicken to a very thick consistency - very odd!!! But rather delicious!

Use the icing while still warm, as it is much easier to use that way.


This was an absoutely amazing cake - rich and fudgy and oh so gloriously chocolatey!!! The frosting was actually a really good choice - it tasted quite treacly on its own, but combined with the soft, sweet chocolate cake it was the perfect soft, gooey partnership.

An amazing cake, perfect for a celebration, perfect to mark the end of chocolate week! I've really enjoyed baking and eating all these chocolate treats, and I hope you've all enjoyed reading about them!

Friday 14 October 2011

Thick Chocolate Oat Crunch Biscuits


Theme of the week - yes, Chocolate Week continues - so much chocolate, so little time....

As a change from cake, I fancied sweet, crunchy biscuits but naturally these had to incorporate chocolate in some way. Instead of incorporating the chocolate into the biscuit, my recipe said to dip the finished biscuits into chocolate - who am I to argue?


I'm so in love with oaty flavours at the moment - oats for me are a warming, comforting flavour, perfect for autumn baking and perfect in this traditional crisp biscuit. I sort of want to call these cookies, because then my American readers will know clearly what I'm talking about, but actually, this recipe comes from the National Trust Teatime Baking Book, and really, what could be more British than that? So really, these are biscuits, but in the very English sense of the word (so a cookie if you're in America, and possibly a biccie for my Australian readers?). Anyway, what really matters is that these are absolutely smothered in a thick layer of chocolate.

If you search chocolate recipes on this blog you will see that I predominantly favour dark chocolate. I did used to love milk chocolate but went off it a number of years ago. However, I know that many people do not share my love of bitter chocolate, so I decided to appeal to those milk chocolate lovers out there and dip in milk chocolate for these.


Slightly adapted from the National Trust Teatime Baking Book, I give you....

Chocolate Oat Crunch Biscuits
Ingredients
100g butter, softened
100g caster sugar
1 tsp golden syrup
100g self raising flour
100g porridge/rolled oats
1/2 tsp bicarbonate of soda

For coating
200g milk chocolate (or dark or white, to your wish!)

Method
- Preheat the oven to Gas 2/150C. Line a baking tray with silicon parchment.
- Cream the butter and sugar and syrup until light and fluffy.
- Add the other ingredients and work together - it will all form eventually, but mine was a little crumbly - it doesn't really matter, you don't need a smooth ball of dough.
- Form the mixture into balls the size you desire - the original recipe says it makes 16 biscuits, I made about 30.
- Place on baking tray, spaced a little apart, but they don't spread too much. Press down lightly with your hand to squash them a little. Bake for 20 minutes until pale golden. Longer will give you crunchier biscuits.
- Allow to cool completely on a wire rack.

-When cool, melt the chocolate in a narrow but deep container (a cup or small bowl) and dip the biscuits in, swishing around to half coat them well.
- Place on greaseproof/parchment paper and allow to set.


Oh so good. The chocolate formed a really thick layer and was a delight to eat. Oaty and crunchy and chocolatey deliciousness. These disappeared in double quick time - absolutely perfect for eating with a cup of tea or coffee, and I bet they're amazing dunked into said cup, until the crunch of the oats softens slightly and the chocolate goes melty and gooey.... mmmm, I wish I had one by my side right now with a big mug of hot chocolate.

Thursday 13 October 2011

Storecupboard chocolate cake - grapefruit


Yes, National Chocolate Week continues, as does my celebration of the delicious substance!

This is the chocolate cake recipe I turn to when I have run out of other ideas and want a reliable, rich, bitter and fudgy cake. I've made this cake many times over the years, it's definitely a keeper.

The recipe comes from Nigella Lawson and she actually uses the base recipe twice in her How to be a Domestic Goddess book. It's the storecupboard chocolate cake, but it's also the chocolate cherry cupcake recipe base. It's very adaptable - the original recipe calls for orange marmalade (mmm, marmalade) but I have used any number of different jams at different times, and this time I used grapefruit marmalade. It's a very handy recipe because it helpfully uses pretty much the whole jar of marmalade/jam (if you buy the 340g ones obviously, but these are pretty common now, where pound jars used to be more common - 454g) so no annoying half jars hanging around.


Chocolate grapefruit cake
Ingredients
125g butter
100g dark chocolate, broken into pieces (I used Lindt 70%)
300g grapefruit marmalade
125g caster sugar
2 large eggs, beaten
150g self raising flour

Method
- Preheat the oven to 180C/Gas 4. Line an 8" springform tin.
- Melt the butter in a large saucepan (the saucepan is your mixing bowl and will have to take all the other ingredients).
- When it is melted, add the chopped chocolate and leave until starting to melt. Stir the chocolate until completely melted. Add the marmalade and sugar and stir well until smooth and amalgamated. Add the eggs and stir again to combine.
- Add the flour and beat in until smooth.
- Pour into the prepared tin and bake for about 50 minutes, although mine always takes about an hour. It's a good idea to cover the cake with foil for the last 20-30 minutes or so (i.e. cover after about 30 mins of cooking) as I find the top gets very dark and erm... caramelised.
- Remove cake from oven and allow to cool on a wire baking rack.

It seems to be in the nature of this cake that the surface is quite dark, almost burned/caramelised. While this is sometimes quite nice, I have taken to putting a greaseproof paper/foil cover over it part way through baking to prevent the top darkening too much.

I adore the texture of this cake - it's so moist and rich and fudgy. In the same way as brownies contain an obscene amount of sugar, so does this recipe - there's the sugar in the recipe, but also that in whatever preserve (jam/marmalade etc) you've chosen to use. I think my favourite incarnation is the original - the bitterness of the orange and the bits of peel are the perfect complement to the aforementioned sugar!


This particular incarnation was quite bitter, and has made me wonder how it would work with milk chocolate instead of 70%, just to counter some of the bitterness brought by the grapefruit marmalade. Next on the list to make with this recipe is a ginger chocolate cake using ginger preserve. Mmmmm, chocolate ginger!

Wednesday 12 October 2011

Chilli Chocolate Fudge Cake


It seems only right that my celebration of Chocolate Week should contain my submission to We Should Cocoa, the challenge designed to celebrate chocolate in all ways throughout the year. This time, Choclette from Chocolate Log Blog is hosting and she has chosen chilli as the ingredient to pair with chocolate for this month's challenge.


A tricky one, I'm sure you'll agree, but instead of remembering things I'd like it to, my brain is littered with the sparks associated with recipes I've seen and been meaning to make for ages. So when the chilli challenge  was announced, this recipe from Dan Lepard immediately popped it's head up and demanded attention. Apparently my memory is pretty long for cake related issues, as this recipe was first posted in September 2008.


I made only minor changes to the recipe - I substituted crunchy peanut butter for the tahini, as I don't have tahini and I do have peanut butter and wanted to use it up. I used the smaller amount of chilli flakes (1/4tsp). I also used the stipulated 8" square tin rather than the pictured round one!!!

The recipe was a little involved to make, with a few different steps, but none of them were difficult. I think the cake was probably done at 1 hour, but I left mine a further 10 minutes, which may have been a mistake...

The chilli heat was a slow build, you couldn't really tell it was there at first, but there was a chilli aftertaste. The predominant taste was of peanuts, and the contrasting lime icing was really delicious and refreshing, I wish there had been more icing to cake - perhaps baking in a shallower tin would help here. The cake was very crumbly in texture, and I don't know whether this is how it was meant to be, or whether I'd overbaked it, but it was tricky to pick up and eat! It was really well received at work, and I had a recipe request (with the requestee being directed to the Guardian website!) too!

All in all, not my favourite chocolate cake, but definitely an interesting and different kind of chocolate cake for the more adventurous baker/eater of chocolate cakes!

Tuesday 11 October 2011

Chocolate Crackles


When I was contemplating what I could bake to celebrate Chocolate Week, I thought that really, baking seven cakes was a bit much, and I'd be better to break it up a bit with some biscuits! I've wanted to make chocolate crackles for ages now, I just love the way they look, and always wondered if I'd be able to get as good a result as those printed in the books.

I've actually got a couple of books with these little biscuits in them - Easy Baking (by Linda Collister) and the Great British Bake Off second series book, which also contains them (also by Linda Collister) but with slightly different proportions in the recipe, it must be a relatively forgiving recipe. I decided to follow the recipe in the GBBO book. I'm really enjoying using this book, and fully recommend it!


Chocolate Crackles
Ingredients
100g dark chocolate (70% cocoa solids)
100g unsalted butter, softened
150g light muscovado sugar
1 large free range egg, at room temp
1/2 tsp vanilla extract
175g self raising flour
1/2 tsp bicarbonate of soda
icing sugar to roll - about 3-4 tbsp
(unusually for me, I was using unsalted butter, and my egg was at room temp!)

Method
- Melt the chocolate, either over hot water, or in the microwave if you prefer (I didn't).
- Stir in the butter and leave to melt for a bit. When completely melted, add the sugar, stir in and leave a couple of minutes to cool.
- Beat the egg and vanilla (in a large bowl) just to combine then add the chocolate/butter/sugar mixture to this.
- Sift the flour and bicarb onto the wet mixture (this is why I used a big bowl) and mix well to combine. The mixture will be pretty wet, and you're not going to fancy making biscuits out of it, but don't panic! Cover with clingfilm and allow to chill for at least one hour (I ended up leaving mine much longer - about half a day!)

                                                            ********************

- Preheat the oven to 200C/Gas 6. Line a baking sheet with parchment paper. I only baked one tray at a time.
- Divide the dough into 30 equal pieces (mine weren't so equal, and I got 32 eventually) and roll into balls.
- Just before baking, roll the balls in the icing sugar. I found that if I did them in advance the icing sugar dissolved, so do them just before you bake them.
- Bake for 10-12 minutes (12 minutes will give a crisper biscuit and is what I went for).
- Remove from the oven and after a minute on the baking tray, move to wire racks to allow them to cool completely.

Notes
- My biscuits didn't really spread that much.
- The first batch I left as balls, the second and third I helped along a bit by squashing them gently, just a little. I think this helped and would do it again.
- Don't be tempted to over-bake. I left the first batch in for 15 minutes and the icing sugar started to catch and burn. Boo!
- I also reduced the oven temperature just a little to about Gas 5 1/2 for the second and third batches.


These were really good. The outsides were really crispy from the icing sugar crust, and very sweet and then the inside was still nice and soft, but also a little crumbly. I had thought they would be somehow more chocolatey, but they were delicious as they were, especially with a cup of tea. And I'm pleased to say that they came out looking every bit as good as the photograph in the book - always a sign of a good recipe, when your results look like the authors results!

Stay tuned for more Chocolate Week goodies.....


Monday 10 October 2011

Ginger chocolate chip pound cake


My celebration of Chocolate Week continutes with another great chocolate flavour combination... ginger and chocolate are such a winning combination and I don't use them together nearly often enough. I can't quite think to myself why I haven't got round to making this recipe before now, given my love of this combination. It was originally published in April and can be found on the Guardian website here.


A cake with a very attractive crack as it baked! I had to make one minor modification (extra plain flour instead of ground almonds) and give my ingredients below:

Ginger chocolate chip pound cake
Ingredients
100g unsalted butter, melted
200g caster sugar
125g full-fat cream cheese
3 medium eggs
1 tsp vanilla extract
1 tsp ground ginger
75g chopped glacé ginger
125g dark chocolate, chopped into small chunks
250g plain flour
2 tsp baking powder

Method
- Preheat the oven to gas 4/180C. Grease and line the sides of a 2lb loaf tin with baking parchment.
- Cream the butter and caster sugar until smooth. While the butter is still warm, beat in the cream cheese thoroughly and then add the eggs one at a time, continuing to beat until the mixture is light.
- Add the vanilla, ginger (ground and glace) and chocolate pieces, beating well to combine.
- Sift the flour and baking powder into the mixture and stir through the mixture until no flour remains.
- Pour/spoon into the prepared tin and bake for 60-70 minutes until a cake tester inserted comes out clean, remembering that hitting a piece of chocolate will never give you a clean tester!
- Allow to cool on a wire rack.

I left mine in for longer than specified until it seemed done. Sorry about the unhelpful vagueness of this comment - I must have lost track of how long the cake spent in the oven altogether.


I wanted to like this more than I actually did. Don't misunderstand me, I really did like the cake, but perhaps I had set my expectations unrealistically high, or was expecting a different kind of cake. I think that this was an excellent example of a pound cake - the crumb was soft and moist and the crust a little dry and crumbly, just as I was expecting. I think perhaps my current ground ginger is a bit under-powered because I didn't really get much ginger flavour from the cake mixture itself, although biting into bits of crystallised stem ginger was lovely and, well, biting into bits of chocolate is always lovely!


Some parts of it were absolutely stuffed full of chocolate and ginger, but in the interests of fairness, a good proportion of the loaf had more of the add-ins towards the bottom than the top. Although they didn't all sink, which is an excellent thing! A good cake, and one to make again if the occasion to use some cream cheese up arises.

Keep visiting for more Chocolate Week goodies....

Sunday 9 October 2011

Chocolate and raspberry marble cake


It's nearly here! What, I hear you cry, what is nearly here? Well, Chocolate Week of course! This annual event (this year the 10th-18th October) was established eight years ago now, and you can find out more about it here, on the Divine website. Divine have been the main sponsor for this event since the start, and there are lots of yummy chocolate ideas on their website (as you'd expect really!). There are lots of events around the country that you can find out about. I love the idea of chocolate week (as a chocoholic this should not come as a surprise to regular readers..) because it's essentially an excuse to eat as much chocolate as possible... mmmm, chocolate induced stupor coming right up.


I thought I'd have a bit of a chocolate theme on the blog this week, so this is the start, although you might want to check out the insanely, intensely chocolate-y double chocolate ricotta scones I posted last week - if I'd thought ahead I'd have saved them for this week, but wanted to share their sweet goodness with you as soon as I could.

To kick off chocolate week, I decided to make a marbled cake, just to ease us in and based it partly on this recipe by Dan Lepard for a crumble topped chocolate marble cake, and also on the availability of ingredients in my fridge (yes, raspberries that I wanted to use up!) I decided to combine a few ideas and came up with this original. (As an aside, said chocolate crumble cake is pictured in Dan's new book, Short and Sweet and looks absolutely delicious. The chocolate crumble on top looks fab, I must do that some time!)


Chocolate and raspberry marble cake
Ingredients
175g butter, softened
175g caster sugar
3 large eggs
200g plain flour
2 tsp baking powder
For the chocolate layer:
2 scant tbsp cocoa powder
1 scant tbsp hot water
100g chocolate (70% cocoa solids), chopped
For the raspberry layer:
70g fresh (or frozen, defrosted) raspberries, crushed
1-2 tbsp plain flour

Method
- Grease and line an 8" square tin with baking parchment. Preheat the oven to Gas 4/180C.
- Cream the butter until light and fluffy.
- Add the eggs one at a time, along with about 25g flour if the mixture looks as though it'll curdle.
- Sift in the remaining flour and the baking powder. Mix well.
- Transfer half of the mixture to a smaller bowl containing the crushed raspberries. Mix well, and then add the extra flour and mix this in. My mixture curdled a little.
- Add the cocoa powder and hot water and mix well, then add the chopped chocolate and mix in.
- Dollop alternate blobs of batter into the prepared tin and when all used up, swirl with the handle of a spoon to marble.
- Bake for 40-45 minutes (I think, can't quite remember the exact timings) until well risen and a cake tester/cocktail stick inserted comes out clean.
- Leave to cool on a wire rack.


I was pleased with the way this cake worked. The marbling was pretty good throughout the cake - always difficult to tell when the cake goes into the oven whether you've over or undermixed the colours. The chopped chocolate in the chocolate portion stayed well suspended and was a really tasty addition. I was really surprised by the flavour of the raspberry portion - I had expected this to be pretty non-existent if I'm honest, but even though I only used 70g raspberries in it, the flavour was definintely raspberry! Admittedly, the colour wasn't pink, but then I didn't really expect it to be. If you want a pink colour, add food colouring!

Keep an eye out for more chocolate goodies this chocolate week.... all will be revealed in good time.

Sunday 2 October 2011

Chocolate ricotta scones


I knew it was only a matter of time before I turned my new favourite scone recipe into a chocolate version, especially after seeing Choclette's lovely scones during international scone week. That time came when I realised I needed to use up some ricotta cheese sitting quietly in my fridge (undemanding stuff, that ricotta) before it expired.

As with lots of the best things in life, these are quick and easy to make, but more satisfying than you would think. The original recipe can be found here on the BBC Good Food website.


Double chocolate ricotta scones
Ingredients
175g ricotta cheese
100g caster sugar
175g self raising flour
25g cocoa powder
50g butter
60g dark chocolate, chopped fairly small (I used Lindt 85% and broke each 10g piece into 16.....)
1-2tbsp milk (or water)
demerara sugar, to sprinkle

Method
- Preheat the oven to Gas 6/200C. Line a baking sheet with parchment.
- Mix the ricotta with half of the caster sugar. Set aside.
- Rub the butter into the flour and cocoa powder until like fine breadcrumbs. Add the remaining sugar.
- Spoon in the ricotta mixture and mix until well combined, adding the chopped chocolate part way through. Add a tbsp or so of milk or water to get a soft but not sticky dough.
- Tip onto the work surface (I worked on a piece of parchment to stop it sticking), knead very briefly, and shape into a round 4cm 11/2 inches deep. Mark into 6 or 8 sections, as desired.
- Sprinkle with demerara sugar and bake for 20-25 minutes.
- Allow to cool on a wire rack.

I definitely left mine in for longer because it's really difficult to tell when something brown is 'risen and golden' and think I probably overbaked it a little as it was slightly drier than the other versions I have made.


Oh so good. If you are a chocolate lover this is one for you - very, very chocolate-y with both the cocoa powder and chunks of intense 85% cocoa chocolate providing the requisite hit, these are something to be enjoyed alone - not a scone for jam or clotted cream, but one to be savoured as it is. Bliss. I love them. 

LinkWithin

Related Posts Plugin for WordPress, Blogger...