Saturday, 31 January 2009

Chocolate Cupcakes with Chocolate Buttercream icing

Mmmm, chocolate buttercream. Just imagine your teeth sinking through the smooth richness of the buttercream before coming into contact with the soft, moist and yielding cake. Well, why aren't you in the kitchen already then? Oh, right, you need the recipe first!

I have a small confession to make. This recipe was a rescue effort (a successful one I hasten to add) due to a lack of care and attention on my part. I had halved the recipe from a printed one I was following, but inadvertently forgot to halve the melted butter component, realising as I poured the butter into the mixture and looked at a pool of melted butter forming that something had gone wrong. So, making the best of a bad job, I added a little more flour to soak up the excess butter and the rescue was complete. No-one other than me (and, well, you now!) was any the wiser as they still tasted great. In for a penny, in for a pound as they say, and having added extra butter to the cake mix I decided to go for full-on buttercream topping for these beauties.

Chocolate cupcakes with chocolate buttercream icing
Ingredients
2 large eggs
85g caster sugar
75g self raising flour
18g cocoa powder
90g butter, melted
1/2 tbsp hot water

For the buttercream icing
75g butter
150g icing sugar, sifted
50g dark chocolate, melted

Method
- Preheat oven to 180C/Gas 4. Put 9 muffin cases into a muffin tin. Alternatively grease a 9 hole friand pan.
- Beat eggs in a bowl with an electric mixer for about 5 minutes until thick and creamy. Beat in the sugar a tbsp at a time until dissolved.
- Fold in the sifted flour and cocoa, the butter and the hot water.
- Divide between the cases. They won't be very full but it doesn't matter.
- Bake for 12-15 minutes until the cakes spring back when touched lightly. Remove from tin/pan to a wire rack to cool.

For the buttercream icing, cream the butter and icing sugar together with an electric whisk until very light and fluffy. Add the melted chocolate and continue to beat until the mixture is very pale. Transfer to a piping bag with the nozzle of your choice on it, and pipe to your heart's content.
I used 85% cocoa chocolate to try and make the icing a little less sickly sweet. I'm sure 70% would also work well though.

These have a lighter, more open texture than the recipe without the extra butter and flour, presumably due to the presence of extra raising agent in the flour.

Naked cupcakes before receiving their complement of rich buttercream. They have risen a little more than the original recipe ones, but not so much as to make icing them difficult.

Needless to say, these disappeared in a trice at work - diet be gone!!
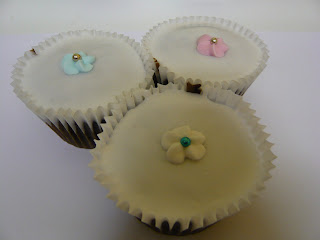
Friday, 30 January 2009

Chocolate peppermint cupcakes

Sometimes only chocolate will do. This was one of those times. I find that the tried and tested combinations are best - chocolate works really well with mint, ginger, dried cherries and cranberries, raspberries etc (obviously not all at the same time!). I'm not a fan of weird and wacky combinations - I was going to give an example, but to be honest, when you love chocolate that much, it goes with most things!

However, chocolate and mint are a match made in heaven as far as I'm concerned. I decided that a fairly light chocolate cake topped with an intensely minty sweet icing would be good.

These are a little different from standard cupcake sponge cakes, as they start out by whisking the eggs until they are creamy and voluminous. I used a recipe from The Australian Women's Weekly 'Cupcakes and Cookies' book. So without further ado, here is the recipe:

Chocolate cupcakes with mint icing
Ingredients
2 large eggs
85g caster sugar
50g self raising flour
18g cocoa powder
45g butter, melted
1/2 tbsp hot water

For the icing
Icing sugar
Mint essence
Hot water

Method
- Preheat oven to 180C/Gas 4. Put 9 muffin cases into a muffin tin. Alternatively grease a 9 hole friand pan.
- Beat eggs in a bowl with an electric mixer for about 5 minutes until thick and creamy. Beat in the sugar a tbsp at a time until dissolved.
- Fold in the sifted flour and cocoa, the butter and the hot water.
- Divide between the cases. They won't be very full but it doesn't matter.
- Bake for 12-15 minutes until the cakes spring back when touched lightly. Remove from tin/pan to a wire rack to cool.

When cool make the icing. I didn't bother measuring the icing sugar for this, it's just a case of mixing as much as you think it needs. I wanted quite a thick layer of icing. For part of the liquid component use the mint extract. I used this one, which is deliciously intense. Start by adding a small amount and then keep tasting. I used a tsp.


You can see that the cake is deliciously dark and chocolatey inside, with quite a close texture.

Naked cupcakes waiting for their icing coat. They have risen quite a bit, but haven't got a domed top, which is ideal for adding a layer of icing.

These went really well, with good reviews.

Wednesday, 28 January 2009

Vanilla Oat Shortbread Biscuits

When I saw these on Maria's blog, The Goddess's Kitchen, I thought they looked really lovely - buttery, oaty, crunchy and easy to make too. Instantly made it onto the 'to bake really soon' list. And so I did. The recipe is originally from Rachel Allen's book 'Bake' (which I have so far resisted the temptation to buy - I may not last much longer) and I halved the given recipe as I don't want shortbread coming out of my ears, no matter how lovely it is. Although actually, this shortbread really is lovely. I sometimes find that shortbread is too rich and buttery, but the addition of oats really helps - the oats give a lovely texture and flavour (and oats are good for you, don't you know!). The vanilla is subtle rather than dominant - all in all a very nice recipe.


Vanilla Oat Shortbread Biscuits
Ingredients
100g (3 1/2oz) butter, softened
50g (1 1/2 oz) icing sugar, sifted
1/2 tsp vanilla extract
100g (2oz) plain flour
1/4 tsp baking powder
50g (1 1/2 oz) porridge oats

Method
- Cream together the softened butter and sugar until light and fluffy.
- Add the vanilla extract, flour, baking powder and oats and bring together to form a dough. Keep going, it'll come eventually.
- Form into a log (30cm long, 6cm diameter), wrap in clingfilm and chill in the fridge for 30 minutes (I put mine in the freezer - it was still fine to slice after 30 mins).

**Preheat your oven to 180C/Gas 4 now if not already on for something else**

- Remove the clingfilm and slice into rounds 5mm thick and place them on a baking tray. I lined mine with parchment, but I don't think they'd stick anyway. They don't expand much at all, so leave a little space, but not much.
-Bake for 15 minutes until light golden brown and dry to the touch. Mine required a couple of minutes more.
- NB Try to make them all the same size and thickness so that they are all ready at the same time. I had a couple of small 'end of log' pieces which became rather brown.
- Transfer to a wire rack to cool then enjoy!


Tuesday, 27 January 2009

Cheery Monday Smarties Cookies

I don't know about you, but I'm never really desperate to return to work on a Monday morning. Once I'm there and busy, it's fine, but sometimes I just need to make something to soften the blow of losing a lie-in and the general laziness that can be the weekend. Smarties cookies seemed suitably cheering and helpful in making the start of the week not so bad.


These are nice and quick and easy and a good start to the week for colleagues too. These were hoovered up in record time and got lots of favourable comments.

The recipe is one from a BBC Goodfood freebie magazine '52 Cakes, Bakes and Chocolate' which was free with the April 2006 issue. Unfortunately the recipe doesn't seem to be available on the website, so I've reproduced it below.


Smarties Cookies
Ingredients
100g/4oz butter, softened
100g/4oz light muscovado sugar
1 tbsp golden syrup
150g/6oz self-raising flour
85g/ 3oz smarties

Method
- Preheat oven to 180C/Gas 4
- Beat the butter and sugar together in a bowl until light and creamy, then beat in the syrup.
- Work in half the flour. Stir in the remaining flour with the Smarties and work the dough together with your fingers.
- Divide into 16 balls. Place them well apart on baking sheets to allow for them spreading. Squash slightly.
- Bake for 12-15 minutes until pale golden at the edges.
- They will keep for up to four days in an airtight container, if there are any left!


They were lovely and crispy at the edge with a slightly soft centre. You could substitute chocolate chips if you can't get hold of Smarties. Very more-ish and went very quickly.

Just as a side note though - Smarties have really changed since they've removed the artificial colours. The colours now are just sort of dull. Like the colours I used to remember, but dull. I was really disappointed, as I haven't bought Smarties for ages! The things we lose in the name of progress (and I suppose losing artificial colours is progress really!),

Saturday, 24 January 2009

Buttermilk spice cake

This must definitely rank among the easiest cakes to make, it was so quick and simple - perfect for midweek baking. I put it together whilst making my dinner and managed not to confuse ingredients for cake and dinner! I had bought some buttermilk with the vague intention of making either cake or soda bread with it, but as with many of my vague intentions, nothing had materialised and the use-by date of the buttermilk was rapidly approaching. I remembered seeing this cake on the Caked Crusader's blog and thought it would be ideal to use up my pot of buttermilk. However, I didn't have 350ml of buttermilk, only 284ml and I didn't want a massive cake anyway, so decided to halve the recipe. I also decided that I didn't want such a deep cake and so although a 7" cake tin is not half the volume of an 8" tin, I decided to go with it, but cut down the cooking time accordingly. This worked remarkably well (I'm usually nervous of messing with cake tin sizes and recipe timings but must learn to trust myself more often!) and the resulting cake was moist and light.


Buttermilk spice cake (original recipe on the Caked Crusader's blog)
Ingredients
150g plain flour
112g caster sugar
3/4 tsp bicarbonate of soda
1/2 tsp baking powder
1/2 tsp ground cinnamon
1/2 tsp mixed spice
1/2 tsp ground nutmeg
50g unsalted butter, melted
175ml buttermilk
1 egg

Method
- Preheat the oven to 180°C/350°F/Gas mark 4.
- Line a 18cm/7" springform cake tin with baking paper.
- Place all the dry ingredients (i.e. the first seven items on the list) in a bowl and mix.
- To the dry ingredients add the melted butter, buttermilk and eggs and beat until smooth and combined.
- Pour the batter into the prepared tin and bake for approximately 30 minutes or until a skewer inserted into the centre of the cake comes out cleanly. Mine took 55 minutes.
- Leave to cool, in the tin, on a wire rack until cold enough to handle. Then remove the tin and leave to cool completely.

The cake was really light and moist, but although the spices were nice, I feel that something was missing, I just can't put my finger on it. I think I'd definitely make the cake again, but I might make a vanilla version, rather than a spicy one, or perhaps vanilla and nutmeg. However, this is only my view, my work colleagues were very enthusiastic indeed, and really seemed to enjoy it with good reports.
I worked out the Weighwatchers (UK) points for this (recipe as given above and baked in 7" round tin, cut into 8 pieces - quite generous) as 3.5.


Monday, 19 January 2009

Apricot and Lemon Muffins


Apricots aren't really in season here right now (well, slight understatement there, given that they're completely, six months out of season) but when I saw them looking so sunny and inviting amongst all the apples and pears on the supermarket shelves I allowed myself to be seduced. I know that apricots are tasteless when unripe, but cooking them always improves the flavour and texture too - from the lack of taste and unyielding crunch they can be (almost!) transformed with the application of heat to give a yielding and tasty mouthful, perfect in the middle of a soft, light muffin. And so these muffins were born. I wanted a second flavour, so that the crumb was flavoursome too, and settled on lemon rather than vanilla, thinking that it would complement the apricot well, which it did.

Apricot and lemon muffins
Makes 12
Ingredients
250g self raising flour
1 tsp baking powder
85g white caster sugar
1 egg
240ml semi skimmed milk
80ml sunflower oil
grated zest of 1 lemon
5 small apricots, cut into small pieces

Method
- Preheat the oven to Gas 6/200C/400F. Prepare muffin tin by lining with 12 paper cases.
- Sift the flour and baking powder into a large bowl. Add the sugar and stir to mix.
- Measure the milk and oil into another bowl, add the egg and beat to mix.
- Grate the lemon zest into the oil/milk/egg mixture.
- Add the wet ingredients to the dry and mix until barely combined. It will be lumpy and unattractive.
- Add the apricots and briefly stir to distribute them.
- Divide the mixture between the cases and place into the oven for 20-25 minutes until risen and golden brown. The tops should spring back gently when pressed.


You can see the lovely light texture of the cut muffin above. These went down really well at work with lots of comments about how light and tasty they were. There were certainly none left come the end of the day.
As some of my colleagues are on the Weightwatchers diet, I pointed these muffins, but make no claims to the absolute accuracy of this. (Obviously, I think I've got it right, but I don't want Weightwatchers coming after me!) For those of you that want to know, these were 3 points each. Bargain!

Thursday, 15 January 2009

Ginger biscuits

Simple, tasty biscuits to last through the week. I love ginger as a flavour in cakes and biscuits (and chocolate too!), and one my favourite cakes of last year were these gingerbread spice cupcakes. I wanted to try and make my own ginger biscuits, and turned to a tried and trusted recipe from an old copy of Sainsbury's Magazine. The recipe is one from Katie Stewart and was the beginning of a series on 'bakes, desserts and sweet treats'. I don't recall any of the other recipes from the series, but this one stuck with me. They're really easy to make, but can't be called superquick because there is a necessary waiting stage while the dough firms up sufficiently to be workable. It's not really a problem though, as the raw dough keeps for up to a week in the fridge or can be frozen so you can make the dough the day before and then refrigerate it until you've got time to bake the biscuits.


I wanted a really spicy, hot, gingery flavour so I increased the amount of ginger given in the recipe from 2 level tsp to 3 level tsp, but they weren't really hot enough. Next time I'd try 5 tsp ginger I think. A work still in progress.

Ginger biscuits
Ingredients
3 level tsp ground ginger (or to taste)
225g/8oz plain flour
1 level tsp bicarbonate of soda
110g/4oz butter
110g/4oz caster sugar, plus 2 tbsp for rolling
110g/4oz golden syrup

Method
- Sift flour, ginger and bicarb into a bowl (if this is going to go in the fridge later to firm up, choose an appropriate size - it doesn't need to be massive).
- Melt the butter, sugar and syrup over a low heat until melted and warm but not hot. (This smells absolutely divine!)
- Add the wet mixture to the dry ingredients and stir well to combine. The mixture will be very soft and unworkable at this stage.
- Cover and leave in a cool place (I used an unheated room) or the fridge for an hour or so to firm up. (At this stage the dough will keep for up to a week)
- Preheat the oven to 180C/350F/Gas4. Turn the dough onto a clean surface and divide into 30 equal pieces - it's important that they're all the same size so that they cook in the same time. (I acutally weighed mine to get a better idea of whether they were even, each piece weighed about 19g - I know that sounds time consuming, but it wasn't really!)
- Roll each piece into a ball and toss the balls in the extra 2 tbsp caster sugar (I forgot this step, but it's really worth doing as it adds a lovely crunch to the final biscuits - the easiest way to do it is to put the sugar into a plastic food bag, add a few biscuit-balls at a time and shake)
- Arrange on two baking trays, spacing them apart because they do spread. Squash slightly as shown in the picture below.
- Bake for 10-12 minutes. Let them cool on the trays for a minute because they will be very soft. Once they have hardened up a bit move them onto a wire rack to cool. Store in an airtight container.


You can see the squashed biscuits ready for baking above. They do spread quite a bit, so remember to leave space between them.


Delicious with a cup of tea or coffee at morning breaktime. I usually take my cakes into work to share, but these are mine, all mine! (Looks greedily at buttery, gingery biscuits with a lovely crunchy edge yet still slightly chewy middle - can't get that from a bought biscuit!). As I said earlier, the recipe still needs tweaking to my taste - these weren't quite gingery enough, so I'll try some more ground ginger next time (for there will be a next time!) and perhaps if that doesn't do the trick I might add some ginger juice. For some reason I prefer them without ginger chunks. Once I get the recipe right I might coat them in dark, dark chocolate. Drool.......

Sunday, 4 January 2009

Biscotti


Biscotti in many flavours! I have been wanting to make biscotti for a long time, probably about 18 months, ever since J and I went to Italy and she enjoyed some almond cantucci with an cappucino in a cafe. You can see them in the picture below. The displays of biscuits in the pasticchieri are gorgeous and I could help but take pictures and peer longingly into the windows. However, this particular treat had to wait for me to be in baking mode. The joy of making my own biscotti is that I can make them without the nuts present in all bought versions. Inauthentic? very likely, but at least I can eat them!


You will see from the first picture however, that the two lower pictures do indeed contain nuts. These were another part of J's Christmas present 2008 and she enjoys eating nuts. The recipe comes by way of Kevin at Closet Cooking, a really interesting blog that I've been reading for some time now. When I spotted this recipe it fitted the bill exactly. I knew I wanted to make a couple of different flavours and other recipes I've seen call for around 3 eggs, which doesn't halve easily, whereas this one required just one egg and didn't make masses.

I decided to go for the following flavours:

- double chocolate and brazil nut
- cranberry and pistachio
- raisin, cranberry, orange and spice
- double chocolate and cranberry

You can see the different stages above - first of all the biscotti are baked as a large log, then sliced and dried out at a low temperature. It may sound like a hassle, but I didn't find it a problem. The log can be difficult to slice neatly, depending on the size of your fruit/nut pieces, but I don't think there's a way around this.

I found that the raisin, cranberry and spice were the better of the two flavours. The addition of orange made them really fragrant and they really tasted 'Christmassy', perfect for the time of year! I liked the double chocolate and cranberry, but felt that the chocolate-y flavour wasn't as pronounced as I would have liked. I think this may be because there was no added fat in the biscuits to carry the flavour of the cocoa powder. J enjoyed the nut ones as part of her present this past Christmas, and they didn't last very long. Very more-ish indeed.
Kevin's recipe is in cups, but I prefer to work in grams, so I converted the recipe as I went along. I suspect these conversions won't be exactly the same as others on the web, but they worked for me.
Biscotti
Ingredients
140g plain flour
1/2 tsp baking powder
70g sugar
1 egg
Flavourings:
(One of)
20g cocoa, 40g dark chocolate (chopped), 40g dried cranberries
20g cocoa, 40g dark chocolate (chopped), 40g brazil nuts (chopped roughly)
40g dried cranberries, 40g pistachios
40g dried cranberries, 40g raisins, grated zest of 1/2 orange, 1tsp mixed spice
Method
1. Mix the dry ingredients; flour, baking powder plus any flavourings eg cranberries and pistachios, in a bowl.
2. Mix the sugar and egg in another bowl.
3. Mix the dry and wet ingredients until they come together. Kevin notes that he needed to add a bit of water here, I didn't - perhaps my egg was bigger or I've weighed one cup of flour wrongly!
4. Form the dough into a rough log about 10 inches by 3 inches on parchment paper.
5. Bake in a preheated Gas 4/180C/350F oven for 30 minutes.
6. Cut it into 1/2 inch slices.
7. Bake in the oven for 10 minutes per side at Gas 3/160C/325F.
8. Allow to cool on a wire rack.
Enjoy!!!


Perfect served with an espresso as a mid-morning or mid-afternoon pick me up.

Friday, 2 January 2009

2008 - The best bits

I haven't been blogging for a year yet, but have really enjoyed the time I've spent doing it and have read some really inspiring posts this past year. I'm really looking forward to creating more delicious things for the blog this year, perhaps with some forays into savoury cooking too. Anyway, here are my favourite posts of the past year, seven, randomly enough! Some of them are favourites because the outcome was utterly delicious, some because they represent something I learnt and others because I actually managed to get a decent shot of them. I hope you enjoy them. What were your favourite posts this past year?

These Butter Whirls were the first time I've successfully managed to use a piping bag. Great fun to make and delicious to eat, what's not to like.


Marbled chocolate cake - so simple to make, looks impressive and so easy to eat.

Although I have no idea what these coffee walnut cupcakes with coffee buttercream icing taste like personally, I'm guessing they're delicious from the speed they disappeared at work. These represent the first time I successfully piped buttercream icing to look as luscious and inviting as I wanted it to.

A combination of a fantastic recipe and some luck meant that these chocolate custard muffins were some of the best muffins I've ever tasted. Thanks to Dan Lepard for the recipe! I was really impressed that they turned out just like the photo.


The ginger spice cupcakes with lemon icing that I made in November were possibly the most more-ish cake I made this year. The sweet-sour icing perfectly offset the spicy soft cake underneath to perfect effect. Definitely on the to-make-again-ASAP list!

Both of the last choices come from December. It was a good month for baking. J enjoyed the Stollen I made as part of her Christmas present (thanks are again due to Dan Lepard for his fantastic recipe):


And all of us enjoyed this delicious Rosemary and Rock Salt Foccacia with our mushroom risotto on Boxing Day. (I sound like a record that's got stuck, but it just goes to show that Dan Lepard produces consistently good recipes!)


I hope you all had a great year in 2008 and here's to an even better 2009!

Thursday, 1 January 2009

Happy New Year


Happy New Year 2009, I hope it brings you all that you want!!!

LinkWithin

Related Posts Plugin for WordPress, Blogger...