Tuesday 31 August 2010

MM1 - Divine chocolate ginger cake

I had a bit of a disaster with this one, but I'm sharing it anyway because I think that it could easily be rectified. The recipe comes from the book Divine - Heavenly Chocolate Recipes with a heart by Linda Collister, which I've had for ages and not managed to bake anything from until now. I have a lot of cookbooks that I've never made anything from (and I'm sure I'm not alone in this!) so I think this cake should be the beginning of a new series on the blog, the MM posts. Marked and Made. I think I should credit Chele at Chocolate Teapot for inspiring this idea, with her Cookbook Challenge posts; I've always thought that this was a really good idea, so thanks Chele! I don't know how frequent these posts will be though....

Anyway, back to the cake. I was really pleased to be able to find this cake already on the internet here, so I can share the recipe with you. I'm sure that if you've been following for a while you'll have realised that I love all things chocolate and ginger is one of my all time favorite flavours so a combination of the two in cake seemed perfect to me. I'm not sure why it's taken me so long to make this recipe, as it was really good! I made one change only; to use dark rather than milk chocolate because I'm that way inclined! and I love the contrast of sweet cake and bitter chocolate (and I have loads of dark chocolate in my cupboard and no milk!). I used Divine brand chocolate and whilst searching the internet for the recipe I looked at their website and spotted lots more delicious looking recipes, as well as lots of info about Divine chocolate which I'm definitely going to be looking at in detail!


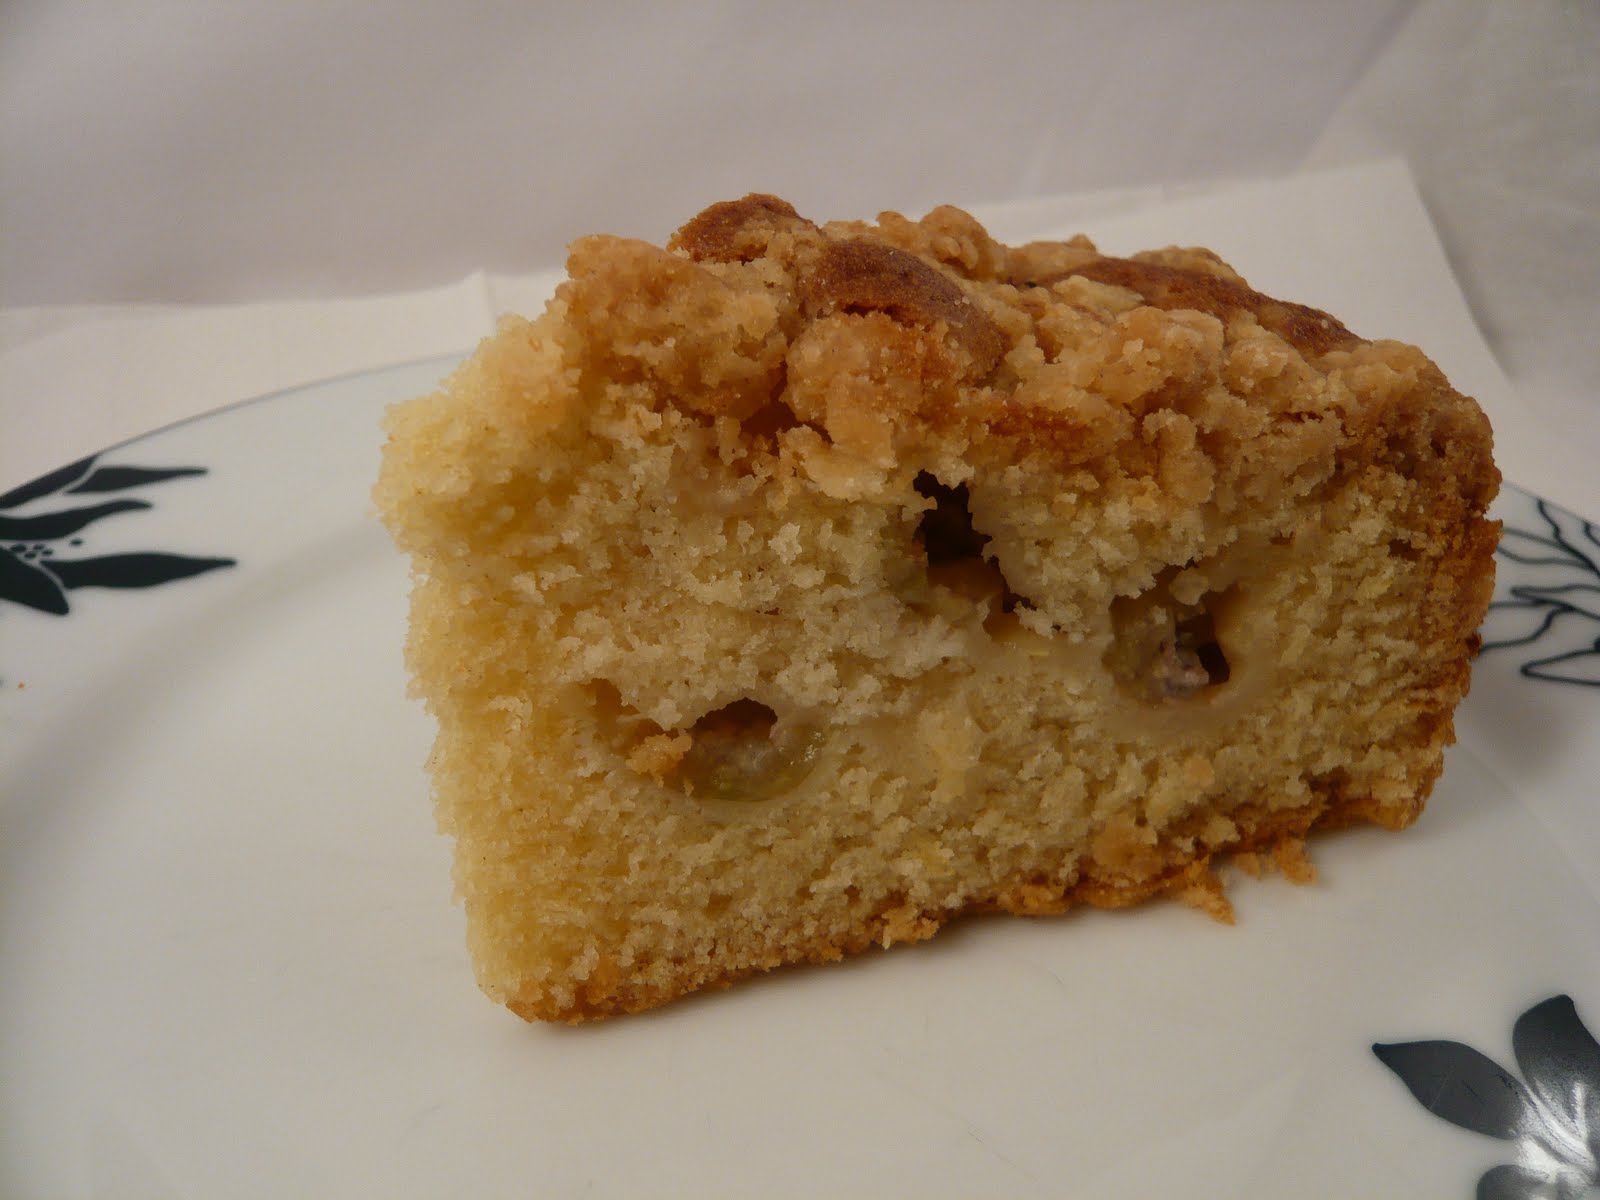
As I mentioned at the beginning though, I had a slight disaster. The recipe in my book specifies a 450g loaf tin, which I duly used. The mixture overflowed. Luckily I had thought to put a baking tray on the shelf below in the oven before I put this in (the amount of mixture in the tin made me suspicious that it wasn't all going to stay put during baking!) so I didn't get the nasty burning smell as cake mixture hits the oven floor that I hate! The cake also took longer than the specified 45-50 minutes to cook, so it's rather brown on the top. A little too brown really. However I think that next time if I use a 900g loaf tin it'll be much better - the cake will cook more quickly and not overflow. And I really hope there will be a next time, because this was one delicious cake. Large hunks of chewy crystallised ginger and big chunks of bitter chocolate made this a very more-ish cake.


You can see the waterfall effect on this side of the cake where the mixture rolled off in the oven. I bet people would pay good money to get that effect deliberately and I've managed it anyway..... or perhaps not! Anyway, make the cake, it's moist and gingery and chocolatey and good. And one of my colleagues asked for the recipe because she liked it so much. Yay!

Sunday 29 August 2010

A low fat fresh fruit cake for summer

This was a cake inspired by having lots of delicious fresh fruit sitting around in my kitchen, begging to be used before it expired. I have mentioned before how I have a tendency to buy rather more fruit than I can reasonably eat and therefore end up turning it into cake and this was the case here. A single lonely overripe banana, a punnet of blueberries and some rather delicious 'donut' peaches were the culprits this time and I set out to make best use of them.

I recall reading somewhere that bananas can be used to replace some of the fat in a recipe and because this was the last cake I made on a day full of baking and I was slightly in awe of the amount of butter that I'd used, I decided to test this theory on this cake! Based on a two egg standard sort of cake mix I simply decided to halve the quantity of butter I'd normally put in and see what the result was!


Low fat banana, blueberry and peach cake
Ingredients
50g soft butter
80g caster sugar
20g icing sugar (I ran out of caster - you could use 100g caster sugar)
1 ripe banana (med-large)
2 medium eggs
140g self raising flour
80g fresh blueberries
1 large donut peach (not too ripe - you need to be able to slice it thinly)

Method
- Preheat oven to 180C/Gas 4. Grease and line a shallow tray-bake/roasting tin 9x6 1/2 inches (approx 23x16cm).
- Cream together the butter and sugar(s) and then add the banana in small chunks and beat this in (or mash the banana first and add it) and then add the eggs and mix well to combine.
- Add the flour and beat until well mixed. Pour half of this mixture into the lined tin and add the blueberries to the remaining half. Mix them in and then add this mixture to the tin, smoothing the top.
- Carefully slice the donut peach thinly and arrange the slices over the surface of the cake.
- Bake in the preheated oven for around 30-35 minutes (sorry, made this a while ago and forgot to note timings) until golden and a cake tester/wooden toothpick comes out clean, barring blueberry juice!

Allow to cool on a wire rack before slicing and enjoying, in the knowledge that it is full of fruit and lower in fat and therefore positively health food! So a big slice is definitely in order!


Very well balanced flavours, and the blueberries I used must have been better flavoured than some of the recent ones because when you bit into a blueberry it released a lovely burst of blueberry flavour, very pleasant against the subtle background banana flavour. The peach slices gave a lovely chewiness (in a good way) because they'd partly dried during the baking and this additional texture was a really good contrast to the soft moist cake.


I'm pleased to say that this met with universal approval at work and got lots of positive feedback. I'm sure this is partly because it's such an attractive cake visually, although the flavour and texture were really great too. I can honestly say that for this cake I really didn't notice that it was low fat in any way - there were lots of other things going on and there didn't seem to be any loss of texture either. This was a gamble that paid off, they quite often don't, so it's nice to have a success!

Friday 27 August 2010

A warning....

A revisit of this semolina bread (I enjoyed it greatly and wanted to make it again!) with a couple of little changes. I still shaped it as a loaf (as you can see) but tweaked the recipe a little. I used about 10g olive oil instead of the butter, and missed the yogurt out as I didn't want to open a tub specially. I also reduced the honey to about 1/3 tsp and used a milder flavoured honey than last time, when the flavour was a little too prominent. These changes worked well, and the bread was still soft and delicious. A very forgiving loaf.

Sadly not forgiving of some of my more stupid mistakes.... I usually use silicon baking parchment for lining tins and trays because nothing I've ever made has stuck to it. I ran out unexpectedly midway through a day of baking and couldn't get to the shop for more before this bread needed to be baked. So I used greaseproof paper. Don't follow my lead. I was very upset to find that it stuck badly and I lost some of the delicious bottom crust - curse the stupid greaseproof paper, and the stupid baker who decided to use it.....

Very upset to see my lovely bread with nasty paper stuck to it!!!

Tuesday 24 August 2010

Dan Lepard's Blueberry and Choc-Chip cookies

Another fabulous recipe from Dan Lepard. Lots of people seem to have been baking these; Celia, Suelle, Joanna and many more I'm sure, so I thought I'd better jump on the bandwagon too. If all these lovely people thought they were good, they must be right! (N.B. This does not follow where garlic is concerned - the whole population of the world might love the stuff but it still won't persuade me to like it... anyway, going off at a bit of a tangent there...)

I stuck to the recipe pretty much as it is printed here, except for substituting half of the dried blueberries for cranberries (I already had cranberries, and had to buy blueberries, making them seem more expensive!). I used 70% cocoa chocolate (and used 140g), and chopped it up myself rather than use chocolate chips as I haven't found a source of 70% cocoa chocolate chips. Plus I substituted vanilla extract for the almond, for obvious reasons!

I don't often make cookies, and I tend to over-bake them when I do, but I managed to keep these on the lighter side of charcoal! Perhaps I should try more often though, because these were really good. The recipe is definitely a keeper and I'm glad I jumped on the bandwagon!!! They've got a lovely chewy centre and the chewiness is enhanced by the oats and dried fruit too. I haven't had dried blueberries before, and even though it's going to sound stupid I'll say it anyway - they really do taste quite blueberry-ish! And wholemeal flour - these are surely good for you! Many positive comments from my colleagues confirmed my view that these are excellent!

Wednesday 18 August 2010

Wholemeal honey cake


Another purchase from my trip to Little Salkeld water mill was some 85% wholemeal flour. This (as far as I understand) is wholemeal flour that has had a first sifting which removes around 15% of the weight, i.e. the coarsest bran. So it is a wholemeal flour, but slightly lighter. It is sold as suitable for cakes and bread and I was interested to see whether a cake made with wholemeal flour could still be light, or would turn out heavy and 'worthy' which isn't really something I aim for in my baked goods!

I was flicking through Hugh Fearnley-Whittingstall's 'River Cottage Everyday' book and he features a cake made with wholemeal flour and honey. I subsequently ignored his recipe (which served 10, used 4 eggs and ground almonds) which is undoubtably lovely, and made up my own. But thanks are due to HF-W for seeding the idea! I used the yogurt simply because I had it lying around, and thought that it might help to add to the moistness of the cake.

Wholemeal honey cake
Ingredients
100g soft butter
50g golden caster sugar
65g mild honey
120g wholemeal 85% flour
2 eggs
about 20g natural yogurt
1tsp baking powder

Method
- Preheat the oven to gas 4/180C. Grease and base line an 8"/20cm round cake tin. Mine had a loose base too.
- Cream the butter, sugar and honey until light and fluffy.
- Add the eggs and yogurt, and sift in the flour and baking powder. I don't often bother sifting my flour for cakes (yes, I am that lazy) but this time I wanted to air the flour and make sure there were no lumps, and to distribute the baking powder more evenly.
- Mix until combined.
- Spoon into the prepared tin and level off.
- Bake for 30 minutes until light golden brown and springy to the touch.
- Remove from the oven and allow to cool on a wire baking rack.


I was going to serve this with a scoop of icecream and some blueberry compote, but I didn't get round to it, so ended up eating it plain for lunch. And because I had a bit of a marathon baking session at the weekend, I didn't eat this until a couple of days later. I was a little concerned that it might have dried out a bit, especially as I cut it on Sunday ready to eat and Victoria sponge type cakes are generally better fresher. However, I think the honey in this cake actually made it moister and stickier over the course of a couple of days because it was deliciously moist and there was a gorgeous stickiness present on both the top and bottom surfaces of the cake.


This may appear to be a bit of a plain jane type of cake, but don't be deceived, I would absolutely make this again in a flash, and no doubt will be doing. And just think, all the fibre in the flour will be doing you the world of good, without tasting in the slightest bit 'worthy'. I honestly thought that this cake would end up being a little dry, perhaps tasting a little too 'wheaty' and being heavy and dense and a chore to eat. Instead I was pleasantly surprised that I ended up with something quite so delicious. The honey flavour came through well, subtle because I'd chosen a subtle honey, so pick your favourite and enjoy the flavour!

Sunday 15 August 2010

Spelt and white stubby loaf and a birthday trip


I was lucky enough to be taken to Little Salkeld water mill in Cumbria recently by J, as part of my birthday celebrations (well, I need something to compensate for the fact that I'm now a year older and hurtling with alarming speed to the first 'noughty' birthday that people seem to dread) and I bought, understandably, quite a reasonable quantity of flour whilst I was there. (You can order flour online too, here.)


If you are lucky enough to be in the area, I really strongly recommend that you call in. They have a lovely tearoom where we enjoyed a mid-morning slice of cake and a scone (very good!) and the buildings themselves are lovely too. They have free range hens roaming about (and trying to get under the wheels of the car!) and the day we went, there was a group of people making a bread oven from clay and straw. We spent a while chatting to them, and I think they said they were part of the Cumbria slow food movement group (or another very similar group, interested in sustainable ways of growing grain and cooking without using the diminishing natural resources of the planet, i.e. oil). The plan was to build the oven on the Saturday and then bake in it on the Sunday. They were also separating the grains of some spelt that had been grown on the property as a test cereal. I think this was going to form part of the loaves to be baked. It all looked really interesting, and I did find myself wishing that I could join them.


Anyway, after watching the hens scratching around for a while (I can totally understand why people keep chickens - they are so funny and engaging even when they aren't your own!) I spent a good while in the shop/tearoom deciding which of the many flours I would like to buy. I did try and be restrained, but, in the end I wasn't!!! One of the many flours I came away with was a wholemeal spelt and this is the first one I baked with.


I have a very loving and caring and well trained(!) family, and T bought me The River Cottage Bread Handbook by Daniel Stevens. I have thoroughly enjoyed reading through it and although this loaf didn't come from the book, I have used the shaping technique explained on pages 56-57. I generally use the technique given by Dan Lepard in his book The Handmade Loaf to shape by loaves into batons, but fancied giving a new technique a go. I'm really pleased with the shape of the resulting loaf. The technique for shaping is slightly more involved, with more steps, but I think that the rolling and stretching, rerolling and shaping and so on gives the surface of the loaf a greater tension, which in turn means that the slashes open more and the loaf retains its shape better. I would probably get better shaped loaves using any technique I cared to try if I made more of an effort to not let them over-proove and therefore have a slight tendency to spread out rather than spring up in the oven, but hey-ho!


For this loaf I used a soaked flour (hmm, can't think of the correct terminology here) method, and adapted to what I wanted.

Spelt and white loaf
Ingredients
150g wholemeal spelt flour
150g strong white flour
3/4 tsp fast acting/instant yeast
3/4 tsp salt

Method
- Boil the kettle, you'll need 200g water.
- Weigh 75g spelt flour into a large bowl and pour over 200g boiling water. Mix to ensure no lumps.
- Leave for a while (until it's a little cooler - I can't give specific times here because I suddenly realised that I had to go to the supermarket for soap - how can one person have 7 bottles of shower gel and not a single bar of soap in the house???) then add the remaining ingredients.
- Mix well and then leave for 10 minutes. Knead briefly, leave 10 minutes, knead, leave 10 minutes, knead then leave 30 minutes. Entirely Dan Lepard's technique for kneading, so all credit to him!!!
- Shape the loaf how you desire. Leave to proove until almost doubled in size.
- Preheat the oven to gas 7/220C. Steam the oven (I put a tray of boiling water below the shelf I'm going to bake on).
- Dust the loaf with flour, cut slashes (I used a bread knife this time, the dough was sturdy enough to withstand it) and put in the oven.
- Leave for 10 minutes, then turn down the heat to 200C/Gas 6. Leave 20 minutes, then turn upside down and leave a further 10-15 mins until the base sounds hollow when tapped.
- Leave to cool completely on a wire rack.


As I've said above, I'm really pleased with the look of this loaf. When I was mixing the flours it seemed quite dry - in my (somewhat limited!) experience it often does with cooked flour methods so I added a little more water, probably about 20-30ml. This made the dough rather sticky, although not unworkable, and by the time it came to shape the dough, it was pliable and elastic.

I have to admit that although it tastes really lovely, I can't particulary tell that spelt has a significantly different flavour from normal wheat flour. I think that perhaps if I used 100% spelt I might be able to tell the difference. Using 50% white flour did make the dough much easier to work than a 100% wholemeal dough. I made spelt and white rolls with rosemary ages ago, blogged about here when I'd only recently started making my own bread. From what I remember they were much more solid than this loaf - perhaps a reflection of my improving skills in bread making!!! The loaf had a lovely crunchy crust and a soft, moist crumb and I'll definitely be making it again.

Friday 13 August 2010

Peanut and cashew nut chilli bread

When this recipe was published last weekend in the Guardian I thought it looked really interesting, but (said in a small voice) I didn't dare make it. Why? Because I'm a complete chilli wuss. I don't ever eat them and I can't do with food that bites back. But I know that most people quite like chillies and the recipe looked good so when I found that I was due to see T (doesn't happen as often as I'd like) and that I could also see J the same weekend, I decided to give this a go, so that I could share the results. T likes chilli much more than I do!!!

Because I didn't have chance to get to the shops I used what I had on hand, resulting in some minor changes to the recipe as published here. I used 100g peanut butter (50g smooth, 50g crunchy) and 50g of cashew nuts instead of the roasted peanuts. I also only used one chilli and scraped out the seeds. Next time I might be braver and use two! I also missed out the cumin seeds firstly because I don't have any, which is probably due to two, I dislike them intensely!

I followed the method as written, which is great because it requires very little work on my part, only one brief kneading and I managed to make it after getting in from work in the evening at 7pm (I just won't tell you what time I got to bed that night!). I was pleased with the way it turned out and rather relieved to find that the chilli wasn't prominent at all (in fact, I can barely taste it) with the taste being predominantly nutty. So that second chilli would be necessary really. I think I also chose the mildest chillies the supermarket had! J enjoyed it, but I haven't asked T what he thought yet - I'll update when I know.

I was going to suggest cream cheese to soothe the heat of the chilli, but the heat doesn't need soothing! I still think cream cheese would be a good partner, or a creamy goats cheese perhaps if you don't like Dan's recommendation of cured meats to eat with this.

Tuesday 10 August 2010

Light chocolate speckle cake


A cake of forgetfulness and disorganisation really, this one. Disorganisation because last weekend I found myself with quite a lot of eggs to use up due to bad planning and over-buying. So I needed a cake that required quite a large number of eggs yet was still simple to bake and transport to work. There are limitations imposed on me by a 40 minute bus journey and 20 minutes of walking that mean the fancier, more decorated cakes that I sometimes feel like making just aren't practical. After all, there's no point in setting out with a beautifully decorated creation only for it to resemble a car crash by the time it's bumped its way to work. Although I like to think that taste is the most important thing, I know from experience that my colleagues prefer their cakes to look at least halfway attractive before consuming them.

So I settled on the idea of a traybake and recalled that in a recent issue of BBC Good Food magazine (the August 2010 issue), there was a 'Bake it easy' feature where the deputy food editor, Sarah Cook, had given base recipes for a loaf cake, biscuit, traybake and slice, to be adapted three ways in each case. One of these was for a cappuccino cake. I'm not the world's biggest fan of coffee, but I think I am coming round to the flavour on the odd occasion, having enjoyed a couple of cappuccinos on holiday recently in Italy, so I thought a light coffee flavour would be good, and chocolate is always good so potentially a great cake. Now for the disorganisation kicking in again..... I didn't have any coffee in the house, so that idea was put to one side. Never mind, thought I, a chocolate and vanilla cake will be just as nice. Which it would have been if I'd remembered to add the vanilla before spooning the mixture into the tin..... sigh. So this was a plain chocolate cake. Still good though!

I followed the recipe given here, with the following changes:

I only had 220g soft butter, so just used that. I only had 100g yogurt rather than 150g (I used full fat natural yogurt). I added 75g finely chopped dark chocolate to the batter to give a speckled appearance to the cake but as mentioned above, left out the coffee and vanilla. I creamed the butter and sugar first, added the eggs, yogurt, flour, baking powder and cocoa powder and mixed well. I then added my chopped chocolate and mixed in before transferring to the lined baking tray.


For the topping I melted 30g each (I think next time I'd only use 20-25g, you need a surprisingly small amount) of white and dark (72%) chocolate and piped it on. In the spirit of laziness I actually melted the chocolate in small plastic food bags (J's idea!) to save on washing up because I would be spooning the mixture into these bags anyway to drizzle onto the cake. This worked really, really well for the dark chocolate which is quite runny when melted, but much less successfully for the white chocolate (I used Green and Blacks here) which was much thicker when melted. I tried to pipe it using the food bag, but it split and splodged out. I ended up using a disposable piping bag, which is much stronger plastic, and this worked really well. The topping was very fragile (as I knew it would be) when the chocolate set, but it was still nice to have a contrasting texture when eating the cake.


Taste? Well, compliments from colleagues so that's good. I thought the texture of the cake was great - it was very light and moist and it was nice to have the little pieces of dark chocolate in the cake providing a slight contrast and also a more intense hit of chocolate. Because the cake was supposed to be cappuccino, the chocolate flavour was very subtle and it wasn't an intense chocolatey chocolate cake, if you get my drift, but it was good all the same. I would use the base recipe again but change the flavourings. You can find all of the recipes for the cakes, biscuits and slices in the August issue of BBC Good Food available online.

Sunday 8 August 2010

Crunchy raspberry and apricot cake

I love all the summer fruit we're able to get at the moment - raspberries, strawberries, gooseberries, apricots, peaches, nectarines, blackcurrants, redcurrants, cherries, greengages, plums, how on earth am I supposed to decide what I want to buy and eat when I want to buy and eat them all!!! My indecision means that I tend to buy far too much for eating as is, and so the excess is either preserved by putting it in the freezer (difficult when it's already full....) or by baking delicious cakes filled with fresh summer fruits. I know which option I prefer....

These cakes tend to be influenced by what caught my eye this week and because I love raspberries so much they often feature, as with this cake. I also had apricots, which I never mind baking with because I really do think that apricots are one fruit that actually benefits from the application of heat. It seems to bring out the juiciness of the fruit, and intensifies the sweet honeyed scents, especially if you poach apricots with just a little dash of honey.

I was also influenced by a recent post on the Caked Crusader's blog, where she uses a sprinkle of demerara sugar to great effect on this delicious looking cherry and almond cake. That was the look I was attempting to emulate, but I obviously went a little light on the sugar, as my cake isn't quite as heavily encrusted. However, the sugar was still obvious after baking and did indeed give the top a lovely crunch.

Crunchy raspberry and apricot cake
Ingredients
125g softened butter
125g golden caster sugar
2 eggs
160g self raising flour
1tsp vanilla extract
2 medium/large apricots
100g raspberries
demerara sugar, to sprinkle

Method
- Preheat the oven to gas 4/180C. Grease and line an 8"/20cm round tin. I used one with vertical sides.
- Chop the apricots into fairly small pieces.
- Cream the butter and sugar until light and fluffy.
- Add the eggs, flour and vanilla and mix until well combined.
- Spoon half of the mixture into the prepared tin and spread out.
- Mix the chopped apricots into the remaining mixture and add to the tin, spreading out to the edges.
- Arrange the raspberries on the surface and press in a little. I could pretend I just tumbled them on, but I didn't. I've tried that in the past and find I get loads in one spot and none in another, so I prefer to put them on more carefully now. Fussy??? Perhaps! Sprinkle generously with demerara sugar - more than you think you'll need.
- Bake for 30-35 minutes until a cake tester comes out clean.
- Leave to cool on a wire rack.

You can serve this just as it is, as I did. It would be lovely to accompany a cup of tea or coffee, or turn it into a more dessert type cake by serving with your preferred accompaniment - ice-cream, creme fraiche, whipped or pouring cream and a generous serving of raspberry sauce. Simply delicious and a great celebration of our summer fruit!

It was soft and moist, with delicious bursts of raspberry and the apricot providing more of a background note to the cake. I really enjoyed the crunchy top and next time would use more demerara sugar for more crunch!

Friday 6 August 2010

Light wholemeal oat bread


I wanted to combine the technique of soaking oats to add to a bread dough with wholemeal flour as I haven't made a wholemeal loaf for quite a while now. So this is adapted from essentially a Dan Lepard recipe (the original on which this is loosely based can be found here) but with a few of my amendments.

Light wholemeal oat bread
Ingredients
38g oats plus more for topping the loaf
1/2 tsp black treacle
3/4 tsp instant dried yeast
3/4 tsp fine salt
75g each of extra strong wholemeal flour, strong white flour and plain white flour

Method
- Pour 190ml of boiling water over the oats in a bowl. Leave for at least 10 minutes (and probably more like 30 mins) to cool a little.
- Stir in the black treacle until it has dissolved - this will turn the oats a lovely colour!
- Add the flours and then yeast and salt and stir until all the flour is incorporated. I'm often tempted to add more water, but then glad when I don't as it doesn't end up needing it. Be patient!
- Leave to rest for about 10 minutes then knead the dough for 30 seconds 3 times over a 30 minute period. Leave for 30 minutes then shape into a baton type shape (as in the picture!).
- Leave until increased in size by about a half again (how long will depend on how warm your kitchen is).
- During this proof, preheat the oven to gas 7/220C.
- When you are ready to bake the loaf, brush it with water and sprinkle with/pat on some more oats.
- Bake for 10 minutes at gas 7 then turn the temperature down to gas 6/200C. Bake for another 20 minutes then take out, turn upside down and return to the oven for a final 10 minutes or so to crisp the base.
- The loaf should sound hollow when tapped.
- Allow to cool completely on a wire rack before slicing.


I really enjoyed this loaf. The texture was light with the slight chewiness provided by the oats lending substance to the loaf. Admittedly this wasn't a 100% wholemeal loaf, but for those who are trying to introduce more wholegrains into their diet this loaf would be a really easy way to do it - the taste is a light wholemeal rather than strong, full on wholemeal but the health benefits of oats and wholegrains are still there. The treacle isn't at all obvious in the finished loaf, but helps to give the loaf an appealing dark colour. The loaf is moist and complements lots of different fillings for sandwiches, though cheese is still my perennial favorite!

Wednesday 4 August 2010

Gooseberry and Lemon Crumble Cake


A quintessentially English treat, I absolutely love gooseberries. When I was younger J used to make gooseberry fool from the gooseberries we got from the pick-your-own, or later from our garden when our fruit bushes were established. I loved it. Gooseberries are such an English treat and one of the few things that remains truly seasonal in our calendar, so when I spied punnets of gooseberries in the local supermarket I quickly put some in my trolley, dreaming of all the things I could do with them. I had to hold myself back from buying punnets and punnets, but I was restrained ;-)

So at home I waited for inspiration to strike. And strike it did - I really fancied the combination of gooseberries and lemons (can you tell that I like my flavours sharp!?!) and then a sweet crumble topping to set it all off. I really enjoyed the texture of this peach and redcurrant cake I made recently so decided to use that recipe, and combine it with the technique I used in the blueberry and lemon cake of spreading half of the mixture into the tin before folding the fruit into the remaining half and spreading that on to try and hold the fruit in suspension better.

For the crumble I used the recipe that Suelle used on her delicious looking chocolate orange crumble cupcakes. I really loved the way that it was all clumpy rather than dusty as my usual crumble mixture tends to be if spread on cakes (on fruit for crumbles it's fine though!). This was a great idea, so thanks very much to Suelle, I'll be using that recipe again. I did scale down the recipe a little though, but the proportions are very similar.

Gooseberry and lemon crumble cake
Ingredients
200g self raising flour
50g fine semolina
175g butter, softened
150g caster sugar
2 large eggs
2 tbsp milk (I used water as I was out of milk)
zest of 1 lemon
175g gooseberries, topped and tailed and cut in half

Crumble mixture
40g butter
55g plain flour
35g demarara sugar

Method
- Preheat the oven to 170C/Gas 3-4. Grease and line a loose-based 20cm/8" cake tin. I've taken to lining the sides and base to try and preserve my cake tins better!
- For the crumble mixture - melt the butter and stir in the flour and sugar. Set aside until needed.
- Cream the butter and sugar until light and fluffy.
- Add the flour, semolina, eggs and lemon zest. Cream until well combined.
- Add the milk and mix in well.
- Spread half of the mixture over the base of the tin. Fold the fruit into the remaining mixture and then spread this into the tin.
- Crumble the crumble mixture over the cake.
- Bake for 1hr 15 minutes until a wooden cocktail stick inserted comes out clean.


The crumble topping worked really well on this cake - there was a lovely combination of crunchy topping and soft cake. The gooseberries provided bursts of fruitiness and tartness and the lemon was more of a subtle background flavour. I'll make this again for the combination of soft, moist cake and lovely gooseberry bursts.

LinkWithin

Related Posts Plugin for WordPress, Blogger...