 I'm sort of at a loss as to how to describe these. I want to call them flapjack because they are a baked bar containing oats and no flour, but to me, flapjack is full of syrup and butter and these bars contain neither, so I'll stick to the name in the title, which is descriptive if a little clumsy. The recipe comes from the Sainsbury's Magazine, which I buy each month and think is great value (£1.40 compared to around £3.40 for most of the other monthly food magazines you can get - Olive, BBC Good Food etc). However, I enjoy buying and reading the magazine, but rarely get round to making anything from it (although this applies to most of the magazines I buy - am I the only one who is guilty of this? I suspect not.....) and so for me to make these within a few months of seeing the recipe, even within the same season, is something of a surprise! In fact, I have made them twice, with slight differences.
The feature they come from is all about 'The fats that help your health' and is explaining about mono-unsaturated fatty acids being beneficial for health so the recipes are low in saturated fats and high in mono-unsaturates - plenty of nuts, seeds and avocados. Fear not, this recipe does not contain avocado! It does contain nuts though, and the original version also contained seeds, but I left these out as I'm not really wild about them. Peanuts are one of the few nuts I am not allergic to (I have been eating them all my life, and am very lucky, because peanut allergy can be extremely severe and peanuts/peanut oil are used in a lot of commercial goods) and are not actually a true nut, growing below the ground as explained in the article linked above.
 I actually decided to make this recipe (on both occasions) to help with an overabundance of low fat yogurt in my fridge as the recipe calls for low fat yogurt to provide the moistness. (If the picture above looks dry, this is my poor cutting skills - it is really, really moist!) As with flapjack, the recipe is a doddle to put together and can be done at the last moment. Great for lunchboxes (unless your child's school has banned peanuts!) or as a healthy breaktime snack for the grown ups too.
Peanut and cranberry oat bars
Ingredients
75g crunchy peanut butter
100g caster sugar
6tbsp agave nectar or honey (I used honey the first time, and golden syrup the next....)
225g virtually fat free yogurt
100g dried cranberries (I didn't have enough the first time so used half and half cranberries and raisins)
275g porridge oats (the recipe specifies 225g but I found this made a very wet mixture)
Method
- Grease and line an 8"/20cm square cake tin with baking parchment
- Preheat the oven to 190C/Gas 5.
- In a pan, gently heat the peanut butter, sugar and honey until melted. Then stir in the yogurt and dried fruit and then the oats.
- Tip into the prepared tin and smooth the mixture into the corners with the back of a spoon.
- Bake for 30 minutes or until golden brown. Mine took longer to become the colour you see in the pictures, probably nearer 45 minutes, but because the mixture is so moist there doesn't seem to be any detrimental effect.
- Using a small sharp knife mark into rectangles (8-10) and then leave to cool completely in the tin.
- When cold turn out and cut into bars.
Recipe note: The original recipe says: 'The bars will keep for several days in an airtight container. They freeze well too."

In its second incarnation this recipe contains all dried cranberries instead of mixed with raisins, golden syrup instead of honey, and butter instead of peanut butter. Just as moist as the version above, but almost certainly significantly less healthy. Guess which version I preferred. Sigh. Oh well, it's still lower in fat than traditional flapjack, and is a good way of getting oats into your diet. (Yes, I grant you that porridge is still a better way, but these are more portable!)
Colleagues enjoyed both versions and the moistness of the bar was a welcome contrast to the chewy dried fruit and oats. I would make these again, but probably only to use up excess yogurt if I have it hanging around in the fridge.

 Well, it's a good job that my new year's resolutions didn't involve blogging more often or more regularly, because I most certainly would have had to call that resolution broken! Sorry about the gap, but I'm back, and with something really delicious to make up for it!

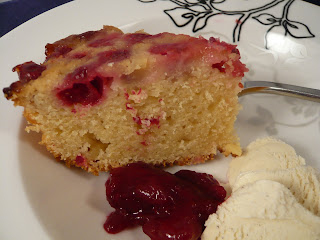 Having spent Christmas very enjoyably at J's house, she came here for New Year and I cooked for the two of us. For dessert I decided on a cake based around Dan Lepard's
 I also made a larger version of the same cake to share with colleagues before the Christmas break. They also seemed to enjoy it! You can see from the edges of the cake that the foil lining of the tin doesn't improve the cake asthetically, but it makes it much less messy to bake, and it's a breeze to line a cake tin with foil rather than parchment paper - just push the foil in and squash the creases out!
 Other highlights were my first (and successful!) baked cheesecake,
  I think 2009 also represents a massive improvement in my bread baking skills. I've now got a couple of recipes I make over and over again, not least this
 It was
  One thing to note when decorating the dinosaurs is that mini Smarties (now with no artificial flavourings or colourings) are rubbish for baking with - all of the colours (which are much dimmer than they used to be when I was young and colourings weren't the work of the devil....) fade to a sort of monotonous green/brown after baking. The decorations you see above are using Silver Spoon baking beans. Clearly still using artificial (and therefore heat stable!!!) colourings. You see, spirulina extract isn't all it's made out to be, Nestle!!