Showing posts with label berries. Show all posts

Monday, 17 September 2012

Blueberry Yogurt Cheesecake


And now for something a little different from the usual baking you see on my blog. I was contacted a while ago and asked if I would like to look at the recipes that have recently been added to the Total Greek Yogurt website so I agreed to take a look, Total yogurt is definitely one of my favourites. I am a big fan of plain yogurt over flavoured, finding most flavoured yogurt too sweet or with an odd thickened texture (Longley Farm is my exception - utterly delicious, properly tangy yogurt, but sadly not too widely available).

My first port of call in the 1000 recently published recipes was naturally the baking ones. I had a good long browse through before deciding that sadly there wasn't anything that took my fancy at all. I had hoped for a delicious cake using yogurt as an ingredient (like this Stone Fruit Yogurt Cake by Dan Lepard that I have made numerous times) but instead there were quite a lot of recipes with a yogurt frosting (all very well, but should really be kept in the fridge I think, so no good for sharing with colleagues).


So I ended up choosing this blueberry yogurt cheesecake. After having agreed to receive ingredients to make the cheesecake I learned that this is part of Total's campaign to spread the word about their delicious natural yogurt. Other points the lovely people at Total would like you to know include:

- They are running a competition to celebrate the launch of their 1000 ways to use Total Yogurt. This recipe is one of 30 you can find across various blogs. The more you find, the more chance you have of winning the grand prize.
- These are also available in a brand new Facebook app, so you don’t even have to leave Facebook to get inspiration for dinner. (I'm a facebook newbie - find Cake, Crumbs and Cooking here - so I don't really know if this is a good thing, but I guess it is)
- Total yoghurt is the only authentic Greek yoghurt on sale in the UK. Because it is made in Greece in the traditional way it is much thicker and more robust than Greek‐styled yoghurt. As such it is much better to use in cooking and is still just as good for you. Total Greek Yoghurt is 100% natural.
- Speaking of the prize, top chef Paul Merrett has put together his list of essential kitchen equipment. The lucky winner will get this amazing wish list including the very best cookware worth more than  £800.


Here is the competition:
There are 30 TOTAL recipes on 30 different food blogs across the web. Can you find them? If so, you are in with the chance of winning Paul Merrett's Ultimate Chef's Kit, worth over £800. On the tab you'll find clues leading to 10 of the hidden recipe and over the next few weeks, additional clues will be posted on the timeline to help you find the final 20. The more recipes you find, the more times you name goes into the draw and the more chances you have to win. The recipes are part of the brand new recipe collection 1000 Ways to Love your TOTAL.

The link to the facebook tab is: http://www.facebook.com/TotalGreekYoghurt/app_270613416296446


Ingredients for yummy cheesecake - including 'maple' syrup

This recipe is quick and easy to pull together, which is just what is needed when you're short of time. I halved the recipe, not needing extra cheesecake hanging around.

When I received my ingredients I realised I'd need to amend the recipe slightly - the recipe specifies two 'cookie type biscuits' and I had been given digestives and butter. What to do, except make a digestive base?! There was also no clue given as to the size of mould/pastry ring/pastry cutter needed so I had to guess. I used a 7cm diameter ring. I guessed slightly wrongly and ended up with too much cheesecake mixture for my ring. I also guessed the amount of biscuit mix I'd need wrongly too. I decided two digestives (weighing 30g) bashed up and mixed with 15g melted butter would be plenty, and it was; plenty and too much. I used about half of it, which corresponds to one biscuit and about 8g butter.


I was saddened that the 'maple syrup' provided was only 35% maple syrup, so I decided that in order to make the best of the other ingredients I had been given I would use some of my own 100% maple syrup - it seemed silly not to. Well, I do not profess to be a cheesecake afficionado, but I really, really liked this and will definitely, definitely be making it again. The beautiful creamy richness of the yogurt-cheese mixture, the popping of the blueberries as you ate them (can you tell I was generous with my blueberries - pile them high) and the buttery sweet base and smoky sweet maple syrup. Wow, it was lovely. I was worried that the yogurt-cheese mix would be too tart but it wasn't at all.

I would recommend making and eating them the same day though because my method of making the base meant that the yogurt-cheese mixture made it go slightly soggy by the next day which was a bit of a shame. The other thing I would recommend is drizzling with maple syrup just before you eat them because again, this made the base a little soft too. However, the taste was just fabulous. My final point is that I needed a chef's blowtorch to get the cheesecake out of the ring. I was honestly dubious as to whether this would work, but just trying to pull the ring off the cheesecase wasn't working so I used the blowtorch (first time use!) and it worked really, really well (just as well as when fancy-pants chefs use it in television programmes). I really don't know how I would have managed to release it otherwise. I was really pleased with how this looked - very smart and definitely suitable for a dinner party. 


So what do I think of the recipes overall? Well, there are a lot of them. I didn't have a thorough look through all of them (not surprising given there are 1000) but I was disappointed to see that the majority of the baking recipes were 'serve with greek yogurt' rather than actually using it as an ingredient. This is why I picked this recipe - the yogurt is actually used as an ingredient rather than just a garnish or serving suggestion. From the savoury recipes I looked at this appears to be the case too - garnishes rather than ingredients for many recipes.

This particular recipe lacked certain necessary details (such as the size of the ring to be used) and that it would be difficult to subsequently remove the ring without a blowtorch (though if you can think of an alternative method please leave a comment!). I made a different base simply due to the ingredients I was given, but the specified cookie would probably work well. But as mentioned before it was delicious and I'll make it again. I was thinking that a 'deconstructed' version would be easier too - just mix the cream cheese and yogurt in a bowl and add the fruit, buttery biscuit crumbs and then pour over a generous slosh of maple syrup - not as pretty but just as tasty!

Overall, the recipes lack a little detail in how to actually make some of them, which has made me appreciate the work recipe writers put in to their jobs. I think there are some excellent ideas there for inspiration but perhaps not for complex recipes. My love for Total yogurt remains undimmed - it's still utterly delicious.

Disclaimer: I received the groceries pictured above to make this recipe and have included relevant links to Total's website for their campaign. I have not otherwise received any payment and all opinions expressed are my own.

Tuesday, 7 August 2012

International Scone Week - Blueberry Vanilla Ricotta Scones


It's International Scone Week - hop over to Fig Jam and Lime Cordial for a bit more of an explanation! Scones are popping up all over the place Joanna has some interesting looking experimental Kombucha scones, Misky has made Celia's lemonade scones, and Heidi is making lots of scones. So as a confirmed scone lover I'm wading in with my offering this time. 

You can find all of my previous scone blog posts by clicking here.


Other scones I'd like to try from around the web...
Dan Lepard's Ginger Beer Scones 
Dan Lepard's Vanilla Almond Scones (I'll miss off the almonds!)
A savoury alternative to sandwiches Mediterranean Scones
Some with strong flour Fig and Date Scones
Celia's Lemonade Scones
A Frying Pan Pizza with a scone-like base


Blueberry Vanilla Ricotta Scones (adapted from BBC Good Food)
Ingredients
250g ricotta
120g golden caster sugar
280g self raising flour
70g butter
100g fresh blueberries
1tsp vanilla extract (or a little more)

Method
- Preheat the oven to gas 5 1/2/190C. Place a sheet of parchment paper on a baking sheet.
- Place the ricotta in a bowl, beat in 60g sugar and the vanilla extract and set aside.
- Place the flour in a large bowl and rub in the butter (I used fridge cold butter here).
- Mix the remaining sugar into the flour/butter mix.
- Add the ricotta mixture to the flour mixture and bring together almost into a dough. When it has nearly combined, add the blueberries and continue to mix.
- Tip onto a floured surface and briefly knead to bring together. (Well, not really knead, just bring it together - by squashing it a bit really)
- Pat out into a large square about 1 1/2" or 3cm thick (it's a bit vague - it sort of depends on how deep you want your scones).
- Cut into 16 pieces (the dough will be fairly dry) and transfer to the baking sheet, spacing apart a bit, as they expand during baking.
- Bake for around 25 minutes until risen and golden. I returned the centre four of my scones to the oven for an extra 5 minutes because they didn't seem quite as done.
- Cool on a wire rack.


This has to be one of my absolute favourite scone recipes, and it has made an appearance on the blog before, but I make no apologies for bringing it out again in a different guise, because until you've tried these you really don't know what you're missing. They're moist and full of vanilla flavour and juicy goodness of the blueberries and don't really even need any butter, although a good dollop of blueberry jam (Bonne Maman do one I'm particularly fond of) wouldn't go amiss.

What's your favourite scone recipe? What am I missing that I should really try?

Tuesday, 24 July 2012

White Chocolate, Blackcurrant and Apricot Cake


I have seen lots of posts recently featuring blackcurrants and chocolate - there seems to be a rash of late entries into We Should Cocoa so I thought it was about time I threw my hat into the ring as it were and typed up my contribution. Choclette is the host this month and has chosen blackcurrants as the ingredient to pair with chocolate. I have to confess that I was rather relieved when this announcement was made. I haven't really relished the last couple of months challenges - firstly almonds (hmm, allergy alert!) which Laura kindly let me enter with a substitute of peanuts (no allergy concerns here for me) and then coffee - ugh. I know many out there are coffee lovers but I'm not among you!


So blackcurrants was rather welcome. I know it seems to have sparked some controversy - blackcurrants are apparently nigh on impossible to come by fresh in Australia and even here in the UK, many people have been unable to find the fresh berries and have chosen instead to use jam. As a little aside, I discovered when googling (thank you Wikipedia) that Ribena (a UK blackcurrant squash drink that used to claim 95% of the fruit grown in the UK) is so-called because the Latin name for the blackcurrant is Ribes Nigrum.


Please allow me a small moment of joy here - my garden is a complete mess (this is not the moment of joy!). I could post a photo and show you just what my lawn meadow looks like at the moment and how the hedges privet trees are threatening to take over the neighbourhood, but I won't (it's embarrassing for a start). But in amongst all the mess I fought my way towards the solitary blackcurrant bush and picked my bounty (I didn't use all of my currants in this cake) for this year. In spite of being nearly overcome by the long grass I have blackcurrants this year!


I decided to make a simple cake to show off the glory of my fresh fruit to the maximum. A combination with fresh apricots and white chocolate seemed fitting for the sunny days this weekend and so that is what I made.

Ingredients ready to be added


White Chocolate, Fresh Apricot and Blackcurrant Cake
Ingredients
125g softened butter
125g caster sugar
2 eggs
140g self raising flour
1tsp vanilla extract
50g white chocolate, chopped small
95g blackcurrants
130g apricots, chopped (this was 3 apricots)

Method
- Preheat the oven to gas 4/180C. Grease and line a 7"/18cm deep tin.
- Cream together the butter and sugar until pale and fluffy.
- Add the eggs, flour and vanilla and beat well to combine.
- Fold in the chopped chocolate
Bear with me here - the method may seem a little odd, but there is method to the madness....
- Spoon half of the mixture into the tin and spread it out.
- To the remaining half of the mixture in the bowl, add half of the chopped apricots and half of the blackcurrants. Mix gently until combined, but take care not to smash the blackcurrants.
- Spread this fruity cake mixture over the top of the cake mix already in the tin.
- Scatter over the remaining apricots and blackcurrants.
- Bake for 55-65 minutes - you may need to cover the cake towards the end of the cooking time if it is browning too much.
- Remove from the oven and allow to cool a little in the tin before removing to a wire rack.


I had wondered how to decorate this cake, but then didn't need to - the fruit that had stayed near the top had done a wonderful job of decorating the cake as it stood - no icing necessary. It was a delicious, fresh, fruity moist cake with little bursts of white chocolate sweetness that disappeared rapidly at work and was very popular. 


I am entering this into We Should Cocoa as mentioned previously. Hosted this month by Choclette of Choc Log Blog and co-hosted by Chele of Chocolate Teapot.


I am also entering it into this month's Alphabakes, where the letter is W (white chocolate). The host this month is Caroline of Caroline Makes and her co-host is Ros of The More than Occasional Baker.


Finally I am entering it into Ren's Simple and In Season, because those blackcurrants are right in season in my garden at the moment. This is hosted this month by Fleur.

Sunday, 26 February 2012

Sour Cream Vanilla Cake


A good storecupboard standby (if you can classify sourcream as storecupboard I suppose). This is one of Dan Lepard's recipes, minimally adapted to suit my fridge.

I remember making this in an adapted form a very long time ago, and not really being very enamoured of it (you can see my original post here) but circumstances dictated that I needed to use up the sour cream, wanted a cake at the end of the day and the two collided in this recipe.


You can find the version published in the Guardian here (I used the version in Short and Sweet) but there are changes in the quantities of butter, sugar and eggs, so although similar it's not exactly the same cake. As I mentioned I made a couple of change of my own. I only had a small (150ml) tub of soured cream, but did have some full-fat Greek yogurt too, so I used all the soured cream and made up the difference with yogurt. I also added 2tsp vanilla extract to the mixture too. I found my cake took about 70 minutes to bake, but it is a deep cake so this is to be expected. I think I recall covering it with foil after about 45 minutes.


I recently bought some parchment cake tin liners from Lakeland, having resisted for a long time. I'm not sure why I waited so long (well, I guess cash is part of the answer - they aren't cheap!) Well, they won't be suitable in all circumstances - they do give a pleated edge to your cakes, which is quite attractive in homely style cakes such as this, but wouldn't be any good if you want a smooth finish, but I'm very impressed! No bother of lining the tin, and saved a little on washing up too - always a bonus! In addition, once I had cut the cake, I simply lifted the liner with the cake contained inside into my cake tin for easy transport to work. 


Noted by Dan as a very buttery cake, best eaten cold I thought this was an absolute dream to cut - you can see how neatly the slices cut - no crumbling in the centre here, with beautiful sharp edges. I decided to make this cake more of a dessert for myself by serving it with stewed raspberries and blackcurrants, with just a little sugar. The contrast of the buttery cake and the sharp berries was lovely. I couldn't really taste the vanilla, perhaps it's such a large cake that it needed more than I used. I was definitely keener on this cake now than when I first made it. The texture seems finer than in my previous photos, and perhaps my tastes have changed too. One of my colleagues commented that it had a subtle flavour - I'd agree with this, but it provides the perfect foil for the berries.  

Saturday, 3 December 2011

Raspberry Blueberry Soured Cream Cake


This cake was purely the result of staring in the fridge and wondering what to make to use up various ingredients. These included blueberries and raspberries on offer from the shops, and soured cream with no future plans attached to it.

The recipe is effectively something I've made up, but based extremely loosely on Nigella's Chocolate soured cream cake, insofar as I looked at her recipe before I started making this one!


Raspberry Blueberry Soured Cream Cake
Ingredients
130g softened butter
150g sugar
175g self raising flour
100g soured cream
2 eggs
1 tsp vanilla extract
150g raspberries (1 punnet)
handful of blueberries (?60g)

Method
-Preheat the oven to 180C/Gas 4. Grease and line an 8"/20cm square tin.
- Cream the butter and sugar until very light and fluffy.
- Add the soured cream, eggs, vanilla extract and flour and beat again until everything is just incorporated.
- Spoon the mixture into the prepared tin and level out with a spatula.
- Sprinkle the fruit over the top of the cake.
- Bake for 50 minutes until golden brown and a cake tester inserted comes out clean.
- Allow to cool a little in the tin and then turn out and allow to finish cooling on a wire rack.


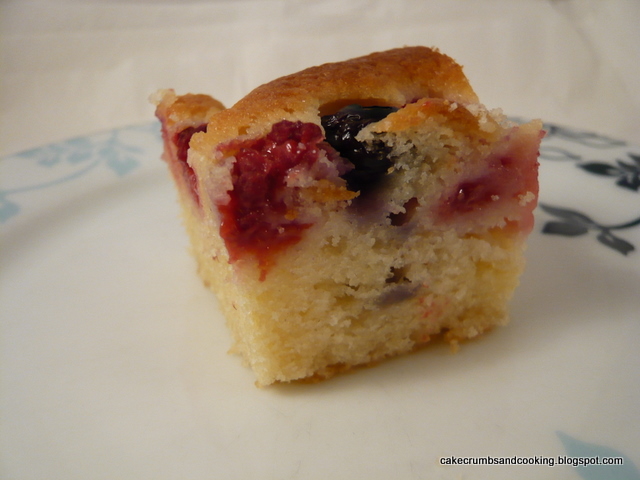
I cut them into relatively small squares and they were the perfect accompaniment for morning tea-break. Really soft and moist cake, with a lovely juicy burst from the raspberries and blueberries. I don't normally buy fruit so out of season, but this was about a month ago, and believe it or not, the raspberries were marked as British, and as they looked such good quality and smelled nice too, I succumbed to the reduced-to-clear offer. And actually, I'm glad that I did because I thoroughly enjoyed this simple cake.


I think that Christmas baking will happen at some point - I keep thinking about it and know that Christmassy baking is popping up all over the place but I haven't got into the Christmas mood just yet. I think part of the problem is that there are so many things I see and want to make that I just don't know where to begin :-)

Any suggestions for things that'll get me in a Christmassy mood and make me want to bake? Anything special that you're planning for Christmas? or anything that is a permanent fixture in your Christmas baking? All comments and suggestions gratefully received!

Sunday, 9 October 2011

Chocolate and raspberry marble cake


It's nearly here! What, I hear you cry, what is nearly here? Well, Chocolate Week of course! This annual event (this year the 10th-18th October) was established eight years ago now, and you can find out more about it here, on the Divine website. Divine have been the main sponsor for this event since the start, and there are lots of yummy chocolate ideas on their website (as you'd expect really!). There are lots of events around the country that you can find out about. I love the idea of chocolate week (as a chocoholic this should not come as a surprise to regular readers..) because it's essentially an excuse to eat as much chocolate as possible... mmmm, chocolate induced stupor coming right up.


I thought I'd have a bit of a chocolate theme on the blog this week, so this is the start, although you might want to check out the insanely, intensely chocolate-y double chocolate ricotta scones I posted last week - if I'd thought ahead I'd have saved them for this week, but wanted to share their sweet goodness with you as soon as I could.

To kick off chocolate week, I decided to make a marbled cake, just to ease us in and based it partly on this recipe by Dan Lepard for a crumble topped chocolate marble cake, and also on the availability of ingredients in my fridge (yes, raspberries that I wanted to use up!) I decided to combine a few ideas and came up with this original. (As an aside, said chocolate crumble cake is pictured in Dan's new book, Short and Sweet and looks absolutely delicious. The chocolate crumble on top looks fab, I must do that some time!)


Chocolate and raspberry marble cake
Ingredients
175g butter, softened
175g caster sugar
3 large eggs
200g plain flour
2 tsp baking powder
For the chocolate layer:
2 scant tbsp cocoa powder
1 scant tbsp hot water
100g chocolate (70% cocoa solids), chopped
For the raspberry layer:
70g fresh (or frozen, defrosted) raspberries, crushed
1-2 tbsp plain flour

Method
- Grease and line an 8" square tin with baking parchment. Preheat the oven to Gas 4/180C.
- Cream the butter until light and fluffy.
- Add the eggs one at a time, along with about 25g flour if the mixture looks as though it'll curdle.
- Sift in the remaining flour and the baking powder. Mix well.
- Transfer half of the mixture to a smaller bowl containing the crushed raspberries. Mix well, and then add the extra flour and mix this in. My mixture curdled a little.
- Add the cocoa powder and hot water and mix well, then add the chopped chocolate and mix in.
- Dollop alternate blobs of batter into the prepared tin and when all used up, swirl with the handle of a spoon to marble.
- Bake for 40-45 minutes (I think, can't quite remember the exact timings) until well risen and a cake tester/cocktail stick inserted comes out clean.
- Leave to cool on a wire rack.


I was pleased with the way this cake worked. The marbling was pretty good throughout the cake - always difficult to tell when the cake goes into the oven whether you've over or undermixed the colours. The chopped chocolate in the chocolate portion stayed well suspended and was a really tasty addition. I was really surprised by the flavour of the raspberry portion - I had expected this to be pretty non-existent if I'm honest, but even though I only used 70g raspberries in it, the flavour was definintely raspberry! Admittedly, the colour wasn't pink, but then I didn't really expect it to be. If you want a pink colour, add food colouring!

Keep an eye out for more chocolate goodies this chocolate week.... all will be revealed in good time.

Tuesday, 27 September 2011

Sticky Blueberry Jam Bread - Breakfast Club #15


Well, I've called this a bread, mostly because it's a yeasted dough, but it actually tastes far more like cake to me! Which is great, I get to eat cake for my breakfast if I make this bread mmmmm, cake!


I blame the whole thing (quite happily though!) on Celia at Fig Jam and Lime Cordial, who, months and months ago, posted a recipe and method for an absolutely amazing looking blackberry crown. She was fortunate enough to be given some delicious homemade blackberry jam by a kind friend and wanted a fitting way to use this gift. So her blackberry crown bread, inspired by the presentation of a recipe in Dan Lepard's The Handmade Loaf and using a recipe for a sweet dough by Richard Bertinet, was born. And I was in love! (Hop over to the recipe, look at the last picture of the cut bread and tell me you don't want to eat it - I won't believe you!)


Time passed, as it does and then when Helen at Fuss Free Flavours announced that this month's Breakfast Club theme was conserves, I realised that the time to make this bread had arrived. For the genius of this loaf is that you don't need to put the conserves on the loaf for they are already contained within the loaf, clever no?! Although additional butter and jam wouldn't go amiss when eating this for breakfast.This month the event is being hosted by Sonia's Kitchen.


I halved the recipe as given and am giving the amounts I used below:

Basic Sweet Dough
Ingredients
125g full-fat milk
1tsp instant yeast (although the original recipe specifies fresh)
250g strong white flour
30g unsalted butter, at room temperature
20g caster sugar
5g salt
1 large egg

Method
- Pour the milk into a pan and warm to body temperature.
- Mix the yeast into the flour, distributing evenly and then rub in the butter.
- Mix in the sugar and salt, then add the eggs and milk.
- Continue with your usual method of kneading (I favour Dan Lepard's method of using oil on the work surface and not kneading all that much) leaving the dough until it has doubled in size.

To make the loaf
Jam of choice and matching fruit - I chose blueberry, but I think raspberry would work well, along with Celia's choice of blackberry, or even perhaps cherry.

Pinch off pieces of dough - from memory I think I used pieces 50g in size and used nine altogether. Form into balls and then flatten out, forming a little pocket. Add a small amount of jam and pinch the ball back into shape. As you finish shaping the balls, pop them into a greased small loaf tin (I used one that is smaller than a 1lb tin, but had some dough left, with which I made some little rolls) and layer them up with light muscovado sugar and fresh blueberries. Sorry, I didn't really measure the amounts of these, but a light sprinkle of sugar and as many fresh berries as you fancy. Check out Celia's post for how much she used.


Confession time that I forgot to note how long I cooked this loaf, but as Celia points out, it is high in sugars, both added and natural from the milk in the loaf, so a lower temperature than normal is needed. Celia suggests starting at 200C/Gas 6 for 10-15 minutes and then dropping the temperature to 175C/Gas 3-4 for a further 20-30 minutes, and I am sure I followed her advice. Keep a beady eye on this loaf because it would be a shame to allow it to burn.

Remember that the jam/blueberries will be scorching hot when the loaf comes out, burning in only the way hot sugar can - ouch! It was very sticky underneath too - mmmm, sticky! I had to take quite a few shots to get one where there was more bluberry in evidence....


Oh boy am I ever glad I made this loaf. It lived up to and exceeded my wildest bread-y dreams. So soft, so light, and ever so delicious. I really must make this again soon. I haven't eaten much brioche in my life (another thing to recify!) but to my mind this was soft and cakey like a brioche, but without nearly so many eggs or as much butter or sugar. It was, however, perfectly sweet and buttery for me, and I love the idea that I'm eating cake for my breakfast. I would urge you to give this a go - it's fabulous!

I am also submitting this to Jac's Bookmarked Recipes event, hosted at Tinned Tomatoes. This was bookmarked from Celia's blog, Fig Jam and Lime Cordial, and also from its original source, Dough by Richard Bertinet.

Wednesday, 3 August 2011

Raspberry oat traybake


These were a very quick and easy bake that I spotted in a recent issue of BBC Good Food magazine. They ticked all the boxes - super quick to make and bake, reasonably cheap to make (especially if you use frozen fruit) and fairly healthy to boot. Well, they only contain 50g of butter for the entire tray, and they've got fresh fruit and oats too so although they aren't as healthy as say, a piece of fruit, you could certainly do worse!

I adapted the recipe slightly, and as I said, I used frozen fruit. I allowed it to thaw first, before mushing it up as stated in the recipe. You can find the original recipe here.

Raspberry oat traybake
Ingredients
200g rolled oats
50g medium oatmeal
150g raspberries, thawed if frozen, then mashed to break them up
1/2tsp vanilla extract
50g butter
75g runny honey

Method
- Grease and line an 8" square tin (20x20cm). Preheat the oven to gas 7/220C.
- Melt the butter and honey over a gentle heat.
- Mix in the oats, oatmeal and vanilla if using.
- Spread about half of the mixture into the tin and press down.
- Spread over the raspberries and then sprinkle/spread over the remaining oat mixture.
- Bake for 10-12 minutes until golden and crispy.


I used a mild honey, so it wasn't too obvious in flavour. I wouldn't bother adding the vanilla again, it got lost in the other flavours, although I had thought it would go well with raspberries. I think I baked mine at gas 6 rather than gas 7, but can't honestly remember, which is a pity because they were indeed browned at 12 minutes, as suggested by the recipe. Perhaps I did use gas 7 then...

I think next time I'll use more fruit because 150g only gave a very thin covering. I also used slightly more than half of the mixture to cover the base, and then sprinkled everything that was left over the top.

As you can imagine, without very much fat to hold them together they were very crumbly. Not so that you couldn't pick up a piece, but you had to be careful. I really liked them and can see them becoming quite a regular quick bake for when I can't think what else to make - they made a perfect small midmorning snack. I think they'd also be great with blackberries (though you'd have to make sure to squash them up well, and might need 200g to get a layer), or perhaps even very finely chopped stone fruit like apricots or nectarines. All sorts of possibilities!

Sunday, 24 July 2011

Redcurrant jelly


I originally wrote this post last October but then never got round to inserting the pictures, recipe, finishing it off and posting it. However, I hope you'll forgive me, because now seems a pretty good time to post it, since redcurrants are actually in season and you'll be able to use fresh ones, preferably from the pick-your-own rather than the frozen ones I used to create some freezer space. I would have pretended that it was jelly from this year, but most of the pictures feature jars labelled 'October 2010' so I think you would have guessed....... so here is the post I wrote last October, modified only slightly!

Regular readers of this blog will know that I seem to have a perpetual freezer problem - there's never any space in there at all. In fact I would go so far to say that my freezer is like a reverse tardis - the freezer looks big enough on the outside but actually seems to hold very little. So, fed up of trying to shoehorn more stuff into it, I decided to have a go at actually using some of the things in there. When redcurrants were in season during the summer I stashed quite a few of them in the freezer with no particular plans in mind - summer fruit pudding perhaps. But months pass and summer fruit pudding no longer seems desirable. So I hunted through and found I had quite a few.


Now for my birthday (some months ago) my darling brother T was kind enough to give me two of the River Cottage Handbooks (he probably won't remember this as I actually bought them ;-)), one of which was No. 2 Preserves by Pam Corbin. I only looked in it recently and am sorry I didn't do so sooner as it's stuffed full of delicious things that I really, really want to make. I've made my own jam for a number of years and enjoy it, and J used to make redcurrant jelly when I still lived at home, so I wasn't too daunted by the prospect of a jelly bag and all the associated sterilising jars palaver that goes with preserving. Hmmm, perhaps I should have thought harder about it before I started.

I went to buy my jelly bag and stand, but discovered that the stands were really expensive, so I thought I'd save myself some money by just getting the replacement jelly bag that was sold separately. Having followed the recipe through to the stage of soft fruit hot in the pan ready to be dripped through the jelly bag I realised the error of my ways. How was I going to hold the jelly bag (complete with clever elasticated neck for holding it securely onto the jelly drip frame) open to add my (very hot) fruit and then stand and hold it while it dripped. Hmmm. So don't follow my example - if you want to make jelly, fork out for the stand too! In the end I had a bit of an elaborate palaver involving various contortionist positions to reach hot fruit on the stovetop whilst holding a bag of dripping hot fruit and pouring aforementioned hot fruit with only one hand from a large pan..... I'm sure you get the picture. Luckily I'm not all that bothered about a crystal clear jelly (which is why you let it drip through under its own weight rather than squeezing) so I cut short the dripping stage by squeezing the bag (did I already mention how hot that fruit was - I really don't recommend this stage!) - I think this also increased the yield. There are no photos of the in-process stages, for reasons outlined above - I could already have done with spare hands; there was no way a camera was being involved too.

July 2011 insertion: As you can imagine I can no longer remember exactly how closely I followed the recipe, but think I was pretty close so I'll give the recipe here:

Redcurrant Jelly
Makes 4-5 x 225g jars
1kg redcurrants
granulated sugar

You will also need sterilised jars.

-The redcurrants do not need to be top and tailed or even taken off their stalks. Simply wash them, put into a preserving pan with 400ml water then simmer until they are very soft and have released all their juice, approximately 45 minutes.
-Strain through a jelly bag - see discussion above!!! Overnight will give a clear jelly, forcing the fruit through the bag will result in a cloudy jelly.
-Measure the juice, put into a cleaned preserving pan and bring to the boil. For every 600ml juice, add 450g sugar, adding it only when the juice is boiling. Stir until the sugar has dissolved, ensuring the sides of the pan are free of undissolved sugar crystals. Boil rapidly for about 8 minutes or until setting point is reached. I can't remember how long my setting point took, but I used the wrinkle test to tell when I had a set - small plate in the freezer, jelly onto plate, push with finger and see if it forms wrinkles, if it does, it will set. 
-Remove from the heat, stir to disperse any scum, then pour into warm, sterilised jars and seal. Tap the jars to disperse any air bubbles caught in the jelly.

Use within 12 months.


In spite of all the problems I had with straining the jelly, I really enjoyed making the jelly and if you reuse jam jars with tamper proof seals hearing the little pop as they pop down must be one of the most satisfying noises I can think of in the kitchen!


Note to self - when reusing jam jars (or honey jars in my case) it's worth trying to get the label off before you sterilise them. The smell of baking label/glue is really unpleasant. However you can use magic sticky stuff remover to get rid of the label. (Available from Lakeland) I wish I'd invented this because it truly is amazing. Remove as much of the paper part of the label as you can and then use the magic sticky stuff remover to .... well, remove the sticky stuff. Bingo, clean tidy jar ready for labelling up!

Saturday, 2 July 2011

Strawberry Chocolate Cake


I think I should really have submitted this cake for last month's We should cocoa challenge; it was a lot more successful and tasty than the strawberry and white chocolate muffins I ended up submitting. Ah well, never mind.

After the debacle of the not-peaking-muffins I still wanted to try out the strawberry and dark chocolate combo - being much more a fan of dark chocolate than either milk or white (though I'm seriously tempted to have a go at making caramelised white chocolate as Celia has done). Just think how delicious strawberries dipped in molten dark chocolate and allowed to set are - mmm. So I thought the combo would be good in a cake. Hence this cake. Well, I'm a simple soul at heart, if I want dark chocolate and strawberries in a cake, that's what I make.... no more complicated reasons required round here!


I sort of made this up as I went along, hence the slightly random amounts of some of the ingredients in relation to each other. I had 175g in my mind, but what follows is what happened....

Strawberry and dark chocolate cake
Ingredients
160g butter, softened
175g white caster sugar
180g self raising flour
3 eggs
60g dark chocolate (70% cocoa solids), broken into small pieces
130g strawberries, washed, hulled, quartered and tossed in a couple of tbsp flour extra
(vanilla extract - see below)

Method
- Preheat the oven to gas 4/180C. Grease and line a 20x23cm (8x9") small baking/roasting tin.
- Cream the butter and sugar until light and fluffy.
- Add the eggs and flour and beat until well combined.
- Fold through the chocolate and floured strawberries quarters until well distributed.
- Spoon into prepared tin, level and bake for 45 minutes.
- When cool enough, turn onto a wire rack and allow to cool completely.
- Dust over a little icing sugar to serve.

If I were making this again (which would be a good idea, it was yum!) I'd add about a tsp vanilla extract just for added oomph in the cake. It didn't really need it though!

Note that when turning the cake out, it's extremely fragile - partly because it's a lovely tender cake, and partly because the strawberries tend to sink to the bottom and make the base very soft.


Really, really pleased with the way this turned out. A lovely snacking cake for break time at work, and my colleagues made their appreciation known. I really enjoyed the strawberry and dark chocolate combo. I had expected the chocolate to be harder than it was, but it was a little soft and very lovely. The strawberries mostly sank, but some remained suspended and they were a lovely burst of juiciness in the cake. I loved the way that some bites had more strawberry and some more chocolate. Mmmmm....

Just as an aside, I used Normandy salted butter for this cake. I often use salted butter, but not normally with crystals in it, but this needed using up soon. I was worried that the cake would taste funny or too salty, or worst of all have big crystals of salt in it still.... eeek, but I needn't have worried, it was fine. I obviously don't have a sufficiently sophisticated palate to be able to pick up salted butter in cakes. More joy me!

Ah, tupperware - all packed up and ready to go.

LinkWithin

Related Posts Plugin for WordPress, Blogger...