Showing posts with label frugal. Show all posts

Thursday, 25 April 2013

Apple and Banana Muscovado Cakes


These little cakes are a Cake, Crumbs and Cooking original, inspired by the random selection of ingredients that I found myself with a few days ago....

I had an over-ripe banana (a common occurence in my house), some eggs that needed using up quickly, and some apples that were not particularly great for eating. It's the end of apple season (by a considerable margin...) and at the moment the quality is a bit mixed. These ones were ok, but some of them had been bruised and I thought baking with them would allow me to lose any soft bits when I chopped them up.


There isn't as much butter in this recipe as I would normally use for this quantity of eggs and flour, but that's because I took one 250g pack out of the fridge to soften, used 175g for a different recipe and the remaining 75g for these cakes. They didn't suffer for the lack of butter, there were plenty of other flavours going on and the banana added moisture too.

A simple glace icing topping was required to let the cakes shine, but then I thought it looked too plain so I scattered across some butterscotch chips I had, guessing that both banana, apple and muscovado would go with butterscotch. I'm pleased to say I wasn't wrong!


These were lovely and received very positive feedback at work too, which is always nice. Soft cake with a good muscovado and spice flavour, the banana adding moisture and the apples added a good crunch to the cakes as they were quite a crisp eating apple and didn't soften all that much during the cooking. A successful experiment.

Apple and Banana Muscovado Cakes
Ingredients
75g unsalted butter, softened
150g light muscovado sugar
1 ripe banana, mashed (about 100g mashed)
225g self raising flour
2 apples, chopped (unpeeled) mine weighed 240g before coring
3 medium eggs
1/2 tsp bicarbonate of soda
generous 1/2 tsp mixed spice

Method
- Preheat the oven to 180C/Gas 4. Line a muffin tin with 14 cases (I have a 12 and 6 hole tin combination that will fit onto one layer in my oven)
- Cream the butter and sugar. It won't really go light and fluffy because there's not that much butter in there.
- Add the mashed banana, self raising flour, bicarb, mixed spice and eggs and beat well to combine.
- Fold in the chopped apple and divide between your cases.
- Bake for 25-30 minutes until golden brown and a cake tester comes out clean.
- Allow to cool on a wire rack.

For the icing: a simple glace icing made with about 200g icing sugar and water

I'm entering these into a number of blogging challenges:


Alphabakes, hosted this month by Ros at the More Than Occasional Baker (cohosted by Caroline of Caroline Makes) where the letter is A for Apple.


Kate of What Kate Baked is hosting Tea Time Treats this month (cohosted by Karen of Lavendar and Lovage) with a theme of cupcakes and muffins.


I'm entering them into the no-waste food challenge at Turquoise Lemons where this months theme is fruit (I was relieved to be rid of my apples and banana!) hosted by Elizabeth of Elizabeth's Kitchen.


I'm also entering them into Credit Crunch Munch, hosted by Fab Food 4 All (and Fuss Free Flavours) as I was using up eggs, apples and a banana that would otherwise have been wasted and this recipe is mercifully light on the expensive butter.

Wednesday, 3 April 2013

Fruity Chocolate Squares

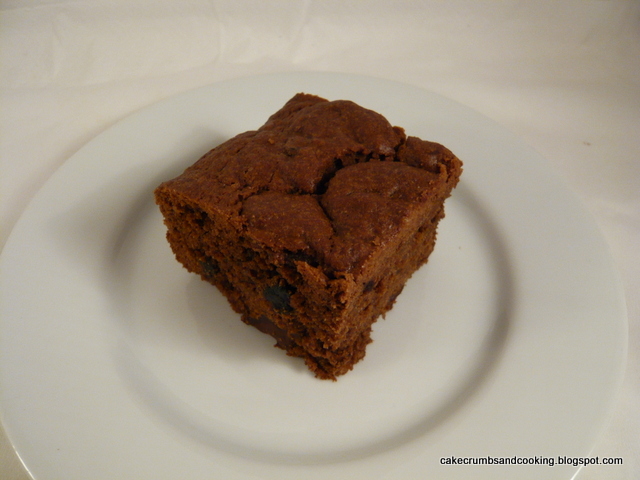
Yep, another brown square.... tasty though

I knew I wanted chocolate cake and nothing too fancy but didn't really know what else beyond that. As I hunted in the cupboards and fridge for inspiration, a carton of soured cream that needed to be used (having been bought with no particular recipe in mind) and some dried fruit caught my attention. The dried fruit in question was some that I had bought reduced-to-clear a while ago. It's dried fruit though - I'm not sure why they were so desperate to sell it off but they clearly were, it had been reduced from £1.50 to 29p with about 6 months still until the best before date. I can only think the manufacturers wanted to launch new packaging. Anyway, a bargain is a bargain. Unless you don't use it so I thought I'd better incorporate my dried blueberries into a cake. 

Double yolker, I promise this isn't just two eggs. Marginally more interesting than a brown square...

Fruity Chocolate Squares
Ingredients
60g 72% cocoa chocolate, melted (I used the microwave - carefully!)
120g butter, softened
175g light muscovado sugar
1 tsp vanilla extract
1 egg, beaten (mine turned out to be a double yolker!)
225g self raising flour
20g cocoa powder
150ml soured cream
70g dark chocolate, chopped
55g dried fruit (I used 30g dried cherries, chopped in half and 25g dried blueberries)

Method
- Preheat the oven to 180C/Gas 4. Grease and line an 8" square tin with baking parchment.
- Cream the butter and sugar until light and fluffy - this might take 5 minutes or so even with an electric mixer.
- Add the vanilla, egg, flour, cocoa powder and soured cream and beat well until combined.
- Stir in the chopped chocolate and dried fruit and transfer to the baking tin (this is a stiff mixture - don't worry)
- Bake for 40-45 minutes until risen and a cake tester comes out clean.

Brown square from a slightly different angle...

I had been worried that this cake would be rather dry and crumbly, but actually I needn't have worried at all. It was moist and tasty and the combination of dried blueberries, dried cherries and chopped chocolate meant that each bite had an extra, interesting taste and texture. 

Sunday, 10 March 2013

Golden Syrup Banana Cake


I frequently pick up the recipe cards that are available in the supermarkets. I think I must have picked up over a hundred over the years, and due to my squirrelling tendencies they don't tend to get culled very often. In my defence, however, occasionally, I will recall a recipe card with something I thought looked particularly good, but for whatever reason didn't get made at the time of picking up the card. That's the case with this recipe.

It was on a card from Waitrose (who do tend to have particularly interesting looking recipes - to my mind at least) and was for 'Sticky honey, almond and banana cake'. There was the immediate problem of having to substitute for the almonds - both ground in the cake and flaked on the top, but that was easily solved by substituting plain flour for the almonds and leaving off the topping.


You can find the original recipe here on the Waitrose website, and apparently I've been meaning to make it for a year now, having first seen the recipe in March last year. I also thought that since I was already adapting the recipe I'd make it cheaper by using golden syrup instead of honey (and for bonus points my golden syrup was on offer when I bought it!). I decided to use an 8" square tin (20cm square), which is about 15% smaller than the stated tin size, so I was prepared to give it a little longer in the oven than the stated 30-45 minutes.

So here is my adapted version...

Golden Syrup Banana Cake
Ingredients
125g self raising flour
50g plain flour
100g butter
100g light muscovado sugar (or light brown soft sugar)
100g golden syrup
1 very ripe banana, mashed
2 medium eggs, beaten

Method
- Preheat the oven to 180C/Gas 4. Grease and line an 8"/20cm square tin with parchment paper.
- Melt the butter, sugar and syrup. Remove from the heat and allow to cool slightly (I didn't leave mine very long at all).
- Mix together the flours in a bowl and add the melted mixture followed by the mashed banana and beaten eggs.
- Beat well (I did this by hand) to give a smooth mixture (well, smooth aside from the lumps of banana...) and pour into the prepared tin.
- Bake for around 35-40 minutes until risen and golden and a cake tester comes out clean.
- Allow to cool on a wire rack.

I served mine cut into 12 fingers.


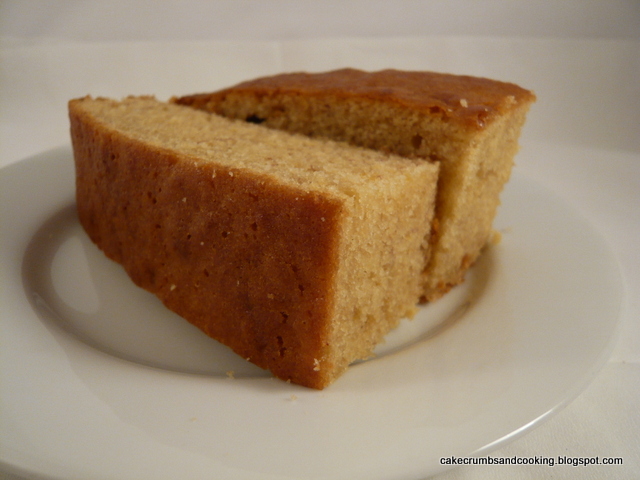
This is a really useful recipe for when you need to use up just one banana that is well past it's eating best (in my opinion at least). Although it doesn't look anything special the cake was good - fairly moist (although it doesn't really look it) and with a subtle banana flavour. I didn't really get much flavour from the syrup, I'm sure the combination of honey and almond would have been much more flavoursome, but I did enjoy the cake as it was. I'll make it again, but now I know that the syrup flavour isn't particularly strong I think I'll add some spice next time - perhaps mixed spice, nutmeg or ground cardamom.

A very quick and easy bake, and I bet children would love to help with this one!


I'm going to send this to Credit Crunch Munch. It helpfully uses up that last overripe banana in the fruit bowl attracting fruit flies, uses syrup instead of expensive honey and is quick and easy to make. Credit Crunch Munch is hosted by Helen of Fuss Free Flavours and Camilla of Fab Food for All. The host this month is Helen.

I'd enter it into Dom's Random recipes too as the theme this month is cuttings, memories and clippings and I guess recipe cards would count. But I be lying if I said that the selection was random - I needed to use up the banana!

Thursday, 12 January 2012

Malted Grain Bread in a Pullman Tin


When my lovely brother asked me what I would like for Christmas, my thoughts sprang, as ever, to baking. I have been very fortunate and have amassed quite a lot of baking kit - tins and cake cases and so forth, perhaps what I really need is more time to make things and experiment, and people on whom to test my experiements. But T couldn't really buy me some time for Christmas! So my next thought was the Bakery Bits website, treasure trove of amazing products for the home baker. I have seen other bloggers making breads in Pullman tins before, and have also seen homemade/makeshift versions of pullman tins, with more or less successful results. It seems that bread dough is extremely strong when it is rising and the oven spring of a good loaf is enough to dislodge a baking sheet held down by a housebrick or two!


Having seen these attempts at Pullman loaves, I thought it would be one to skip until I had the right tin for the job. And this Christmas I was lucky enough to receive one of these. Since there is a need to have the correct volume of dough to fill the tin and give the characteristic square shape, it made sense to attempt the recipe linked to on the Bakery Bits website. You can find the recipe here on the Bakery Bits blog. I adapted it slightly as I didn't have all of the specified ingredients, but stuck to the main proportions of ingredients.


Malted Grain Bread
Ingredients
400g strong white flour
100g malted grain flour (I used Dove's Farm)
20g olive oil
300ml warm water
scant 2 tsp dried yeast
10g salt (although next time I would reduce this slightly I think)

I essentially followed the method given on the Bakery Bits website, which follows the usual method I use for bread - Dan Lepards method of fairly minimal kneading. I didn't think that the dough was particularly softer than any of my usual bread doughs, but this could well be due to my changing the recipe!


When it came to shaping the loaf to go into the tin to prove, I greased the tin lightly with butter rather than use oil and just rolled the dough up and plonked it into the tin. I then pressed it down to try and make it more even, with some of the centre dough pushed to the ends, because the middle always seems fatter! I then left it to proove while I did other (baking) things. When it came to sliding the lid on, the dough had almost reached the top of the tin in the centre so I had to be a little careful.

The bread was then baked at 200C/Gas 6 for about 40 minutes. After this I tipped it out onto a tray and continued to bake for around a further 10 minutes to colour the three sides of the loaf that hadn't really coloured. The top seemed to have browned quite well anyway but the other sides were pale.


I loved this loaf - absolutely amazing! I made a 100% malted grain loaf with the same bag of flour a few weeks ago and it was a complete chore to eat my way through it - the malted flavour didn't seem as strong for some odd reason, and the bread hadn't risen very well. This loaf was the complete opposite! Somehow, having less malted flour makes the taste more prominent when you bite into a grain, and the crumb was beautifully soft and tender. I left the loaf until the following day to slice and it was so easy to cut into even slices - brilliant. It made the perfect sandwich loaf, and would be ideal for children's packed lunches (or mine, come to that!). An added bonus was that the crusts of the loaf, which I adore, are huge - in a normal tin loaf, the crusts tend to be quite small, but not here!

The tin worked so well, I can see myself adapting lots of recipes to use it. I'd like to try a sourdough in it, but will have to wait a while for that - my starter is *ahem* inactive at the moment. I certainly won't be using it exclusively, as some breads work so well without a tin, and sometimes you want a different kind of crust but this is definitely a most successful Christmas present - thank you very much T, and to Bakery Bits for starting to stock this smaller size tin - the larger one would make far too much bread for me! 

I am going to send this to Helen at Fuss Free Flavours for her Frugal Food Friday blog event (the current Linky is here) - I think that making your own bread is certainly frugal (plus more satisfying and delicious - although I appreciate it's not for everyone), even if this magnificent tin wasn't (although it will pay for itself over time!).

Sunday, 13 November 2011

Buttermilk Oatcakes - Short and Tweet


Again, I'm only just going to get my post up before the Sunday 6pm deadline!

These are the second item I've made from Dan Lepard's new book, Short and Sweet, for the challenge set up by Evidence Matters on twitter and the Short and Tweet blog. Check it out for more information.

This week there was a choice of recipes, we could make either the cheese and black pepper buttons (p258) or the buttermilk oatcakes (p259). Or both of course! I chose to go with the buttermilk oatcakes, I can't find a recipe for them online, but if you fancy making the cheese and black pepper buttons, you can find the recipe here. This was a good challenge because I'd never have made these otherwise, and would have missed out on a good recipe, very quickly made yet pleasing and impressive.

The method involves grinding oats to oat flour/powder in a blender (I love this step, it's so satisfying!) and then mixing the flour with bicarbonate of soda, a little sugar and salt, a little butter and buttermilk or low fat yogurt to mix to a paste. I used low fat yogurt because that's what was in the fridge! These were really quick to pull together, and would be very impressive to serve guests with a cheese board - they need never know that you hardly had to put any effort in at all!


My oatcake dough was really quite soft and sticky, I'll be interested to find out how other people found it. I baked for the specified 25-30 minutes until they were starting to go slightly brown round the edges. The finished oatcakes were still quite soft in the middle, rather like a soda bread type texture rather than the crisp oatcakes you can buy from the shops. Not unpleasant at all, just not quite what I was expecting, although given the combination of yogurt and bicarb, plus the softness of the uncooked dough, I'm not sure why I was expecting them to be crisp!


They are actually quite sweet on their own, which surprised me, because for the half batch of dough I made, I only added 10g of sugar (recommended amount 15-23g). I'm quite pleased with them, because although they will go well with cheese and chutney, they will also be tasty on their own, and I do rather love the taste of oats. I think if you're a fan of porridge you'll like these, because the flavour is the same, but don't be put off if you don't like porridge - these are obviously biscuit texture, not soft and sloppy!!! I made 19 small oatcakes from half a batch.

I hope I manage to make next week's top teacakes, but I may well run out of time!

Sunday, 13 March 2011

Chocolate cranberry crunchies

I love these little crunchy biscuits. I know I've made them before, but they're so versatile, quick and easy to make, and so tasty that they deserve revisiting. The recipe is extremely adaptable to the ingredients you have available, this time I chose dried cranberries and some dark chocolate chips.


I only decided to make them on a whim - I was waiting for some bread to be finished rising, and in the meantime decided to throw together a batch of these biscuits, guessing that they'd probably be pretty well received at work. I was right!

The recipe is from Delia Smith's How to Cook Book 1, in the 'Cakes and Biscuits for beginners' chapter. It can also be found online, here. Delia gives suggestions for variations on the specified chocolate and almond - apricot pecan, cherry flaked almond or raisin hazelnut crunchies, but I think that this could be a very frugal recipe - if you use raisins as the dried fruit (I think they're the cheapest dried fruit you can get hold of round here) and then a mid-range chocolate for the chocolate chips. Much as I adore 70% dark, you could substitute it here for your favourite milk or white chocolate. Yum!

Chocolate cranberry crunchies
Ingredients
110g butter
75g demerara sugar
generous tbsp golden syrup
110g self raising flour
110g porridge oats
40g chocolate chips, or chopped chocolate
40g dried cranberries

Method
- Preheat the oven to Gas 3/170C. Line a couple of baking trays with baking parchment.
- Melt together the butter, sugar and syrup over a low heat.
- Stir in the flour and oats.
If you're using chocolate as one of the add ins leave the mixture to cool a bit at this point otherwise your chocolate will melt and become a big mess (still yummy, but not as attractive)
- Stir in your chosen additions (chocolate and cranberries here)
- Form into walnut sized balls, place on the trays and squash flat a bit.
- Bake for 15-18 minutes. Next time I'll bake mine a little less (I think I gave mine 18-20 mins) because the soft middle was nice!
- Allow to cool on the tray for a while - if you try and move them, they'll fall apart and the chocolate will adhere to the tray rather than stay in the biscuit. When a bit cooler, transfer to a wire rack to cool completely.

These disappeared rapidly, and I wrote out the recipe for a colleague the day I took them in. (Another advantage of having an easy recipe - it's easy to remember the ingredients!) The next day she reported back that she'd made them successfully and her family all liked them. She used a darker sugar, being the only available one, but is going to try them again with a lighter sugar. They're much cheaper than the commercial cereal bars available, and let's face it, much tastier!

They're oaty and good, and the dark chocolate and cranberries are a lovely combination. The biscuits are still a little chewy in the middle, but crunchy round the edges. As I said above, next time I'll cook them a little less to get more chew and less crunch. But they're so easy and popular that it won't be a problem if I make them again soon!

Wednesday, 19 January 2011

Chocolate and Dried Fig Cake

Another one of my 'everyday' type cake recipes. It may not be much to look at, but this is a tasty cake, and perfectly complements a cup of coffee at morning break time. This cake follows the frugal theme and is not my recipe for We Should Cocoa this month (although it was for a while... for my submission see here), making the most of Christmas left overs. Chele set the challenge for this month and specified that our chocolate submission should also include leftovers. For me this was a packet of dried figs, bought with no specific purpose in mind. I quite like dried figs, but never seem to get around to eating them, so thought that incorporating them into a chocolate cake seemed like a good way to go.

Again in the frugal vein I was using up some low fat creme fraiche that was hanging around the fridge (leftovers from the banana cake recipe) and also wanted to see how the combination of creme fraiche, a relatively lower egg content and wholemeal flour would work in combination.


This was quite a light chocolate cake - it was moist from the creme fraiche, and sank very slightly on coming out of the oven, which I guess is due to the wholemeal flour. However, it did stay level, without a dip, which is encouraging - I hate it when cakes sink after coming out of the oven, it's really depressing! So this is my recipe, created as I went along...


Fig and chocolate cake
Ingredients
120g butter, softened
120g caster sugar
2 tbsp cocoa powder
120g self raising wholemeal flour
100g low fat creme fraiche (I used Yeo Valley, which doesn't have any added stabilisers or other ingredients)
50g dried figs, chopped small (about 4 dried figs)
40g 70% dark chocolate, chopped small


Method
- Preheat the oven to 180C/Gas 4. Grease and base line a shallow 8"/20cm round cake tin.
- Cream the butter and sugar until light and fluffy.
- Add the eggs, flour, cocoa powder and creme fraiche and beat again until well mixed.
- Fold through the figs and chocolate and dollop into the cake tin, spreading the mixture out.
- Bake for 35-40 minutes until springy and a cake tester comes out clean.
- Cool on a wire rack, then cut and eat.


You could also add a chocolate frosting or glaze of some sort, but I was too lazy, sorry, frugal to do this!


Some of my colleagues really enjoyed this cake, but personally it's probably not one I'll make again. I think there are probably better ways of using dried figs up, and better chocolate cake recipes but you don't know until you try do you? I'm glad that I chopped the chocolate and figs very small - they stayed suspended in the cake rather than sinking to the bottom. I was pleased with the use of wholemeal flour, I should definitely do it more! The fig flavour wasn't obvious at all until you bit into a piece of fig, unsurprising I suppose. I wonder if you could stew the figs, make a puree of them and fold this in, modifying the flour content to account for the moisture - I'm sure this would make the cake more figgy. An evolving recipe I feel....

Sunday, 16 January 2011

Crunchy banana spice cake


I like to think of this kind of cake as 'everyday cake'. It's the kind of cake that is fabulous to have in the cake tin for when your kids come home from school starving hungry and wanting a sweet treat - but you want to feel that they aren't eating rubbish. Or the kind of cake that will stave off the biscuit cravings - perfect with a cup of tea, but whereas a small slice of cake seems to be sufficient and even a treat, two biscuits just won't hit the spot - it needs to be a small pile (or half the packet....). This way you can feel virtuous - you're getting some of your five a day (OK, there are better ways to do it, but humour me) and it's full of wholegrains too.


The recipe came about because in an attempt to waste less food (an ongoing task made difficult by my inability to resist buying things in supermarkets...) I wanted to use a tub of low fat creme fraiche approaching its 'use-by' date and I had a banana too ripe for me to happily consume it on its own. The wholemeal flour was idle curiosity rather than New-Year-health-kick - I'm interested to see how cakes turn out with wholemeal rather than white flour. I should say that Choclette over at Chocolate Log Blog has definitely made me think about using more interesting flours in my baking - she's got some inspirational ideas on her blog using loads of different flours, and Katie over at Apple and Spice, who has embraced gluten-free baking (having recently been diagnosed with coeliac disease) with a speed and success rate that I'm totally in awe of - spectacular baking apparently doesn't need wheat at all if, like Katie, you know what you're doing and enjoy experimenting!


As I was spooning the cake batter into the tin, I spotted a packet of large grained sugar sitting on the side, calling to me to be used. I think this sugar was possibly the making of this cake. It would have been delicious without, but the layer of sugar on the top added a great contrasting crunch to the moist, soft cake. The picture above shows the brand of sugar I used, and below is a comparison between the size of the grains of sugar that I used, on the left, and demerara sugar (turbinado sugar for US readers), on the right. The grains are much, much bigger than demerara.


So to the recipe...

Crunchy Banana Spice Cake
Ingredients

100g butter, softened
120g light muscovado sugar
120g wholemeal self raising flour
1 medium size ripe banana
1 tsp mixed spice
1 egg
85g low fat creme fraiche (I used Yeo Valley brand which doesn't have any added stabilisers or other ingredients)

Sugar for dredging - see above!

Method
- Preheat the oven to 180C/Gas 4. Grease and base line an 8" round cake tin.
- Cream the butter and sugar until light and fluffy.
- Add the banana, broken into chunks, and beat again until well amalgamated.
- Add the egg, flour, spice and creme fraiche and beat until well combined.
- Spoon into the prepared tin, level the surface and dredge with the grain sugar.
- Bake for 35-40 minutes until the cake is springy and a cake tester comes out clean.
- Allow to cool on a wire rack.

Cut into generous wedges and enjoy!

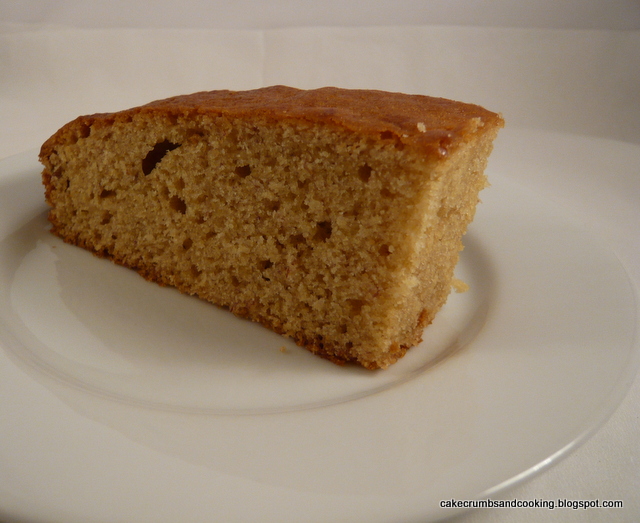
I would definitely make this again but next time, I'd double the recipe and make two cakes so that it was a layer cake, perhaps with a buttercream filling, to make a more spectacular looking cake. Popular with colleagues, this one went quickly in spite of its relatively frugal appearance. It was light but still moist and I think that the combination of wholemeal flour and muscovado sugar gave it a depth of flavour that I don't usually get. The spice was fairly subtle, as was the banana flavour. No one flavour dominated, and it was a lovely, balanced cake.

Sunday, 9 January 2011

Mulled poached pears


A good dessert for the post Christmas cleanse retaining the flavours of the season, but in a more delicate way. One of the gifts I received for Christmas was a little selection of food from Fortnum and Mason - I'm looking forward to the chutney and ginger conserve but I really wasn't sure what to do with the four sachets of mulled wine spices. I'm not really a mulled wine person and can't imagine wanting mulled wine four times before the best before date of these sachets - next October.

I think most people can identify with a post-Christmas glut of goodies around the house - cakes, nuts, chocolates and so forth, but for some reason I also have a glut of fruit. I have no idea why, perhaps I bought it to offset the seasonal goodies, but buy it I clearly did, and it needed using up. Part of this glut was pears. Then inspiration struck - pears poached in a light sugar syrup, with mulled wine spices.

The little sachets contain cinnamon, dried orange peel, allspice and cloves - a lovely warming mixture of spices that I'm sure would be ideal for mulled wine, but are also perfect for these poached pears. I peeled my pears, halved and quartered them, then put them in a pan, covered them (just) with water, added 50g caster sugar and tied the mulled wine spice sachet around the pan handle. I brought the water to a simmer, and poached the pears until tender. I allowed them to cool before refrigerating. I served mine with a generous dollop of fromage frais - a delicious, fresh end to a meal.


I guess you could reduce the syrup further and make more of a coating consistency with it, but I just wanted a light syrup. These were lovely, I'm not sure what it is about the texture of cooked pear, but I really love it, and I'll do this again - perhaps the spice sachets could be used to flavour an apple sauce.... I still have three to use!

LinkWithin

Related Posts Plugin for WordPress, Blogger...