Showing posts with label cooking my books. Show all posts

Sunday, 2 June 2013

Rhubarb Cupcakes


I keep seeing rhubarb in the shops at the moment and decided to buy some to bake with. The only way I've ever really had rhubarb in the past is in crumble and not for years and years. For some reason I can't recall, I had convinced myself that I didn't really like it very much. It seems that's not really true! 

The rhubarb I bought is the outdoor variety (the forced kind having gone out of season months ago) so the colour is more towards green rather than the pretty bright pink kind you see in the winter/spring months, but the flavour is still good.

Reduced rhubarb syrup - pretty in pink

I decided to make rhubarb cupcakes from one of my less-used baking books, The Primrose Bakery Book, which is the second from the Primrose Bakery (yes, I do have the first one too, and have actually made quite a lot out of it!). I can't find a legitimate copy of the recipe on the internet, but it involves chopping and stewing the rhubarb first to cook it and then draining the cooking syrup. This is then reduced to make a thick sticky syrup to add to the buttercream. The stewed rhubarb is added to the cupcake mixture. The only change I made to the recipe was to omit the 1tsp ground ginger called for and replace it with 1tsp vanilla extract. I found that after the specified 25 minutes the cakes were pretty much cooked but because I'd been a numpty and set my oven too low they weren't coloured at all (note to self: check oven temp) so I turned the oven up and left them a bit longer to colour. This meant that I was a little concerned they'd be dry and so used some of the reduced rhubarb syrup as a glaze.

Glazed cupcakes before buttercream

The buttercream recipe wasn't my most successful attempt. The recipe in the book calls for 110g butter and 500g icing sugar, along with the reduced rhubarb juice from stewing the rhubarb. I thought this sounded unbearably sweet and started out with 110g butter and about 200g icing sugar. Unfortunately the buttercream split slightly when I added the rhubarb juice and a little warm water to slacken the mixture, I'm not quite sure why. 

Buttercream in the making

I ended up trying to rescue it by adding more sugar (to about 300g total), whisking like mad and I also added about 30g melted white chocolate (as the chocolate is supposed to stabilise the fat/sugar emulsion). It worked out in the end and the buttercream didn't split again but it was too sweet for my tastes. I think I'll add more white chocolate and less sugar next time. Because the rhubarb syrup is added to the buttercream you get a natural, very pale pink colour. 


These were ok, not the best thing I've ever made - the cakes were on the moist/heavy side and as above the buttercream wasn't my favourite. I also found I couldn't really taste the rhubarb but I did discover that I like the smell of rhubarb cooking, which is a good thing!


Since these are an 'R' bake I'm going to enter them into Alphabakes, hosted this month by Ros of The More than Occasional Baker and cohosted by Caroline of Caroline Makes. I haven't managed many challenges over the past few months, but I'm off to an early start here!

Monday, 27 May 2013

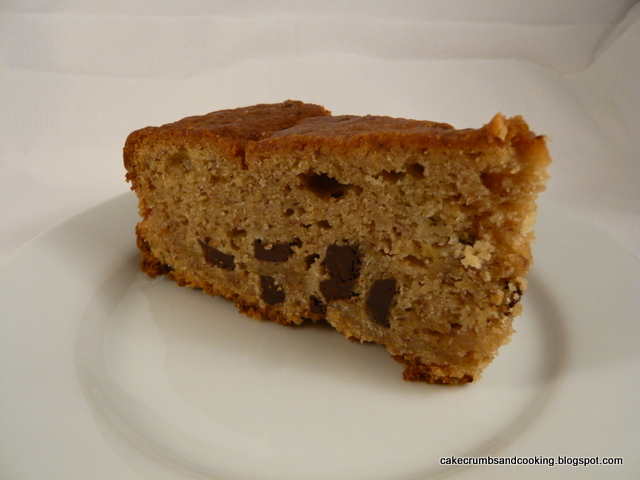
Chocolate Chunk Banoffee Cake


The last time I was casting around for ideas to use up the inevitable overripe bananas sitting in my kitchen I saw one of my more recent cookery book purchases, one which definitely deserves more of my attention. The book is 'The Birthday Cake Book' by Fiona Cairns, and is full not only of amazingly decorated cakes and biscuits (many of which are around different birthday party themes) but also really interesting cake recipes. I sometimes find that books can concentrate too much on the decoration of the cake and the actual cake itself is neglected. Which is slightly daft because however good the cake looks, ultimately it is going to be eaten!


One of the cakes in the book is a Banoffee Cake - in the book this is baked in two 13cm (6") square cake tins, which are then stacked and decorated to look like playing dice - very clever. I used the basic recipe as I wanted to use up my ripe bananas but made a few small changes. I left out the spices (nutmeg and cinnamon) and added a 100g bar of 70% dark chocolate, broken up into small chunks. I also wanted to bake it in an 8"/20cm round tin. This meant that the cooking time was 60-70 minutes (longer than I had expected really, so perhaps check slightly before this time if you make it).


I had intended to add either a chocolate frosting or some other kind of decoration, but ended up running out of time to do this so the cake went to work naked. It was really successful though - banana cakes can sometimes be heavy, dense and almost wet and although this one was quite dense, it was in a pleasant way. It felt substantial and I think the banoffee of the name comes from the toffee flavour imparted by using light muscovado sugar in the recipe. I enjoyed the chocolate chunks in it very much - the bitterness of the chocolate contrasted well with the sweet cake and I would definitely make it again. 

This is not a sponsored post - I bought and liked this book!

Sunday, 17 March 2013

Red nose day? Soured Cream Chocolate Cakes


Or should that be Pink Nose Day? Well, as I'm sure you can probably guess from the title (and the fact that in the UK it was Red Nose Day on Friday with a staggering, record breaking £75 million raised on the night alone) these were supposed to be red noses. I always forget (not being someone who uses food colouring very often, if at all) that adding food colouring to buttercream is never really very successful in creating bright primary colours such as red. I actually did use gel food colouring here, so was expecting a redder red, but was probably too reticent to add enough colouring to achieve the colour I was after.

So not really the most inspiring or successful decoration really and I wasn't going to bother talking about these, but it's always worth talking about Comic Relief - it's an excellent way of putting fundraising for charity into people's minds. 


The other reason it's worth talking about these cakes is because the sour cream chocolate cake is delicious. Really good. The recipe is Nigella Lawson's, from How to be a Domestic Goddess and so I won't reproduce it here. However, her recipe for Old Fashioned Chocolate Cake is very similar and can be found on Nigella.com. The differences are that the Sour Cream Chocolate Cake uses only 3/4tsp baking powder and 1/4 tsp bicarbonate of soda, adds a little salt and uses 1 1/2 tsp vanilla extract. There is also 25g less butter in the web version. Not massive changes.

As I wanted cupcakes I divided the mixture, unsure of how many it would make and got 17 reasonable sized cakes that baked in 22 minutes. I was surprised that the baking time was so quick - the ingredients were pretty much fridge cold when they went into the oven (cold sour cream and cold eggs) but they rose beautifully. I'll definitely use this recipe for cupcakes again if I want a rich, chocolatey base. They were deliciously smooth and very chocolatey. 


The icing was a (pink) white chocolate buttercream - 100g butter, 140g icing sugar and 70g white chocolate, melted and cooled. Cream the butter until light, add the icing sugar and continue to beat until light and fluffy then beat in the white chocolate. Colour as you desire. I did overwork the icing a little as it wasn't as creamily smooth as the last batch I made, but still worked well.

Sunday, 28 October 2012

Red and Blackcurrant Jelly

The first batch

I have to confess that this is not really a 'how-to-make' redcurrant jelly post. It's a 'how-I-made' red and blackcurrant jelly, based on what was available and a bit of experience.

Redcurrants aren't in season right now. Neither are blackcurrants. But by the power of technology (freezer - gasp!) I had far, far too many redcurrants and the only way I could really think of moving them out of the freezer is to make them into jelly. Redcurrants are full of hard seeds meaning that they don't really respond very well to jam making but are great for jelly, jelly being essentially refined jam.

Boiling jelly

So I dug through my freezer drawers and located the offending (in terms of taking up space!) redcurrants and found I had 1.5kg (I think - this is a while ago now). Using the basic recipe for redcurrant jelly in Pam Corbin's very lovely little book 'Preserves' (River Cottage Handbook No. 2) - I'd recommend this to anyone interested in preserving I found I needed 400ml water for every 1kg redcurrants. The currants and water are simmered until they are tender - Pam specifies 45 minutes, but I suspect mine were done sooner because the process of freezing and thawing them starts breaking down the berries anyway.

Successful wrinkle test

At this point the berries, stalks and random bits of garden (leaf, stone... don't worry, there weren't too many leaves in there) are strained out. Long time readers may remember that last time I made redcurrant jelly I bought the jelly bag but not the strainer. I decided to go for broke this time and bought the whole set - so, so much easier. I thoroughly recommend it. 

This said 104... for setting, but I wasn't quick enough with the camera

Making the jelly then involves the addition of 450g granulated sugar to each 600ml juice - you don't want to poke the bag or you won't get a clear jelly. More on that point later... You then bring it to a rolling boil and boil for 8 minutes or until a set is reached. This will occur at 104C or when a little of the jelly placed onto a cold (freezer cold) plate wrinkles when pushed with a finger. Pour the jelly carefully into sterilised jars and then add a waxed disc and seal with a lid. The jelly keeps for 12 months according to Pam.


This represents the jelly I made with the juices that dripped through the bag (there are two jars in the background too, it's not just the jar and a bit at the front). After the redcurrant mixture had cooled a little I decided to squeeze the bag and see if I could get any more juice out. The answer was a resounding yes - there was much more juice in there and I squeezed and squeezed the jelly bag until all that remained inside were dry skins and stalks. I repeated the jelly making process again for this new lot of juice (although since the previous lot had set as I was pouring it into the jars I decided to dilute this second lot with a splash of water - unmeasured, sorry) and got as much again in yield. 

Almost double the amount - both first and second batches

Yes, this second batch is cloudier, but it seemed such a shame to waste that redcurrant goodness. My thinking is that I'll use the clear batch for tasks such as glazing fancy fruit tarts (hah, in my dreams!) and the cloudier batch for adding to casseroles for depth of flavour, or for making the traditional Cumberland sauce recipe that Pam gives in the book, where the clarity of the jelly is unimportant. So my conclusion is that since I don't intend to enter WI competitions where the clarity of my jelly is all-important I'm going to carry on squeezing that jelly bag.

Random blobby jelly - definitely set though

This wasn't a problem I had last time, but this time round there must have been so much pectin in my redcurrants that the jelly actually set as I was pouring it into the jars. You can see in this small jar that the surface isn't level because I was essentially scraping solidified jelly into the jar.... certainly no worries about a set here!!! I ought to point out that although this is called red and blackcurrant jelly, there were probably about 80-100g blackcurrants mixed in with the redcurrants when I froze them, and just those few have changed the colour significantly from a pure redcurrant jelly.


I'm entering this rather unseasonal jelly into Teatime Treats - hosted this month by Kate of What Kate Baked and co-hosted by Karen of Lavender and Lovage. The theme this month is Jams, Curds, Chutneys and Conserves. Now although jelly isn't mentioned specifically I don't think I'll get booted out for submitting this one!     

Sunday, 14 October 2012

Salted Peanut Butter Chocolate Cake


For a bit of a finale to Chocolate Week I thought I would make a layer cake - they always look impressive and I wanted a celebratory cake. Now whilst I am allergic to tree nuts I am lucky enough to be able to safely eat peanuts (and cashews) but I have never really paired them with chocolate before. I have seen many recipes where the pairing is made though, so thought it was about time I gave it a go (so many combinations of flavours, so little time to try them...).

The chocolate is my favourite standard recipe, with the added depth of muscovado sugar, and the peanut butter chocolate frosting comes courtesy of the Divine Chocolate Cookbook, which is rather appropriate given that Divine chocolate are the main sponsor/partner in Chocolate Week. I adapted the recipe to suit my tastes.


Salted Peanut Butter Chocolate Cake
Ingredients
175g softened butter
100g caster sugar
75g light muscovado sugar
3 eggs (with thanks to Suelle!!!)
155g self raising flour
25g cocoa powder
a couple of tbsp milk

Frosting
85g dark chocolate (I used 70%)
125g smooth peanut butter (mine was salted, but with no added sugar)
25g butter
cocoa powder (2tsp - optional)
icing sugar (to taste - optional)

Method
- Preheat the oven to 180C/gas 4. Grease and line two 8"/20cm round cake tins.
- Beat the butter and sugars until soft and light (the colour will change to being much lighter).
- Add the eggs, flour and cocoa powder. Beat until combined.
- If the mixture is too stiff (won't drop off a spoon), add a few tbsp of milk to soften.
- Divide the mixture between the two tins and bake for 25-30 minutes or until the sponge springs back when pressed and a cake tester comes out clean.
- Allow to cool on a wire rack.

- When the cakes are cool, or nearly cool, make the frosting.
- Melt the chocolate gently - either over a pan of simmering/hot water or in the microwave (carefully!).
- When melted, add the peanut butter and butter and beat until smooth.
- Taste the mixture and add cocoa powder and/or icing sugar to taste.
- Spread half of the mixture between the cakes and the other half on the top.

- Enjoy!


I have to say that this was a bit of a marmite type love/hate cake. Whereas most things I bake are well received this one did split the eater-ship slightly. The cake was universally liked, but the peanut butter frosting was slightly divisive, some liked it, some weren't so keen. I have to confess that I was in the not-so-keen camp, which was a little disappointing. Perhaps it's just a combination of flavours that I need to try again to appreciate more. After all, I love both peanut butter and chocolate, so they should theoretically be even better together! The other thing is that I used neither cocoa powder nor icing sugar in my frosting - it was late at night when I made it and I really didn't fancy tasting it at that point. Perhaps a touch of sugar would have made it much better because I think it was the salt of the peanut butter that perhaps skewed my taste off for this. I'll have to make it again and find out...

Friday, 12 October 2012

Squidgy Chocolate Orange Cake

Hmm, apparently my ability to take photos of brown squares of cakes hasn't improved yet...

This is the perfect cake to have in your repertoire - it's so, so easy to put together and quick to bake but the flavour and texture are just divine. I have made it a number of times before, but have tweaked slightly to suit my taste. The original recipe is from Nigella Lawson and it's the Storecupboard Chocolate Orange Cake in How to be a Domestic Goddess. It is also a very adaptable recipe - Nigella herself uses exactly the same ingredients in her Chocolate Cherry Cupcakes in the same book (swapping cherry jam for marmalade), so if you're wondering whether the recipe works as cupcakes, it does. (I have tried this out too, and the cupcakes are very good!)

When I have made it in the past I followed the instructions to use an 8"/20cm round springform tin and always found it needed slightly longer than the specified 50 minutes to bake and it tended to catch and overbrown slightly around the edges before the middle was done. I've made it in an 8"/20cm square tin and after 40-45 minutes it's perfectly cooked around the edges and in the middle - win/win.


The quality of the marmalade is important in the cake. I know that sounds like a silly thing to say because of course it will be - the marmalade is a key ingredient. From experience I know that using too bitter a marmalade will not be very pleasant - even though there is a lot of sugar in the recipe, the bitterness still comes through. This time, I had a jar of marmalade that I had used for a couple of other cakes where I had wanted that bitterness, and had found this particular jar sadly lacking. However it struck me as perfect for this cake, where I don't think you actually want a particularly bitter marmalade. I did want to make sure that the orange flavour was there though and added some of my latest favourite - orange extract (I bought mine from Lakeland - a dangerous place to shop...). This really boosts the orange without any bitterness.

Another brown square...

Squidgy Chocolate Orange Cake
Ingredients
120g butter
100g dark chocolate, roughly broken (I used Green and Blacks 85% cocoa)
245g orange marmalade (I used Bonne Maman Mandarin marmalade)
150g caster sugar
1tsp orange extract
2 large eggs
150g self raising flour

Method (this is truly simple!)
- Preheat the oven to 180C/Gas 4. Grease and line an 8"/20cm square shallow tin.
- Melt the butter over a low heat and when it is melted add the broken chocolate. Stir until melted.
- Add the marmalade, sugar and extract and stir until well amalgamated.
- Add the eggs, beating them into the mixture until well combined and then add the flour, folding it through to make sure you don't have any unmixed bits.
- Pour into the prepared tin and bake for 40-45 minutes.
- Remove from tin and allow to cool, or eat hot as a pudding with icecream.


I love this cake - it's moist and fudgy and on the start of the cake to brownie scale - at the cake end but with a slightly brownie-like texture due to the high sugar content. The peel in this marmalade is quite fine and soft - I missed the chewy texture of the peel in the more bitter marmalades I've used in the past, but I didn't miss the overall bitterness that too strong a marmalade can give. Adding the orange extract worked well here to boost the orange flavour, as I knew the marmalade didn't have enough punch. This is perfect for an indulgent treat during Chocolate Week.

This would be a great family recipe to make with little ones. The melt and mix method is easy for little hands and the chocolate orange flavour is great for children too - especially if you do what I did and use a relatively mild-flavoured marmalade and boost the flavour with orange extract. This avoids any unwanted bitterness. It's also perfect for harrassed mums who are having dessert demanded of them but haven't got time to think what to make - perfect with custard or icecream. Any leftovers are perfect as a gettting home from school treat. I really hope you make and enjoy this cake - it's one of my perennial favourites!

Friday, 28 September 2012

Maple Syrup Butter Cookies


When Dom from Belleau Kitchen and Karen of Lavender and Lovage announced that this month, their two challenges; Random Recipes and Tea Time Treats were getting together I had mixed feelings. Not that this isn't a good pairing, but rather that my heart sort of sinks when I have no control over the recipe I have to make - I am a complete control freak and hate having decisions taken out of my hands. And this month this would apply to another of the challenges I like to enter, not just random recipes itself.


So I took a deep breath, opened one of my (many - what, are you surprised I have many) baking books. I chose 'Mix' which is one of my books containing recipes from the Australian Women's Weekly. I really like these recipe - there are often combinations that I haven't thought of, or different presentations that inspire me to bake. And my recipe was these rather cute little maple syrup butter cookies.

The chosen book - note all the stickers for recipes I want to make

Perfect - nothing says 'Teatime' to me more than biscuits. These were really quick and easy to put together. They're a melting-moment type biscuit. I tried to find the recipe online, but find the AWW website very hard to navigate so I had to give up. They consist of butter beaten with maple syrup and a tiny dash of vanilla. This was my only real problem making them - the butter and maple syrup is supposed to become light and fluffy but mine split and wouldn't do light and fluffy. Plain flour and cornflour is then added and they are piped onto prepared trays to be baked. They were fun to pipe (I like piping generally), if a little sticky.

First batch - nicely cooked

After the first batch came out of the oven I decided to refrigerate the rest and see if they would keep their shape better - they didn't so I wouldn't bother wasting time refrigerating them again. The first batch were baked while I had something else in the oven underneath them, the second batch were alone in the oven and have consequently coloured more on the base. I am still trying to learn the foibles of my new oven.

Second batch - overbaked

The house smelled particularly delicious while these were baking - what's not to like about warm maple syrup and butter - utterly divine! I would try these again - I wanted to see if I can get them to keep their shape a little better and I might try using the fan oven instead of the conventional setting.They were very buttery and quite crisp at first with a melt in the mouth texture that comes from the use of cornflour as part of the flour. The maple syrup flavour was unfortunately not to my taste at all. I don't know why, but they really didn't appeal to me at all. The texture was great - melting and delicate, but the flavour was just so wrong. I haven't baked a lot with maple syrup before, but these were not pleasant. And I also found that as the only sweetening agent was the syrup they weren't quite sweet enough for my taste in biscuits either. A bit of a disappointment and a definite don't make again.

I can't decide what to do with them now, whether to give up on them as a bad job (made about a week ago now) or whether to whip up a batch of buttercream and sandwich them together - this would counteract the problem of them not being sweet enough but might make them soggy. Hmm, what would you do? Or can you recommend good baking recipes using maple syrup please?

Edited to add: I am also submitting these into Jac's Bookmarked Recipes feature, since they are also something in this recipe book that I have been meaning to make for ages.


Sunday, 9 September 2012

The Great British Bake Off, Flapjacks, a Plaited Loaf and a Review


I was recently contacted and asked whether I would like to receive a copy of the Great British Bake Off book to review. Not being one to say no to the offer of a lovely free new book, and being a book which is perfectly in-keeping with the theme of my blog I jumped at the chance. Shortly after, a thump was heard on the doormat and the book was in my possession. Actually, that's a bit of artistic license... what really happened was that I heard the postman trying his very best to shove the book unceremoniously through the letterbox and went and quickly opened the door to relieve him of it before my letterbox was broken. Anyhow, I have my copy which is the important part.

 Ginger flapjacks

I've been enjoying watching the bake off as it has progressed on the television, but don't worry, there are no spoilers here - I haven't really been keeping up to date, what with one thing and another - which is also why it has taken me so long to get round to writing this review of the book. 

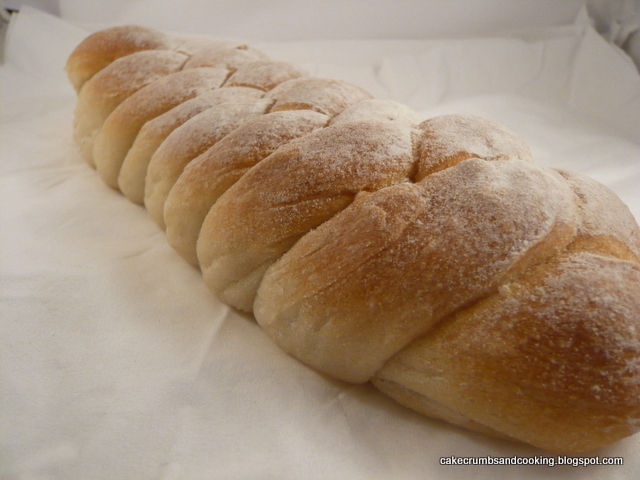
6-braided plait

As you may have surmised from the altercation the book had with my letterbox, it's pretty hefty. 320 pages with many, many delicious looking recipes. As in previous years, the majority of the recipes are by Linda Collister, an author whose recipes I enjoy making and has my trust. At the beginning of each chapter is the 'Showstopping Challenge' recipe - a basic recipe is given and then variations on that theme getting more difficult. For example - in the biscuit chapter the basic gingerbread is used to make Gingerbread People (easy), Iced Stars (takes a little time) and then Winter Woodland Cottage (needs a little skill). There are also technical challenge recipes from Paul and Mary throughout the book along with the best of the contestants recipes from the bake off. There are also really helpful pages devoted to 'Showstopping Techniques' such as icing and stacking a cake and chocolate ribbons and bows in the cake chapter, crimping and decorating in the pie chapter and piping meringue swirls in the desserts chapter, among many, many more.

5 braided plait

The chapters of the book are *Cakes *Biscuits *Breads & Sweet Dough *Tarts *Pies *Desserts *Puddings and then finally *The Basics. The majority of the recipes have illustrations (just), and generally the book is beautifully photographed, so it's a little irritating to find that some of the recipes are not illustrated. I counted 108 recipes, of which 37 do not have an illustration (just over a third of them). I wonder if this is down to budget but I wouldn't think so - there are plenty of full page 'lifestyle' shots and shots of the contestants working. It does seem a pity to have so many recipes without any idea of what they should look like when a small photo on the corner of the page would have been more than adequate for some. I do think it's important for the styling of the book that there are 'lifestyle' and contestant photos, but it seems to be at the expense of the recipe shots here.

Ginger flapjacks

For my recipes I decided to choose something really easy, and something that required a little more time. I decided to make the 'Ruby Jacks', a variation on flapjack. The recipe was easy to follow, but used a rather smaller proportion of oats to the recipes for flapjack I usually use, resulting in a rather spectacular rising of the mixture in the oven (I didn't know flapjacks could puff up like these did) and subsequent sinking and the resulting flapjack was very buttery and soft indeed rather than being substantial and chewy. They were very nice, but I'm not quite sure where the name 'Ruby' comes from - the introduction to the recipe suggests that this is due to the ruby hint given by the inclusion of the stem ginger (mmm, ginger, I am such a ginger fiend), but given that stem ginger is yellow(ish) I can't really see why they'd be red(dish) and they weren't! Still tasty though.

Braiding and baking bread

My other recipe was Paul's technical challenge from the Bread episode - a braided bread. The recipe and full instructions can be found on the BBC Food website, so I won't reproduce them in full. The dough itself was straightforward to make - just a simple white dough so I was more interested in the actual braiding process, having never done this before (but having meant to for a very long time - Celia has a lot to answer for I think!). I know that my loaf wouldn't have passed muster with the master of bread - firstly I couldn't get his instructions for an eight stranded plait to work for me (and I haven't had chance to try with a bit of appropriately sized rope - I just don't have that sort of thing hanging around in my house!) and secondly when I baked and cut my bread I had clearly used too much flour to keep the strands separate - they were still visible in the cross section of the loaf. The bread tasted fine - plain white bread but I'm annoyed I couldn't follow the instructions (I'm sure this is my fault, although if the bake-off contestants were given the same instructions I'm not surprised they found it tricky!). In the end I resorted to a different baking book, Bread, by Jeffrey Hamelman as I knew it had some alternative braiding instructions in there and I successfully followed his instructions for a five stranded braid and then cut my remaining three strands in half to give six short ones and made a six-strand braid too. Celia's right though - it is fairly addictive and I'm going to give it a go again (perhaps when I have more time and give myself a chance to read through the instructions for braiding first!)

Jeffrey Hamelman's 'Bread' with braiding instructions

I know I am biased because I am a keen buyer of cookbooks, and baking books too but I would recommend this one. I was unsure as to whether it would just be full of 'Showstoppers' that are unachievable, but actually, there are loads of recipes in there that I'd like to make, ranging from very basic to rather special. There are far too many to list here, but I'd really like to try the 'Chess Cake', the 'Caramel Layer Cake', the 'Camembert and Quince Flatbreads', the 'Double Crust Pear Pie' and Mary's 'Creme Caramel' among many others. 


Because these loaves are plaited (or braided) I'm entering them into this month's alphabakes, where the letter is P. Alphabakes is a monthly challenge hosted by Caroline of Caroline Makes and Ros of The More than Occasional Baker. The letter for this month is P and the host is Caroline.

Disclosure: I received a copy of this book to review. All views expressed are my own and aside from the book I did not receive payment.

Saturday, 25 August 2012

Nigella's Chocolate Pistachio Fudge


I have been a little busy recently, both at work and with having the kitchen redone (there will be photos, but perhaps not yet, as it still needs to be tiled and redecorated) and my time and motivation to blog has fallen slightly by the wayside. I have still be making lots of things though, so the backlog (an ever-present problem for me) has been building steadily.

In line with needing to make something quick and easy, and not having all that much time, this post will be short and sweet, rather like the fudge it describes. I often flick through books I bought a while ago, and happened to be flicking through Nigella Express recently, not really with anything in mind, when the page with the chocolate pistachio fudge caught my eye. So pretty. So easy. And fairly quick too - just need to let it cool and set. It's the perfect thing for those in need of an easy sweet treat to make. No baking required, and only four ingredients too.


You can find the original recipe for Chocolate Pistachio Fudge on Nigella's website. Regular followers will be wondering about the pistachio of the title. No, I cannot magically eat them, but instead substituted dried cherries for the nuts. A different texture, I grant you, but not an unpleasant one. Admittedly, the contrast of the green nuts and the dark fudge is rather more photogenic than the rather unremitting brown of my fudge, but never mind. 


I adapted the recipe slightly and give my amounts here:
Chocolate Cherry Fudge
Ingredients
300g condensed milk
260g dark chocolate (I used G&B Cooks 72% chocolate here)
22g butter
90g dried cherries, chopped a bit smaller

Method
- Line a 20cm/8" square tin with clingfilm/wrap.
- Melt butter, condensed milk and chocolate in a large pan over a low heat.
- Mix in chopped cherries.
- Spoon into prepared tin and level. Allow to cool before refrigerating.
- When set, cut into 64 pieces and store in the freezer.

I have only one small gripe about this recipe - there seemed to be a slight fatty deposit on the top of the fudge which is really not very attractive. I don't know why this is, perhaps I overheated the mixture? It doesn't matter all that much because I know what it is, and it's only me that'll be eating this rather than my colleagues, but I'm not sure how to prevent it next time. 

Hmm, unphotogenic fatty bit....

That aside, this is beautifully smooth and rather more-ish to eat too. Not too sweet and the cherries add a good textural contrast. Having this in the freezer is pretty dangerous though... I wasn't convinced that it would be good to eat straight from the freezer, but it really, really is. Not too hard to bite into at all, and I can hear it calling me as I type. It'll make a great 'freezer-raider' snack!

When I thought about this fudge it fulfils the criteria for a number of the blogging challenges this month.


We Should Cocoa, hosted this month by Janice of Farmersgirl Kitchen, founded by Choclette of Choc Log Blog and Chele of Chocolate Teapot. The theme this month is cherries and although I made a lovely cake with fresh cherries in it I haven't had chance to post it and we're at the deadline now.


Forever Nigella, hosted this month by Karen of Lavender and Lovage, and founded by Sarah of Maison Cupcake, where the theme is 'Fridge Raider Snacks'.


Bookmarked Recipes, hosted by Jac of Tinned Tomatoes, because this is a recipe I've been meaning to get round to making for ever such a long time now - I don't know what took me so long as it's so simple and quick to do.


Sarah of Maison Cupcake has also launched a 'No Bake' challenge, born from her lack of a kitchen for a period this summer. I can empathise with that feeling, although mine didn't take quite as long as Sarah's to change. I feel eminently qualified to enter the no-bake challenge!


Finally, I think this would make a good 'Sporting Snack' and am submitting it to Ren's Sporting Snacks challenge on Fabulicious Food. 

LinkWithin

Related Posts Plugin for WordPress, Blogger...