Showing posts with label chocolate. Show all posts

Sunday, 22 September 2013

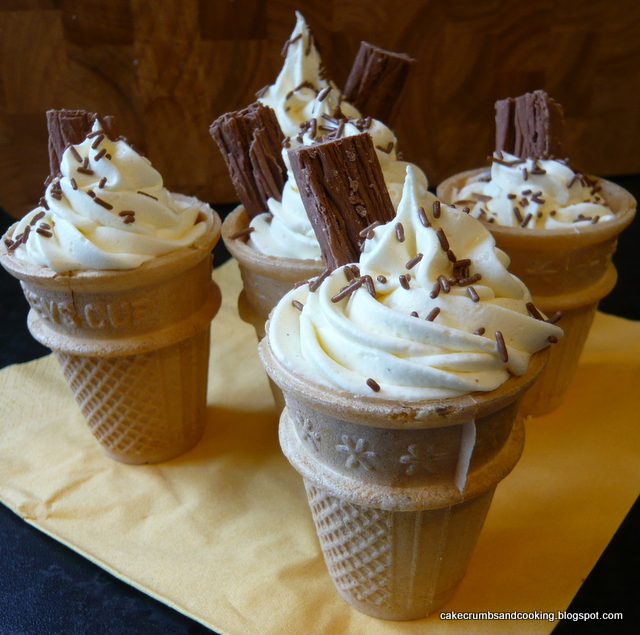
Vanilla Ice Cream Cone Cupcakes


I've been meaning to make these for ever such a long time, and although I know it's not an original idea, we seem to be having a mini heatwave reminiscent of summer and so it's probably the right time to share them. I took advantage of a recent day of leave from work to make the cakes and take them into work in the car. One of my difficulties with this recipe is that it's pretty difficult to transport the finished product for me - they're too tall for my tins and have a propensity to fall over and I had serious concerns about a successful bus journey with them. So my day off seemed like the perfect time to attempt them.

I was a little nervous because I've tried making these before, a couple of years ago. I can't remember which recipe I used but suffice it to say that the attempt was not successful. Overflowing and overdone does not make for a happy baker. And it was impossible to trim off the overflow without damaging the cones so I gave up and didn't attempt them again. Until now, when I saw the recent (well, relatively so) BBC Good Food magazine cover and remembered that I needed to conquer this recipe. I looked at their recipe which calls for 200g each plain flour, butter and caster sugar, 2 eggs, 4tbsp custard powder and vanilla (but no raising agent) and decided not to trust them (my loss probably - I guess with no raising agent that amount of mixture would fit into the cones) partly because the recipe states that it makes 10 yet calls for 12 flat bottomed cones...


Anyway, I decided to use a standard victoria sponge recipe and go carefully when filling the cones, which worked admirably. And then make a lovely soft, whippy white chocolate buttercream to top them with, along with the obligatory flake and chocolate sprinkles.

Vanilla Ice Cream Cone Cupcakes
Ingredients
125g softened butter
125g golden caster sugar
2 large eggs
125g self raising flour
1-2tsp vanilla extract

For the white chocolate buttercream
105g butter, softened
175g icing sugar
70g white chocolate, melted and cooled slightly (I used Green and Blacks with lovely vanilla seeds in it)
small splash hot water

To decorate
Chocolate sprinkles
Flakes (I used full size Cadbury Flakes, chopped into thirds. You'll need 5 flake bars and I had a piece leftover)

Method
- Preheat the oven to 180C/Gas 4. Stand 14 flat bottomed cones in a 12 hole muffin tin, placing two on the top of the tin (or just stand them on a baking sheet).
- Cream the butter and sugar until light and fluffy.
- Add the eggs, flour and vanilla and continue to mix until well combined. It will be quite thick, this is ok.
- Divide evenly between your cones. I had intended to make 12 but found myself with too much cake mixture. I think 14 was right because 12 would have been too full or overflowed. There was just one cone that I thought was slightly underfilled.
- Bake for 20-25 minutes then allow to cool on a wire rack while you make the buttercream.
- Beat the butter until it is very soft. Add the icing sugar in two stages, beating well until it is smooth and creamy. Add the melted white chocolate and continue to beat until the mixture is light and fluffy. I added a small splash of water to make it easier to pipe and used a Wilton 1M tip to pipe the buttercream. 
- Decorate with sprinkles and flakes and admire your handiwork!


My colleagues were really very impressed with these and there was some discussion as to how the cake managed to get inside the cone... not many people knew that cones bake quite happily without burning and it was a source of wonder!

I'm pleased to have finally managed this recipe successfully - I made these a good few weeks ago before changing jobs and they were a final farewell to my lovely and much missed colleagues (although I am lucky enough to be working with lots of lovely new people now too).

I guess this is the explanation for my blog absence too - moving to a new job with more responsibility on the other side of the country, settling in and getting to grips with the job and people haven't left me much time to blog. Added to which I've sort of only half moved house - I am renting somewhere and simultaneously trying (currently unsuccessfully - anyone fancy a nice three bed semi with potential to develop?!?) to sell my house means that I'm back and forth and parted from most of my baking equipment for much of the time. Time to bring out the violins! I probably won't be around much for a while (certainly not until I get an internet connection in the new place - I'm sorry I haven't been commenting much recently, I'm still reading) but I'm still alive. Thanks to all the people out there still reading ;-)


I'm going to enter these into the Calender Cakes challenge, as I'm just catching the end of National Cupcake week and the challenge this month is cupcakes. Hosted this month by Laura of Laura Loves Cakes and co-hosted by Rachel of Dolly Bakes.
Thursday, 4 July 2013

Chocolate Cashew Cookies

Chocolate Cashew Cookies

I was recently contacted and asked if I would like to take part in the Aero Perfect Pairing challenge. With the offer of Niki Segnet's book 'The Flavour Thesaurus - Pairings, recipes and ideas for the creative cook' I was definitely in. The book arrived along with a big bag of Aero's Chocolate Orange bubbles (which I didn't manage to get a picture of) and a bar of Aero mint chocolate. 

I made some chocolate orange cupcakes using Nigella's Storecupboard Chocolate Orange cake recipe (one of my standby recipes) and topped them with some chocolate frosting and the chocolate  orange balls. Unfortunately, making cakes in the morning before work isn't really conducive to having enough time to allow them to cool, so they were still warm when I put the chocolate frosting (which was itself still warm and runny) on them and the chocolate orange bubbles kind of melted. Sorry, no pictures!


I have to confess that I wasn't quite sure which flavour combination to go for - I wanted something I thought would work, but which isn't too widespread and well known. The brief stated that the recipe didn't have to include either Aero or chocolate but being a bit of a chocoholic, I decided that I would include dark chocolate in my recipe. 

A cookie recipe that I'd bookmarked ages and ages ago from the Hungry Hinny sprang to mind as being an interesting one in which to incorporate different flavours. The recipe is for cream cheese cookies and doesn't use egg at all. I increased the amount of flour slightly and hope that the Hungry Hinny doesn't mind me reproducing my attempt at these cookies. Very unusually for me, I made these by hand - only a bowl and spoon required - no need to make washing up and use the stand mixer!

Creamed butter and cream cheese

Chocolate Cashew Cookies
Ingredients
85g cream cheese (I used full fat Philadelphia)
85g butter, melted and cooled slightly
1 tsp vanilla extract
105g light muscovado sugar
150g plain flour
1/2tsp bicarbonate of soda
1/2tsp salt
30g cashews, roughly broken/chopped
50g dark chocolate, in small chunks

Method
- Preheat the oven to 160C. Line two baking trays with parchment paper.
- Beat the cream cheese until softened, then add the melted butter and vanilla. Keep beating - it will turn from curdled looking lumpy mess into a beautifully smooth batter (I had serious doubts when I saw the initial mixture but it all turned out fine). 
- Beat in the sugar and then the flour, bicarbonate and salt until a dough forms.
- Fold in the cashews and dark chocolate. 
- At this point I ignored the instructions to leave for 30 minutes to chill and just dolloped small blobs onto the lined baking tray, spread well apart. (For my mixture putting it in the fridge didn't really seem to make much difference - I put the rest of it in the fridge while the first batch of cookies were baking, but actually preferred that first batch slightly - the second batch appeared 'grainy' - no idea why)
- Bake for 15 minutes until very light brown. Allow to sit for around 10 minutes once removed from the oven to make it possible to transfer them to a wire rack (they'll be very soft once they come out of the oven).
I made 22 cookies from the mixture.

Soft cookie dough

Verdict? Actually, personally I wasn't all that keen on this cashew chocolate combo - I couldn't really taste the cashews and think I should have toasted them before adding them which would have enhanced their flavour and made them crunchier - cashews are quite a soft nut really. Otherwise successful and colleagues liked them more than me. The actual cookie dough part was very soft and far more cakey than I was expecting. I'd like to try the recipe again though. I'm wondering about using some golden syrup sugar from Tate and Lyle I bought recently and using dried fruit like cranberries along with the chocolate. An interesting recipe to play with.

And my colleagues finished up all of the Aero chocolate orange balls quite happily!

Cakey cookies

Disclaimer: I received a copy of 'The Flavour Thesaurus' and some Aero products. All views expressed are my own. Thank you Sophie.

Monday, 27 May 2013

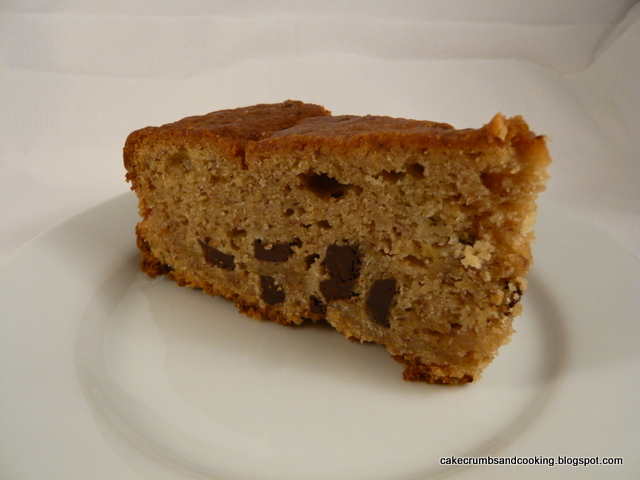
Chocolate Chunk Banoffee Cake


The last time I was casting around for ideas to use up the inevitable overripe bananas sitting in my kitchen I saw one of my more recent cookery book purchases, one which definitely deserves more of my attention. The book is 'The Birthday Cake Book' by Fiona Cairns, and is full not only of amazingly decorated cakes and biscuits (many of which are around different birthday party themes) but also really interesting cake recipes. I sometimes find that books can concentrate too much on the decoration of the cake and the actual cake itself is neglected. Which is slightly daft because however good the cake looks, ultimately it is going to be eaten!


One of the cakes in the book is a Banoffee Cake - in the book this is baked in two 13cm (6") square cake tins, which are then stacked and decorated to look like playing dice - very clever. I used the basic recipe as I wanted to use up my ripe bananas but made a few small changes. I left out the spices (nutmeg and cinnamon) and added a 100g bar of 70% dark chocolate, broken up into small chunks. I also wanted to bake it in an 8"/20cm round tin. This meant that the cooking time was 60-70 minutes (longer than I had expected really, so perhaps check slightly before this time if you make it).


I had intended to add either a chocolate frosting or some other kind of decoration, but ended up running out of time to do this so the cake went to work naked. It was really successful though - banana cakes can sometimes be heavy, dense and almost wet and although this one was quite dense, it was in a pleasant way. It felt substantial and I think the banoffee of the name comes from the toffee flavour imparted by using light muscovado sugar in the recipe. I enjoyed the chocolate chunks in it very much - the bitterness of the chocolate contrasted well with the sweet cake and I would definitely make it again. 

This is not a sponsored post - I bought and liked this book!

Saturday, 18 May 2013

Jaffa Cupcakes


I do enjoy a jaffa cake or two (although it's been a while since I bought any) and the chocolate orange flavour combo is generally a successful one. I decided to combine the flavours by using a chocolate cupcake base, marmalade to add orange, chocolate buttercream flavoured with orange extract and then topped with a mini jaffa cake.

The cupcake recipe is my adaptation of the Hummingbird Bakery's recipe - I've altered the quantities to give me 12 reasonable sized cakes instead of 12 tiny ones. 

Jaffa Cupcakes
Ingredients
150g plain flour
30g cocoa powder
200g sugar
2tsp baking powder
60g unsalted butter
200ml milk (I used semi skimmed)
1 large egg
pinch salt
1tsp vanilla extract

For the buttercream (and as I'm typing this I realise I can't actually remember how I made the buttercream, but if I were to do it again these are the quantities I'd try)
90g unsalted butter, softened
75g dark chocolate, melted and cooled (see later comments)
140g icing sugar
1tsp orange extract

For filling and decoration
Marmalade (I used Tiptree's Orange and Tangerine - it's not as bitter as some marmalades)
Mini Jaffa cakes
Chocolate sprinkles if desired

Method
- Preheat the oven to 170C. Place 12 paper cases in a muffin tin.
- Combine the flour, cocoa powder, sugar, baking powder and butter in a mixer and blend. The mixture will not form any kind of coherent mass, but the butter should look fairly distributed rather than huge lumps.
- Add the egg, milk and vanilla extract and beat well until combined.
- Divide between cases and bake for 18-20 minutes until a cake tester comes out clean.
- Allow to cool.


- When cool, cut a cone out of the cake (this is more difficult than with some other cake recipes as the crumb is so soft), blob a little marmalade into each hole and replace the top of the cake you cut out. See photo above - coincidentally this is why you don't usually get in-process shots from me - I'm usually doing this late at night and the light is truly rubbish. Apologies!

- For the buttercream - firstly melt the chocolate and allow to cool - this is slightly tricky because you want it cool enough to not melt the butter in the buttercream, yet warm enough to avoid it recrystallising into lumps. I learnt the hard way that my chocolate was too cool.
- Beat the butter and sugar until very light and fluffy, add the chocolate and orange extract and continue to beat. If the mixture is too stiff to pipe easily add a little hot water (from a kettle).
- Pipe onto the cupcakes, taking care not to dislodge the lid of the marmalade.

- Add a mini Jaffa cake and sprinkles if you want.


This chocolate cake recipe is really, really soft and light. It's quite sweet and structurally very delicate - perhaps not the most robust container for the marmalade but delicious anyway. The combination of soft chocolate cake, slightly tart, bitter marmalade and sweet orange scented buttercream was gorgeous and these were really popular at work. I'll definitely make this recipe for chocolate cupcakes again - they're so soft and moist!


Exhibit number one - cupcakes piped with a blocked star shaped tip. I was trying to use a Wilton 2D here, and the cupcake on the right is fairly ok. As I mentioned earlier, I found out to my cost that my chocolate was too cool - it has formed micro-blobs of chocolate in the buttercream mixture, making it impossible to pipe. The cupcake on the left shows what happens to your pretty rose when the tip is blocked - a bit of a mess. Hence the smooth-piped look in the rest of the post. I usually avoid this and especially with chocolate buttercream, but actually with the mini Jaffa cake it looks quite acceptable!


Ignoring the holes in the buttercream if you look directly at the centre of the picture above you can see a darker bit - that's one of the (many) bits of chocolate to clog the nozzle...

Saturday, 11 May 2013

Frozen Chocolate Bananas and an idea for the 5:2 diet

Frozen Chocolate Bananas with chopped ginger or butterscotch pieces

This is literally as simple as it sounds - frozen chocolate bananas. But don't make the mistake of thinking that something so simple must somehow be underwhelming; these are fabulous. I can take no credit for the idea as I first saw it in a booklet for Comic Relief produced by Delia Smith, over ten years ago. I've made these many times since but had forgotten the recipe until recently when looking at the chocolate dipped bananas on Jac's Coconut and Mango fool. It occurred to me that it was time to revisit this favourite idea.

Ingredients

The frozen banana is a revelation - it's so creamy and smooth and utterly delicious. As Delia says, the snap of the chocolate followed by the creaminess of the banana is a great combination. She suggests that the chocolate dipped bananas can then be dipped in chopped nuts, but in my case I decided to go for very finely chopped stem ginger (drained of its syrup) or butterscotch pieces. Both were great choices. 

Sliced banana, ready to freeze

As for the 5:2 diet, the banana alone is seriously delicious. Having it frozen really makes it taste like ice-cream and it also means it'll take you longer to eat the banana rather than just eating it straight up. I obviously can't provide a calorie count because that will depend on the size of your banana and how much of it you eat....

Melted chocolate plus chopped ginger and butterscotch pieces

You don't need an ingredients list or method for this really but...
Bananas - as ripe as you like, as many as you like
Chocolate - your favourite - dark, white, milk, flavoured
Cocktail sticks - to allow you to pick up your treat
Nuts/Ginger/Butterscotch/popping candy/whatever else you fancy - optional

- Slice the bananas, insert a cocktail stick and open freeze on a piece of parchment paper on a tray until fairly solid
- Melt the chocolate and prepare optional dippers if necessary (I chopped my ginger finely)
- Dip frozen banana into chocolate, then into dippers if desired.
- Return to freezer until you want to eat them. Store frozen.

Final product

Yum.

Sunday, 5 May 2013

Funny Face Jam and Cream Sandwich Biscuits (Cookies)


I often wish that I had stronger willpower when it comes to resisting things I see that I could use to bake with. I'm sure I'd be a lot better off without some of the things I buy, but it'd also be a lot more boring! That's my excuse and I'm sticking to it. 

Anyway, I recently saw some biscuit (cookie) cutters in Lakeland and couldn't resist buying them. I  then made the leap from buying them to actually using them (this happens less often than it should!). Having seen Ros of the More than Occasional Baker using them very successfully I decided I would use her simple sugar cookie recipe for my own attempts. You probably wouldn't guess from the content of this blog, but I actually eat more biscuits than cake, it's just that I don't make them very often. I have a tendency to burn biscuits and they just never seem very successful so it was with some trepidation I set out to make these biscuits.

I needn't have worried though, the recipe was easy to use, and along with Ros's tip about chilling the dough they were very successful, thanks Ros!

Bulging slightly!

Vanilla Sugar Cookies
Ingredients
125g butter
125g white caster sugar
1 egg
2tsp vanilla extract
250g plain flour

To fill
50g butter
70g icing sugar
30g white chocolate, melted and cooled

Method
- Preheat the oven to 175C/Gas 4. Line baking trays with parchment paper.
- Cream together the butter and sugar until light.
- Add the egg and vanilla and beat again.
- Add the flour and fold in. Divide the mixture into two flat discs and refrigerate for around 30 minutes.
- Roll out to your desired thickness (a few mm is fine) and cut out your cookies. Place on a parchment lined baking tray.
- Return to the fridge for 10-15 minutes.
- Bake for around 10 minutes, until going light brown. Mine took a few minutes longer, but watch like a hawk because they'll overcook quite suddenly.
- Transfer to a wire rack to cool.

When cold sandwich together with white chocolate buttercream (50g butter, creamed with 70g icing sugar and then 30g cooled melted white chocolate added) and the jam of your choice - I used blackcurrant.

Generously filled

These were great - I'll definitely have to make my own biscuits more often. They were a lot easier than I was expecting and the dough was really easy to work with too. It was easier when still chilled though, and when it warmed up and started to soften it became more difficult to work with. 

They went really well at work - the crisp biscuit worked well with the soft, sweet buttercream and the slightly sharp jam. In essence, very posh jammy dodgers! Some of my colleagues were greatly amused to find that when bitten into jam oozed out of the eyes of the biscuits - what can I say, I have colleagues with a slightly twisted sense of humour.... (They were right though, the eyes do tend to bulge a bit!)


I'm entering these into Teatime Treats, the theme this month being biscuits/cookies hosted by Karen of Lavender and Lovage, cohosted by Kate of What Kate Baked.


I'm also entering them into Jac's Bookmarked Recipes - I was pleased to have made these quite quickly after bookmarking them and even more pleased that I got round to using my shiny new biscuit (cookie) cutters!

Wednesday, 3 April 2013

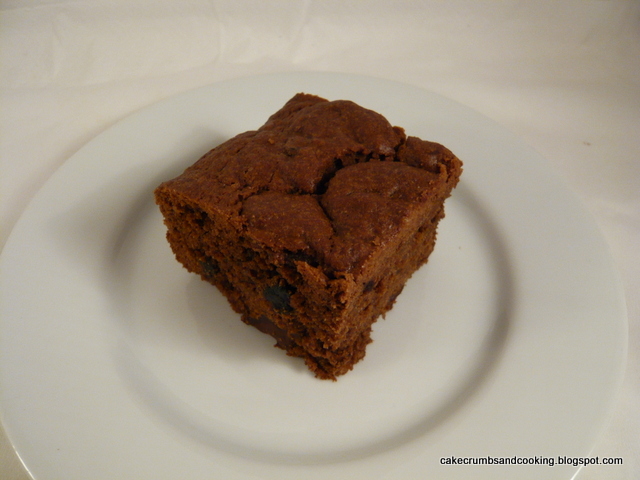
Fruity Chocolate Squares

Yep, another brown square.... tasty though

I knew I wanted chocolate cake and nothing too fancy but didn't really know what else beyond that. As I hunted in the cupboards and fridge for inspiration, a carton of soured cream that needed to be used (having been bought with no particular recipe in mind) and some dried fruit caught my attention. The dried fruit in question was some that I had bought reduced-to-clear a while ago. It's dried fruit though - I'm not sure why they were so desperate to sell it off but they clearly were, it had been reduced from £1.50 to 29p with about 6 months still until the best before date. I can only think the manufacturers wanted to launch new packaging. Anyway, a bargain is a bargain. Unless you don't use it so I thought I'd better incorporate my dried blueberries into a cake. 

Double yolker, I promise this isn't just two eggs. Marginally more interesting than a brown square...

Fruity Chocolate Squares
Ingredients
60g 72% cocoa chocolate, melted (I used the microwave - carefully!)
120g butter, softened
175g light muscovado sugar
1 tsp vanilla extract
1 egg, beaten (mine turned out to be a double yolker!)
225g self raising flour
20g cocoa powder
150ml soured cream
70g dark chocolate, chopped
55g dried fruit (I used 30g dried cherries, chopped in half and 25g dried blueberries)

Method
- Preheat the oven to 180C/Gas 4. Grease and line an 8" square tin with baking parchment.
- Cream the butter and sugar until light and fluffy - this might take 5 minutes or so even with an electric mixer.
- Add the vanilla, egg, flour, cocoa powder and soured cream and beat well until combined.
- Stir in the chopped chocolate and dried fruit and transfer to the baking tin (this is a stiff mixture - don't worry)
- Bake for 40-45 minutes until risen and a cake tester comes out clean.

Brown square from a slightly different angle...

I had been worried that this cake would be rather dry and crumbly, but actually I needn't have worried at all. It was moist and tasty and the combination of dried blueberries, dried cherries and chopped chocolate meant that each bite had an extra, interesting taste and texture. 

Sunday, 24 March 2013

Dan Lepard's Chocolate Lamingtons

Lamingtons with successful glaze - mark 2

Well, sort of. Last year, Dan's recipe for double chocolate lamingtons was published in the Guardian, ahead of ANZAC day. I made them at the time, and used the glaze that he recommended for coating them. However, since I avoid coconut (as one of those things to which I might be allergic but don't fancy finding out about) I didn't want to actually coat the lamingtons and dip them in desiccated coconut, I just wanted to glaze the cakes. 

Lamingtons the first time round - with a rather runny glaze used in the middle and on the top

I rather fancied Suelle's take on the cake, which you can find here Chocolate and Coconut Layer Cake. She had the rather brilliant idea of halving the coating quantities and splitting the cake in half, sandwiching it together with the glaze and spreading it across the top. I decided to go for this too but unfortunately I was in a bit of a hurry to get the cake iced and my glaze was steadfastly refusing to thicken, which as a coating I think you'd probably expect. My lamingtons were good, but rather messy to eat and the glaze wasn't really what I wanted. I think I possibly used a different chocolate to Suelle and that's why my glaze took so long to set. I refrigerated a little of it and it did eventually thicken up. 


As with many cakes I make that end up turning out not quite right, I intended to remake the cake (very successful) and ice it with a different icing. But as usual, time slides and I didn't get round to remaking the cake. Then as part of the step-by-step baking series that Dan is now doing for the Guardian, he published a more conventional lamington recipe recently, for Australia Day (26th January) and also a twist on this recipe,  Macadamia Ginger cake with lamington icing. These two recipes reminded me of how successful the chocolate lamington cake had been and how I had intended to give it another go. And so I did.


I used the double chocolate lamington cake recipe, as stated here and then taking inspiration from the macadamia ginger cake with lamington icing, used an approximation of the lamington icing from that cake to ice mine with. As with my first attempt, the cake was successful. I did note that it took longer to bake than stated (about 10-15 minutes longer) and the top surface seemed a little darker than I would have liked. However, once the icing was on not only was this not noticeable, there was no hint in the taste of the cake that it had caught at all, so the dark surface was obviously just in my mind.

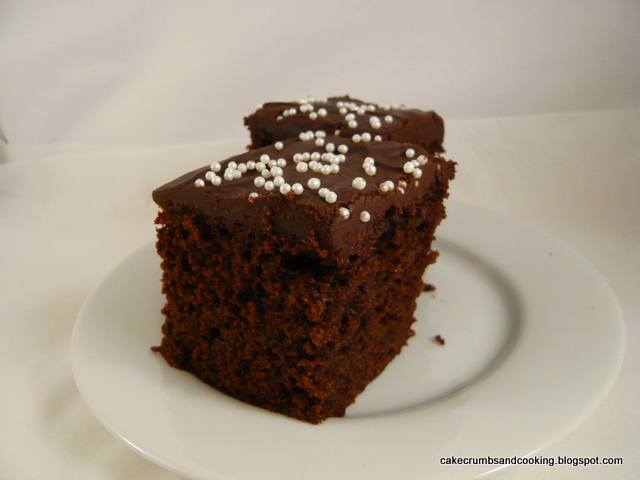
Dan states for the lamington icing that you need a half batch of the lamington icing, plus 75g dark chocolate. I used the quantities stated below (which are approximately 1/3 of the amount stated, plus 30g dark chocolate) , which gave a generous covering for an 8" (20cm) square cake, as you can see in the pictures. 


Lamington icing
130g dark chocolate (I used G&B 72% cooking chocolate)
10g cocoa powder
100g caster sugar
65ml milk

Method
- Bring the milk, caster sugar and cocoa powder to the boil in a small pan, whisking.
- Add the chocolate, stir until melted, allow to thicken if necessary and then use to spread over your cake.

* I found that it was difficult to beat all of the small lumps of cocoa out of the icing, therefore I would recommend sifting it first. I also ended up transferring the sugar/cocoa/milk mixture to a small bowl to try and beat some of the lumps out of it before adding the chocolate. The mixture thickened quickly when I added the chocolate and was easily spreadable - I could happily spread the mixture right to the edge of the cake without fear that it was going to run off.


The actual cake was lighter than I expected and as you might expect from the ingredients, really quite sweet. I'm not sure why, but the top 1/3 of the cake seemed to be more aerated than the lower portion - you can see this in the picture above. The icing was very successful - it was less sweet than I was expecting and I would definitely use it again (I'm not that keen on super sweet icings as a rule). The icing doesn't dry to a gloss, but to a matt finish. I also decorated my cake with hundreds and thousands, and these needed to be added quickly while the icing was still wet enough to hold them, otherwise they just rolled off....


I'm entering this into We Should Cocoa, the monthly chocolate blogging challenge set up by Choclette of Choc Log Blog and Chele of Chocolate Teapot. The host this month is Lucy of The Kitchen Maid and she has chosen 'Fame' as the theme. Lamingtons are a famous Antipodean treat and Dan Lepard is a famous baker so I think these qualify!

Sunday, 17 March 2013

Red nose day? Soured Cream Chocolate Cakes


Or should that be Pink Nose Day? Well, as I'm sure you can probably guess from the title (and the fact that in the UK it was Red Nose Day on Friday with a staggering, record breaking £75 million raised on the night alone) these were supposed to be red noses. I always forget (not being someone who uses food colouring very often, if at all) that adding food colouring to buttercream is never really very successful in creating bright primary colours such as red. I actually did use gel food colouring here, so was expecting a redder red, but was probably too reticent to add enough colouring to achieve the colour I was after.

So not really the most inspiring or successful decoration really and I wasn't going to bother talking about these, but it's always worth talking about Comic Relief - it's an excellent way of putting fundraising for charity into people's minds. 


The other reason it's worth talking about these cakes is because the sour cream chocolate cake is delicious. Really good. The recipe is Nigella Lawson's, from How to be a Domestic Goddess and so I won't reproduce it here. However, her recipe for Old Fashioned Chocolate Cake is very similar and can be found on Nigella.com. The differences are that the Sour Cream Chocolate Cake uses only 3/4tsp baking powder and 1/4 tsp bicarbonate of soda, adds a little salt and uses 1 1/2 tsp vanilla extract. There is also 25g less butter in the web version. Not massive changes.

As I wanted cupcakes I divided the mixture, unsure of how many it would make and got 17 reasonable sized cakes that baked in 22 minutes. I was surprised that the baking time was so quick - the ingredients were pretty much fridge cold when they went into the oven (cold sour cream and cold eggs) but they rose beautifully. I'll definitely use this recipe for cupcakes again if I want a rich, chocolatey base. They were deliciously smooth and very chocolatey. 


The icing was a (pink) white chocolate buttercream - 100g butter, 140g icing sugar and 70g white chocolate, melted and cooled. Cream the butter until light, add the icing sugar and continue to beat until light and fluffy then beat in the white chocolate. Colour as you desire. I did overwork the icing a little as it wasn't as creamily smooth as the last batch I made, but still worked well.

Tuesday, 12 March 2013

Soured cream, raspberry and blackcurrant mini cakes with white chocolate buttercream frosting

Candles omitted - I'll leave you to guess the age...

Well, that's a bit of a lengthy title for some very diminutive cakes. It was J's birthday recently and for various reasons I wanted to make small cakes rather than a giant centrepiece. I decided to use my straight-sided 12-hole mini cake tin from Lakeland (sadly this is not sponsored by them, I paid for it myself, hence the desire to get plenty of use out of it!) and use a soured cream enriched cake mixture to provide a richer cake, suitable for a birthday.

I was also experimenting with some freeze dried raspberries I bought recently. My theory was that if I squashed them into powder they might provide enough colour to tint some of the sponge pink. It was quite a reasonable theory, but I probably didn't use enough of the raspberries, and didn't pulverise them enough and the sponge remained resolutely un-pink. Next time I want a coloured sponge I guess I'll just have to resort to food colouring.

The filling was a white chocolate buttercream (another slight experiment for me) and blackcurrant jam. Raspberry would have been more complimentary, but blackcurrant was available.


Soured cream, raspberry and blackcurrant mini cakes with white chocolate buttercream frosting
Ingredients
65g butter
65g caster sugar
65g self raising flour
1 egg
1/8 tsp baking powder
1/2 tsp vanilla extract
25g soured cream
freeze dried raspberries (optional - I didn't measure these and probably used about 1/2-1tsp)
Ingredients for white chocolate buttercream - see below
Blackcurrant (or raspberry) jam

Method
- Preheat the oven to gas 4/180C. Grease five of the mini tin holes. These would work in regular muffin tins too, just make sure they're well greased, and realise you'll get sloping sides.
- Beat together the butter and sugar until light and fluffy.
- Add the egg, flour, baking powder, vanilla and soured cream. Beat until well combined.
- Spoon half the mix into two of the holes.
- Add the raspberries (pulverised or not) if using to the remaining mixture and divide between the other two holes. The fifth prepared hole is for if you've got a little more batter than you think will fit into the other holes. I did have and ended up making a half-height mini-mini cake too.
- Bake for around 30-35 minutes until risen and golden and a cake tester comes out clean.
- Remove from the tin and allow to cool on a wire rack.

White chocolate buttercream
This amount is too much for these cakes, but since I was just playing to see how it turned out I wasn't worried about how much I was making.
50g unsalted butter, softened
70g icing sugar
30g white chocolate, melted and cooled
- Beat the butter until light and fluffy. Add the sugar and continue to beat. Add the chocolate and beat to combine. 

To assemble
- Cut each cake into three. Spread a little buttercream onto each of the two lower layers then dollop on a little jam and spread out. 
- Reassemble layers.
- Dust with icing sugar. Although if you wanted to, you could use more of the buttercream to add to the top of the cakes.

Admire and then eat.

These were very much appreciated and I had the mini one for myself. The cake was rich and smooth and not very strongly raspberry flavoured. The white chocolate buttercream is definitely something I'll be doing again. It wasn't as sweet as the usual buttercream I make and was very smooth and rich without particularly tasting of white chocolate. I used Green and Black's white chocolate, so it's interesting that even a relatively strong tasting variety didn't seem to come through.

Very successful - Happy Birthday J xxx

Monday, 25 February 2013

Ginger Chocolate Chewy Cookies


Also known as third time lucky! And also phew-just-in-time! When Choclette published a recipe for chewy apricot cookies back in December I immediately decided I needed to bake them. They looked delicious and pretty much my idea of a perfect cookie. And then I pretty much went off the idea of baking altogether. (Yep, it's been a bit like that round here recently).

But when I decided that I needed cookies I remembered Choclette's recipe and how good it had looked and decided to make some. Please don't ask what happened to the first batch, and then whilst making the second batch I completely forgot to add the baking powder. So although they turned out ok, they were rather more chewy than I was expecting and I decided that third time's the charm and had another go. I halved the recipe and these went perfectly well.


I'm going to give the recipe here as this is how I made them after adapting the recipe slightly. You can find Choclette's original recipe here.

Ginger Chocolate Chewy Cookies
Ingredients
50g butter, softened
50g light muscovado sugar
15g honey (I used a floral New Zealand honey.... airmiles *cough*)
1/2 tsp vanilla extract
75g plain flour
scant 1/2 tsp baking powder
30g crystallised stem ginger, chopped
30g 70% cocoa solids chocolate, chopped

Method
- Preheat the oven to 175C/Gas4 (ish). Line a baking tray with parchment paper.
- Cream the butter, sugar and honey together until well combined.
- Add the vanilla extract, flour and baking powder and continue to mix. The mixture will seem very dry.
- Add the chopped ginger and chocolate and work the mixture together. I used the back of a spatula for this and then ended up squashing it together with my hands.
- Divide into approximately equal balls, I got twelve from my mixture.
- Squash the balls slightly, place well apart (although I only used one tray here and they didn't merge) and bake for 10-15 minutes. I found mine took 16 minutes.


I can see these becoming a favourite around here - they were really quick to put together and to bake and are deliciously soft and chewy. The ginger and chocolate work really well together and the honey is delicious too although the fairly mild honey I used doesn't come through strongly. As they don't have an egg in them it's really easy to halve the recipe too - always a bonus.


I am entering these into this month's We Should Cocoa challenge, hosted by Jen of Blue Kitchen Bakes and co-hosted by Choclette of Choc Log Blog and Chele of Chocolate Teapot. The theme this month is ginger and I absolutely adore chocolate, ginger and the combination of the two!


I'm also entering them into Jac's bookmarked recipes challenge as I had noted the recipe on Choclette's blog ages ago and have finally got round to making them.

Saturday, 2 February 2013

Simple Double Chocolate Vanilla Marble Cake


Well, that break wasn't really expected - life sometimes gets in the way of blogging and I think a combination of post-Christmas readjusting to work and general busy-ness meant that January sped past before I knew what had happened. I'm sorry to have missed out on participating in all of the blog challenges I usually enter, but hopefully I'll be a bit more active this month.

To ease myself back into baking mode I decided to make something quick and easy, requiring no decoration but that also looked reasonably impressive. Marble cake fulfils all of these requirements and because I'm a chocolate fiend I decided to double up the chocolate goodness of the cake by adding chocolate chunks to the chocolate portion of the batter.


Double Chocolate Vanilla Marble Cake
Ingredients
175g butter, softened
175g white caster sugar
1 tsp vanilla extract
50g full fat greek yogurt
3 eggs
175g self raising flour
100g chopped chocolate (I used 60% cocoa solids)
15g cocoa powder (approx...)

Method
- Preheat the oven to Gas 4/180C. Grease and line an 8"/20cm square cake tin with baking parchment.
- Cream together the butter and sugar until light and fluffy.
- Add the vanilla, greek yogurt, eggs and flour and beat well to combine.
- Blob about half of the mixture into the tin in separated blobs.
- Add the cocoa powder and chocolate chunks to the remaining mixture in the mixing bowl. Beat to combine.
- Blob the chocolate batter into the spaces between the vanilla batter until the batter is all used up.
- Swirl the handle of a knife/fork/spoon through the mixture until it appears marbled (don't forget the corners!)
- Bake for about 40 minutes until risen, golden and springy and a cake tester comes out clean.
- Allow to cool on a wire rack before enjoying!


I do enjoy making marble cakes, they have the advantage of not really needing frosting/icing and this was a good one - the marbling went well and having the added chocolate chunks in the mixture made a nice contrast of texture and certainly enhanced the chocolate appeal of the cake! I use the handle of one of my soup spoons because it is wide enough to marble effectively - feel free to use your implement of choice. Not too taxing for a quick after-work midweek bake.  

LinkWithin

Related Posts Plugin for WordPress, Blogger...